Census
![]()
Census is a customer data platform that enables clients to easily send data to third-party platforms through data integrations. With Census’s existing Rokt Destination, users can effortlessly send conversion data from their Census account to Rokt, enabling more precise targeting, better personalization, and improved campaign outcomes.
This guide outlines the steps required to set up your Rokt integration within Census to easily send comprehensive and enriched conversion data to Rokt to connect marketing activity, such as a Referral, to outcomes that drive business value, such as a customer Conversion (e.g., purchases, subscriptions, or application downloads). This includes required steps for authentication as well as an example implementation using HTTP.
Integration Setup (Events)Direct link to Integration Setup (Events)
AuthenticationDirect link to Authentication
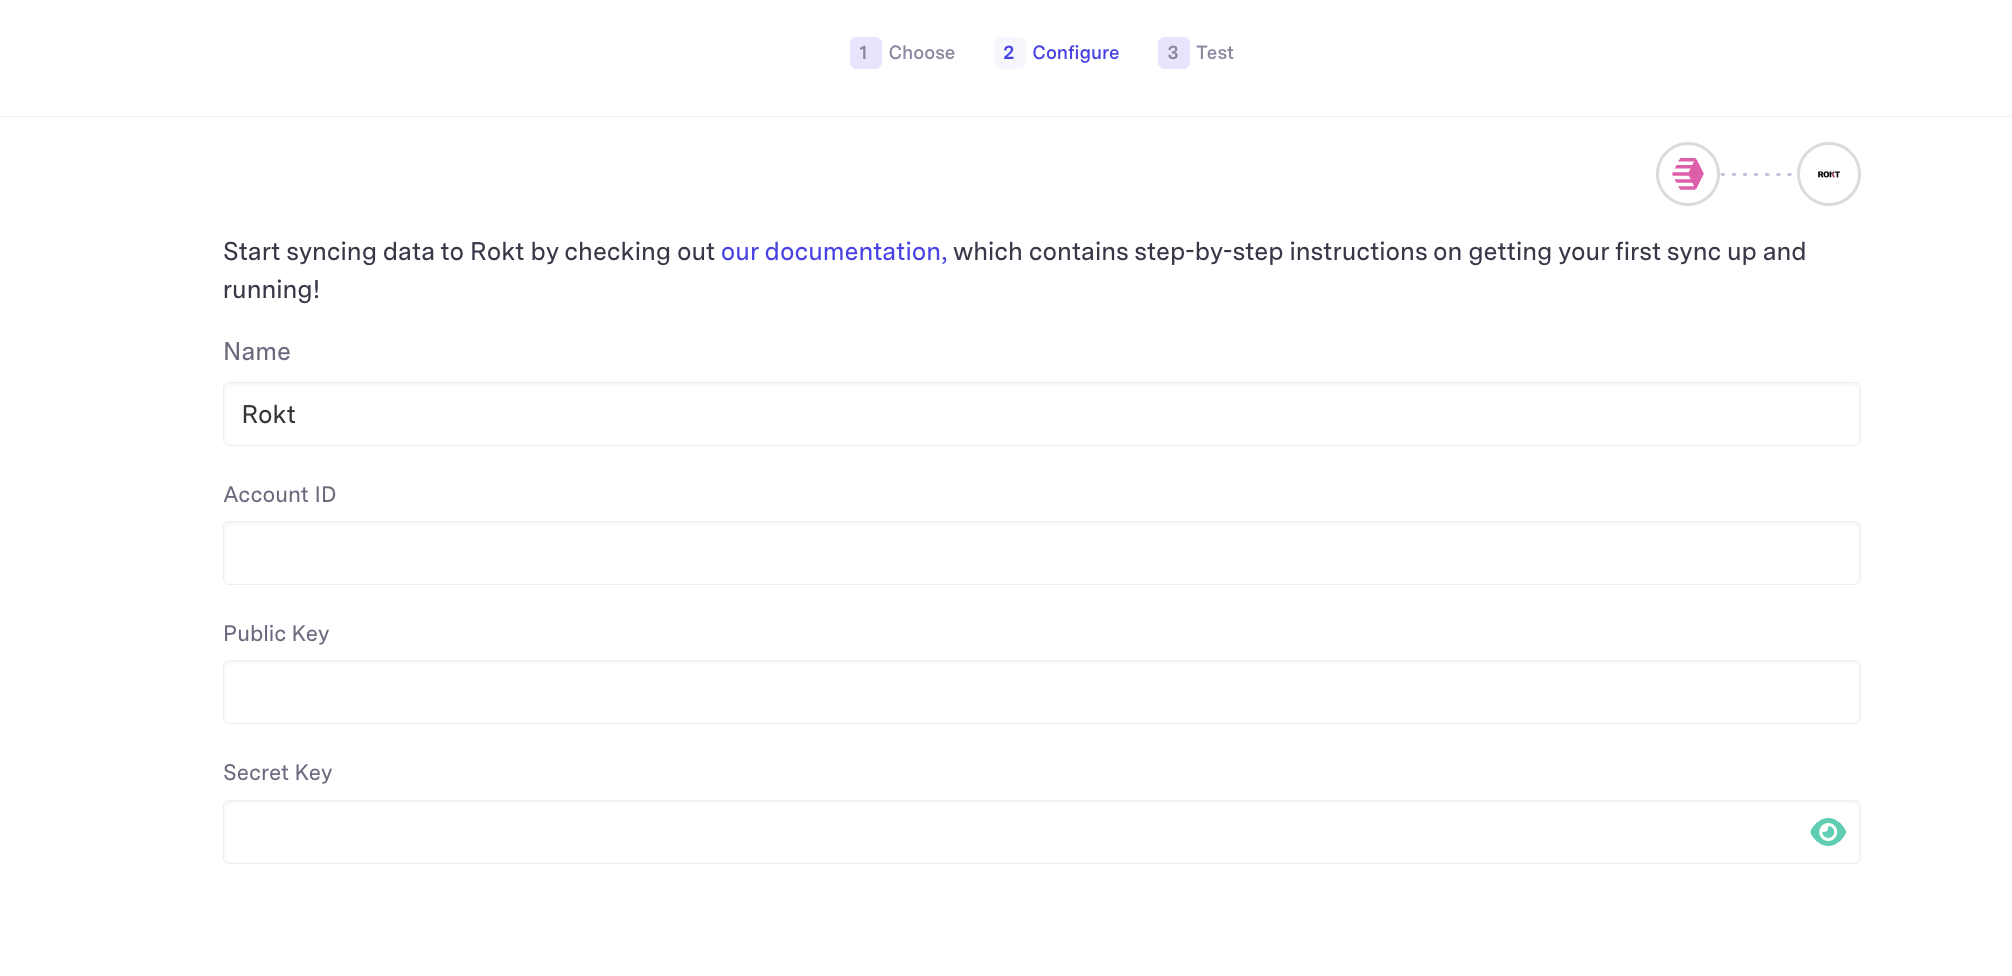
Authenticating with the Rokt Events Destination requires an Rokt Public Key (rpub), Rokt Secret Key (rsec) and Account ID. Read V2 Authentication for more information.
Creating a Rokt DestinationDirect link to Creating a Rokt Destination
-
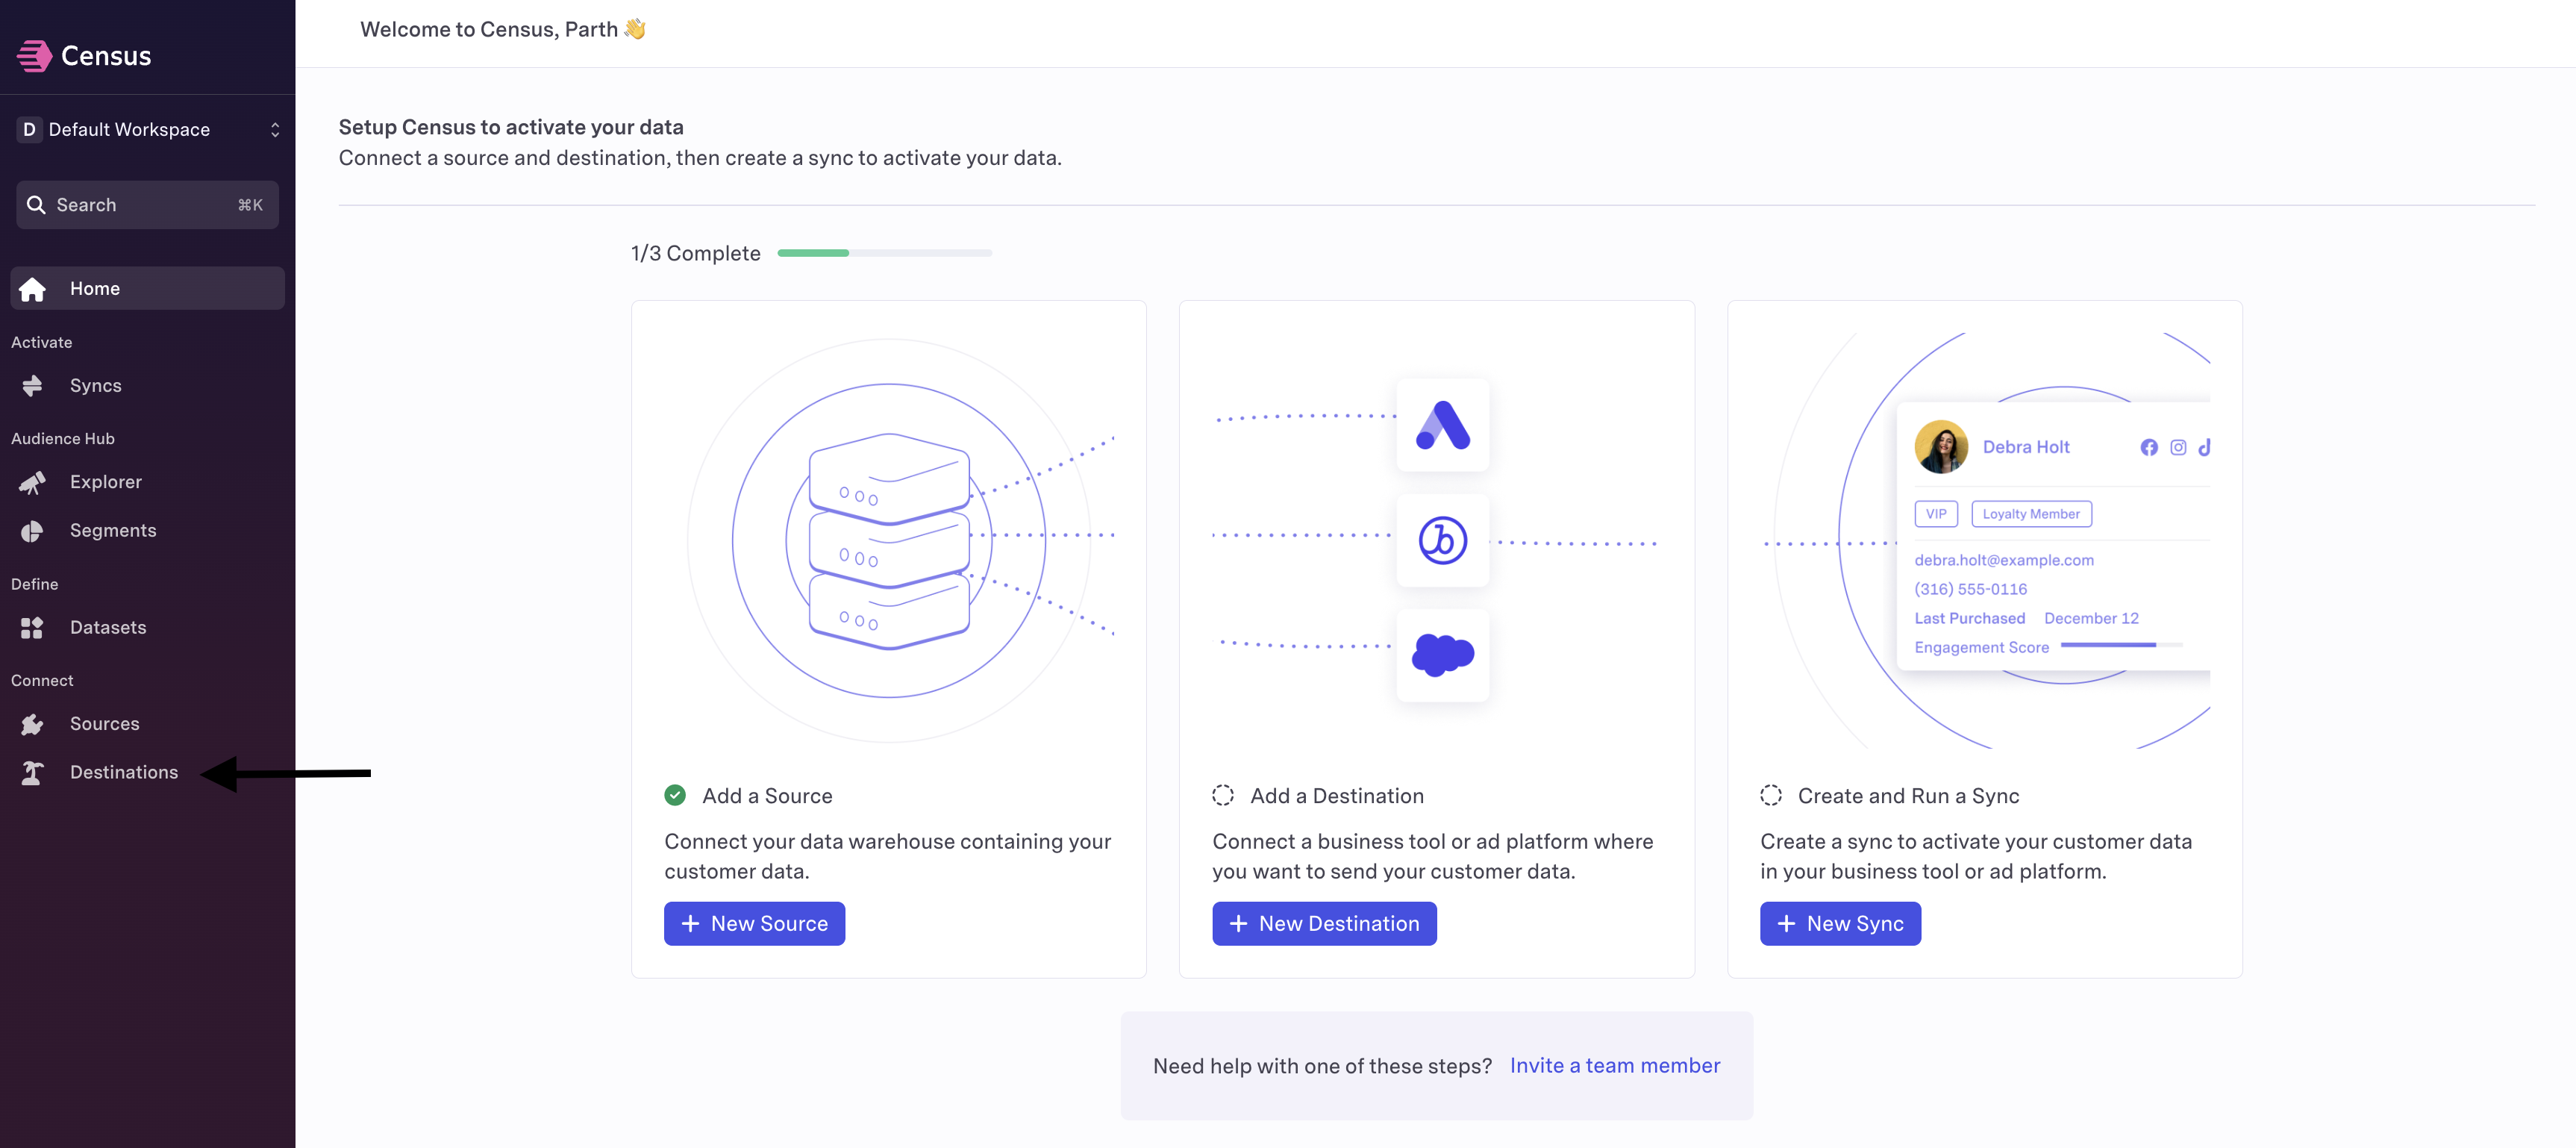
Login to your Census account
-
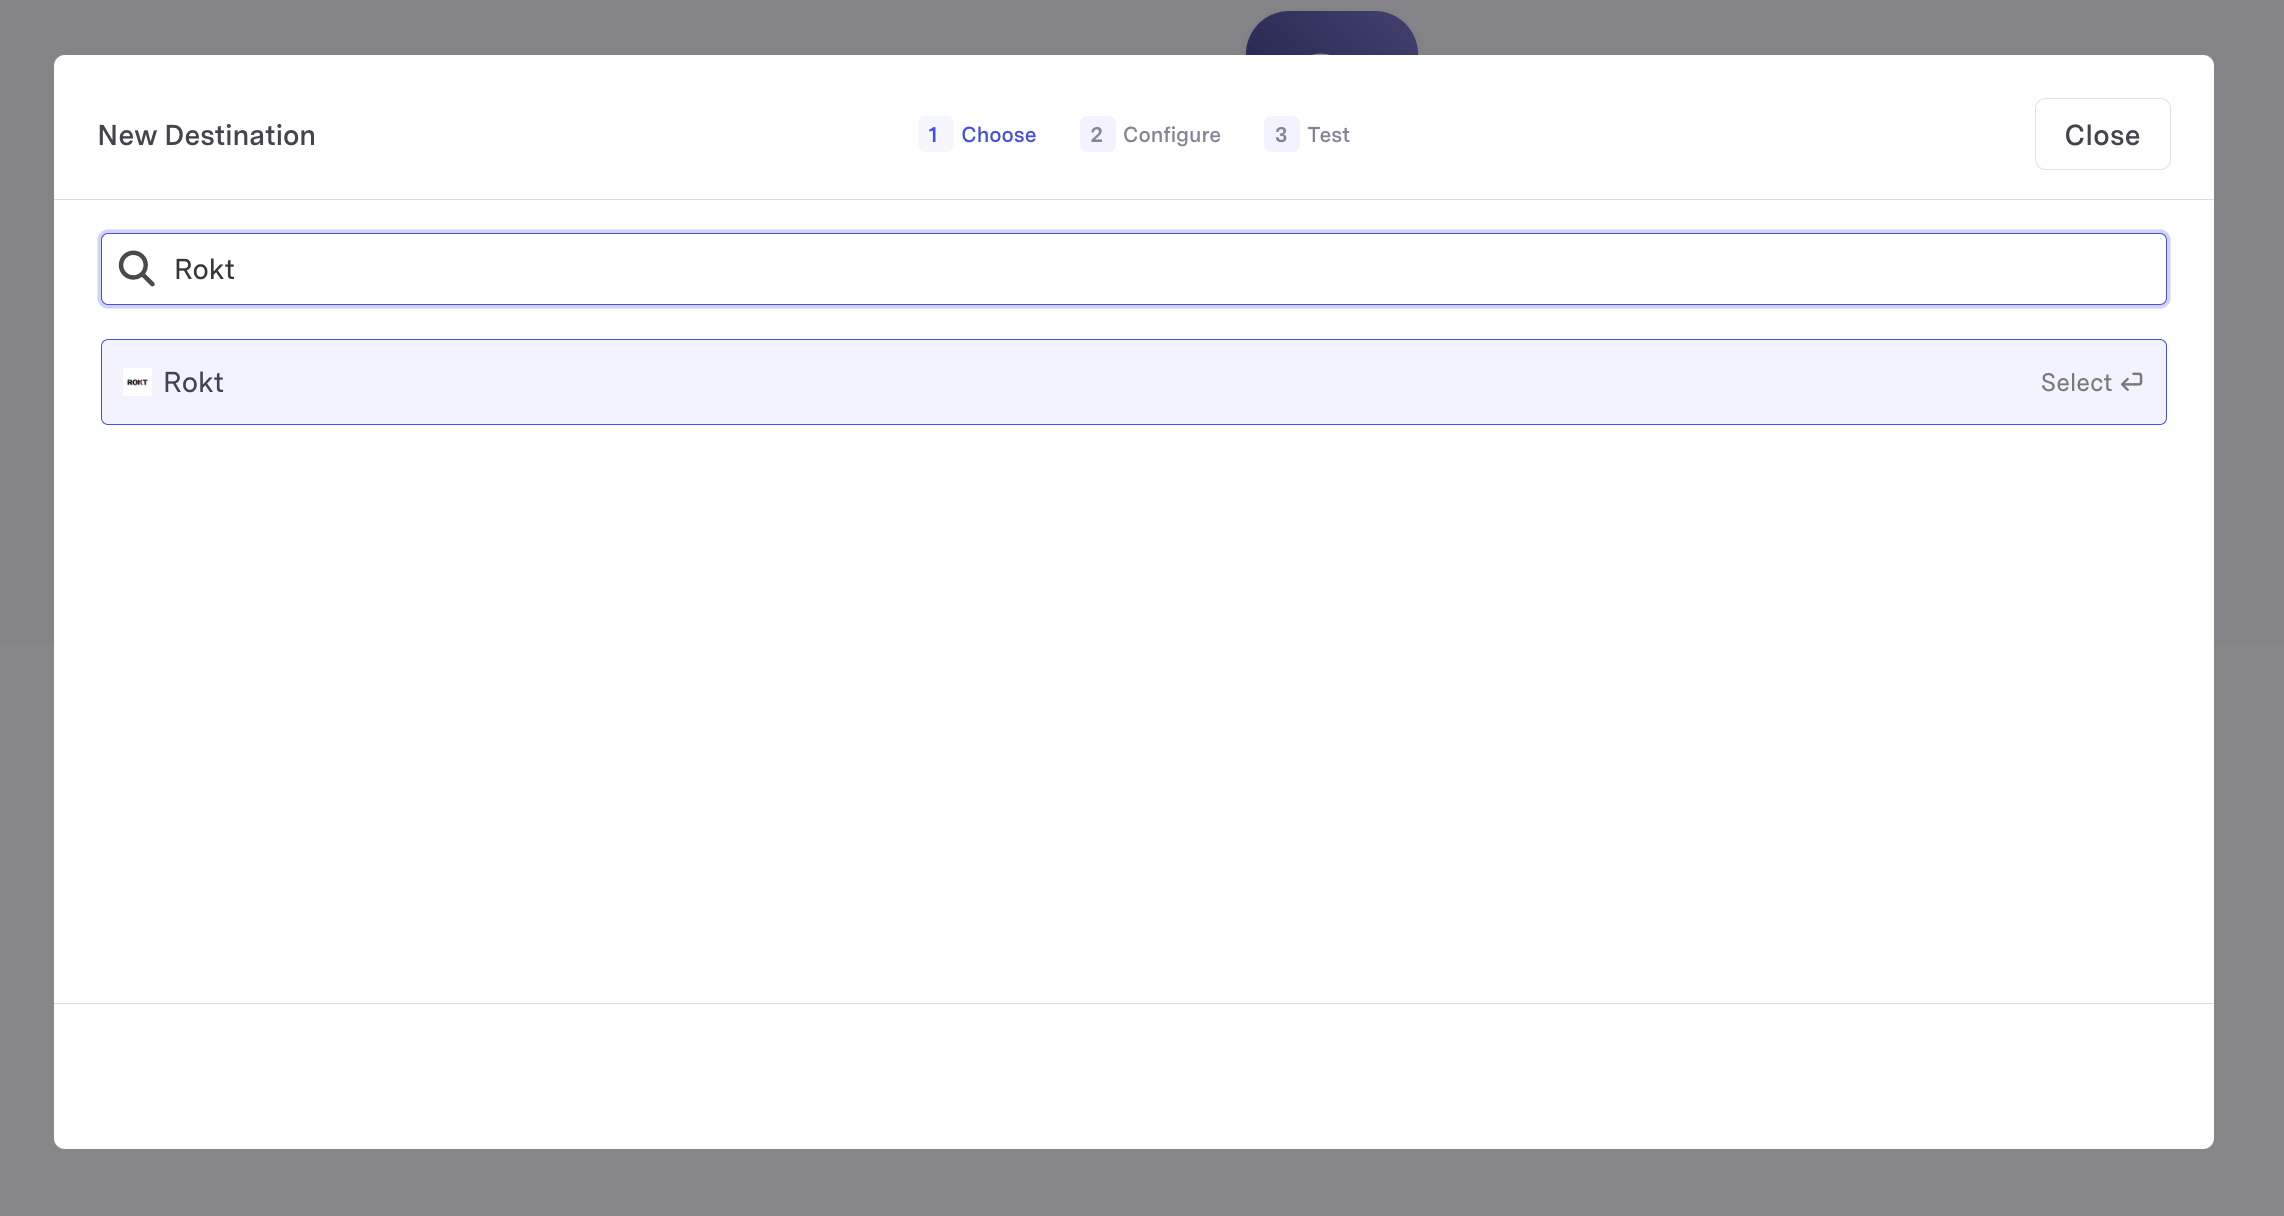
Click on Destinations on the left navigation bar and click New Destination
-
Search for the Rokt Destination
-
Add the Account ID you want to send conversions to using your rpub and rsec values. Ask your Rokt account manager for these values.
-
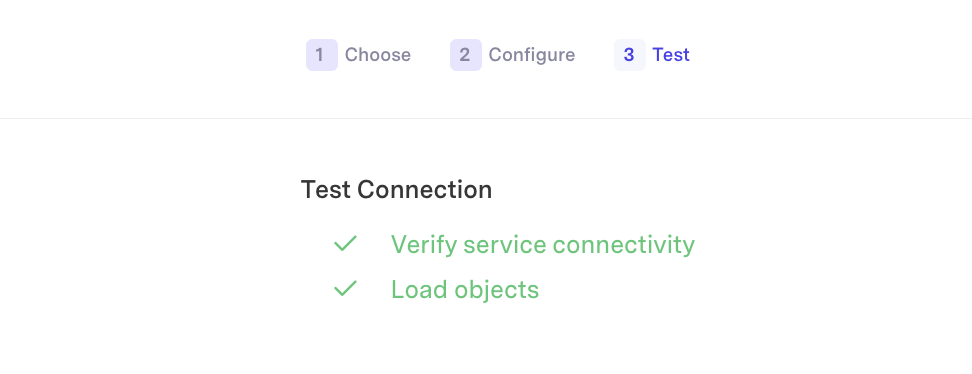
Click Connect to run the connection verification step
-
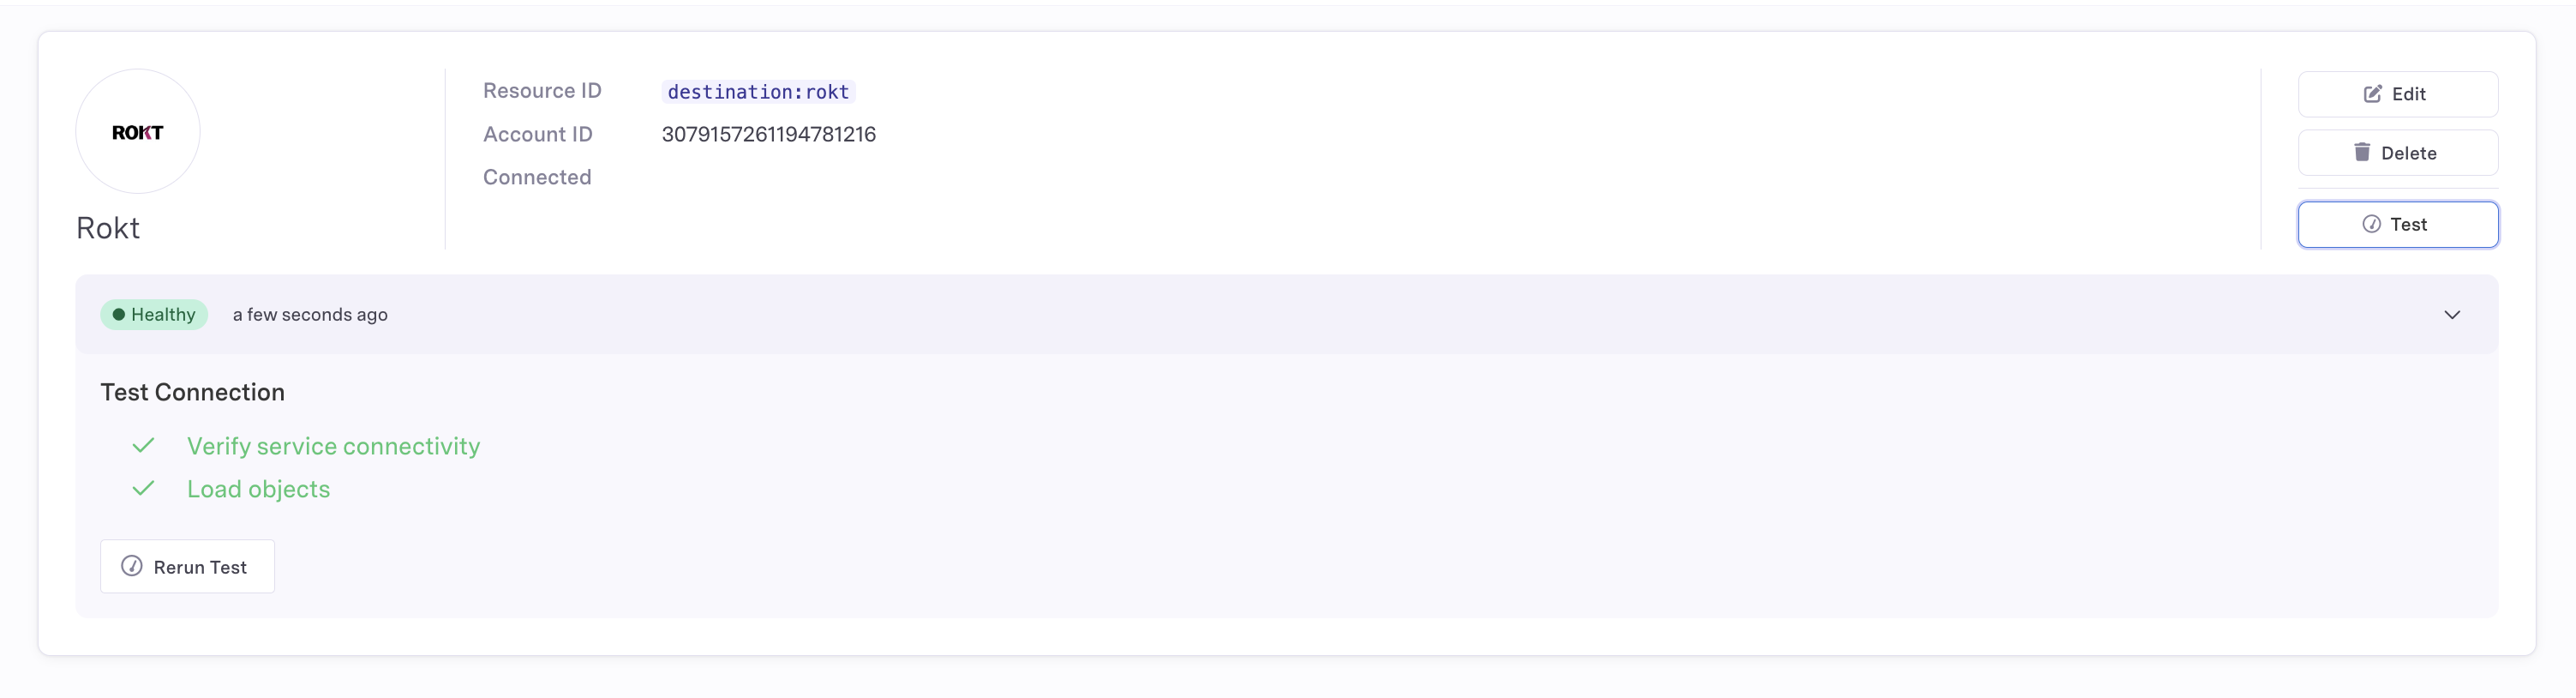
A successful connection will look like this:
-
Click Test to create a Healthy destination connection


-
If the connection succeeds, you will see Rokt Destination as Healthy
Creating a SyncDirect link to Creating a Sync
The most important component in your Census integration is defining a Sync. A Sync defines the rules of how data should be synced, from your selected Data Source to your Destination. For detailed documentation on Syncs, refer to the Census Sync Overview.
Please forward only event types that Rokt can use to optimize your ad campaign.
-
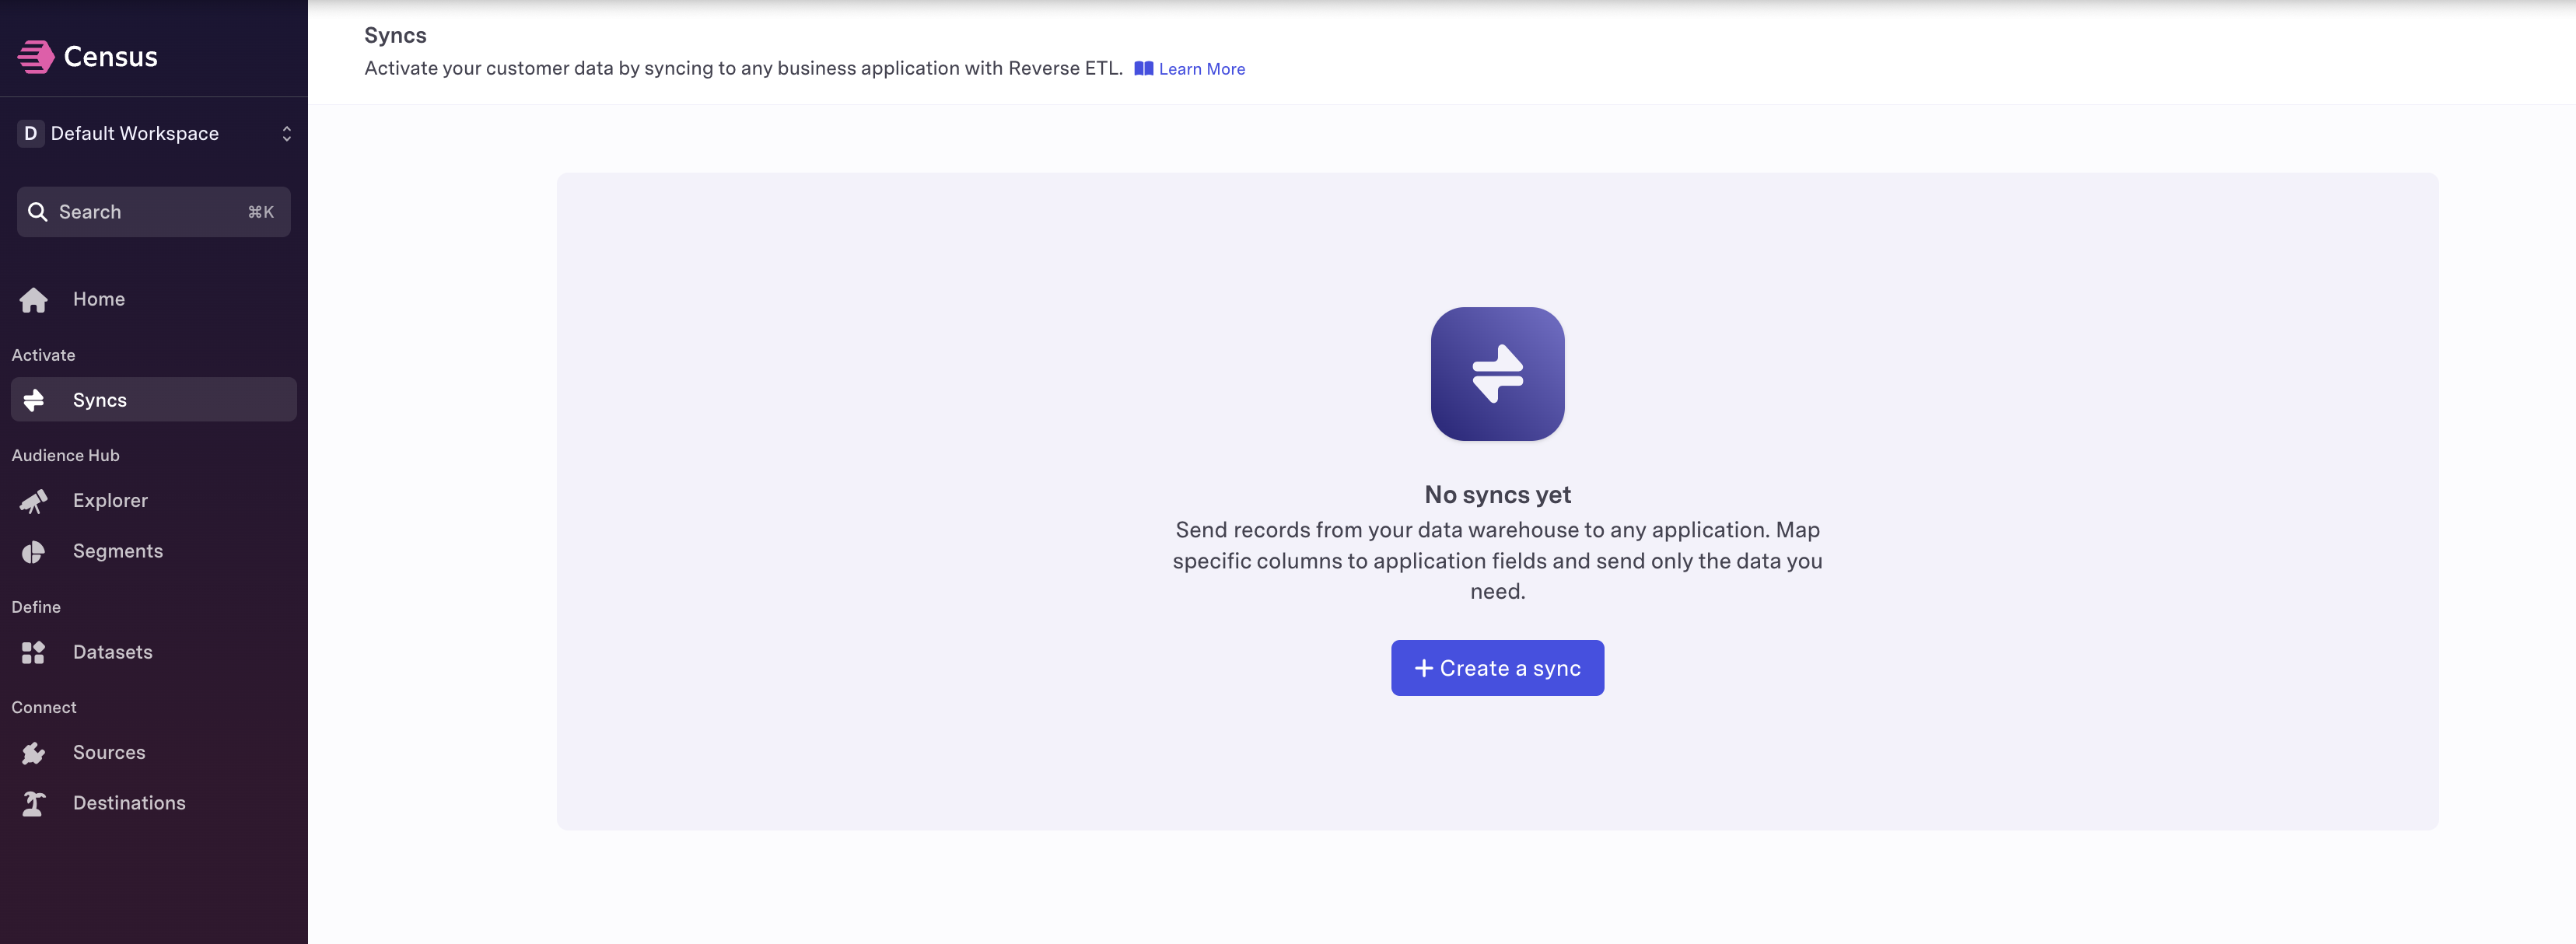
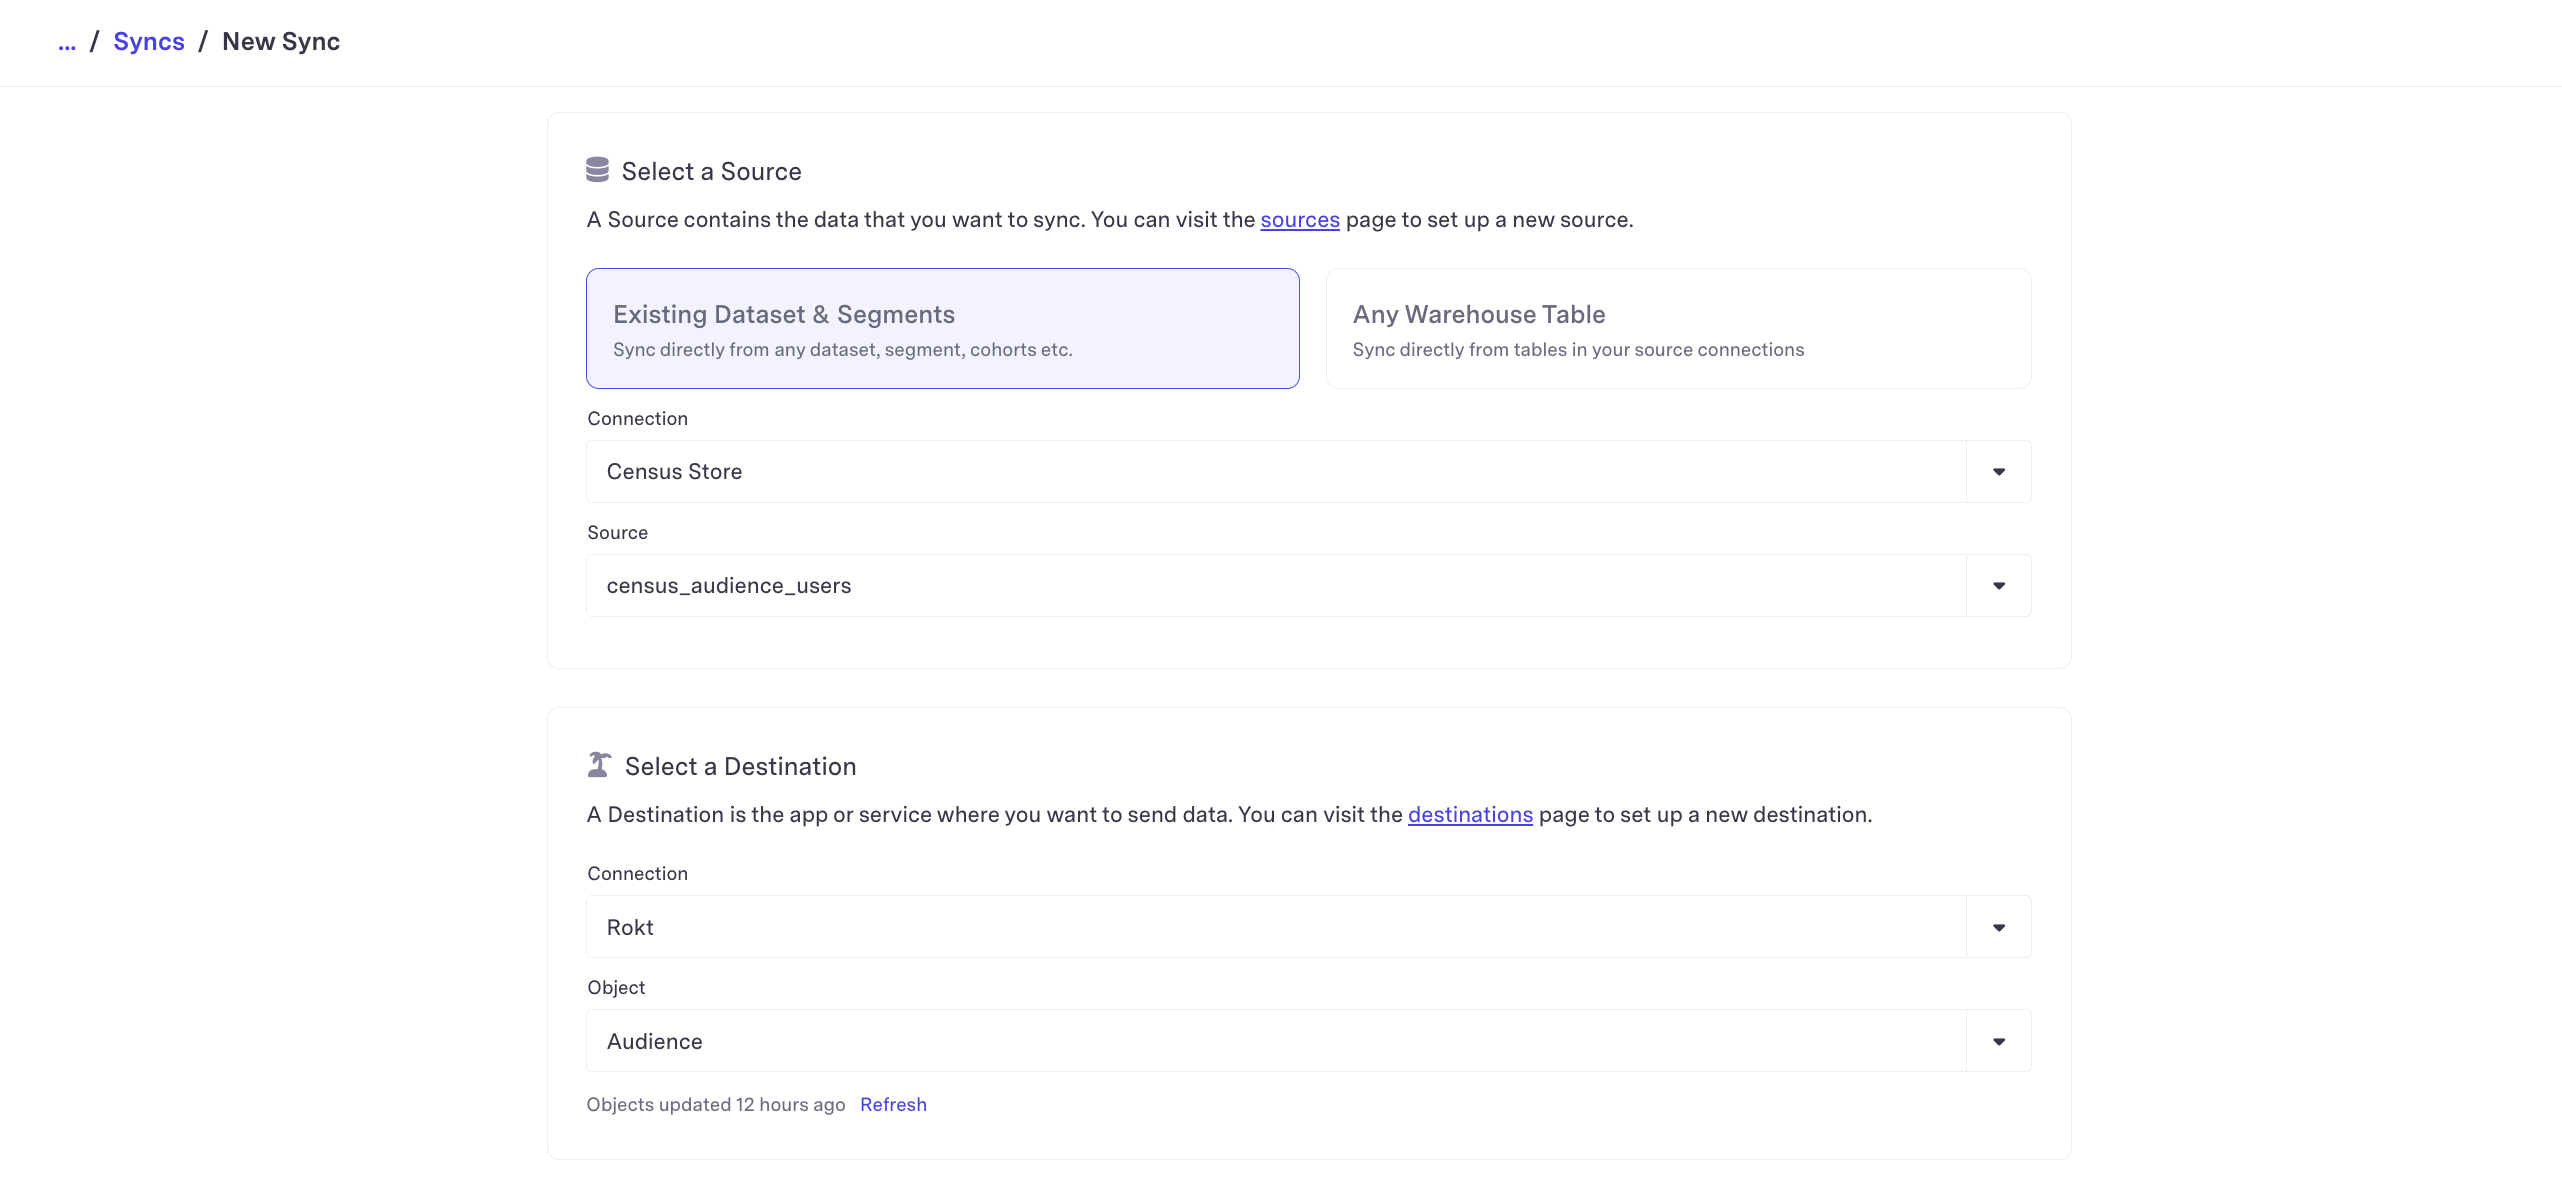
Click on Syncs and then click + Create a sync
-
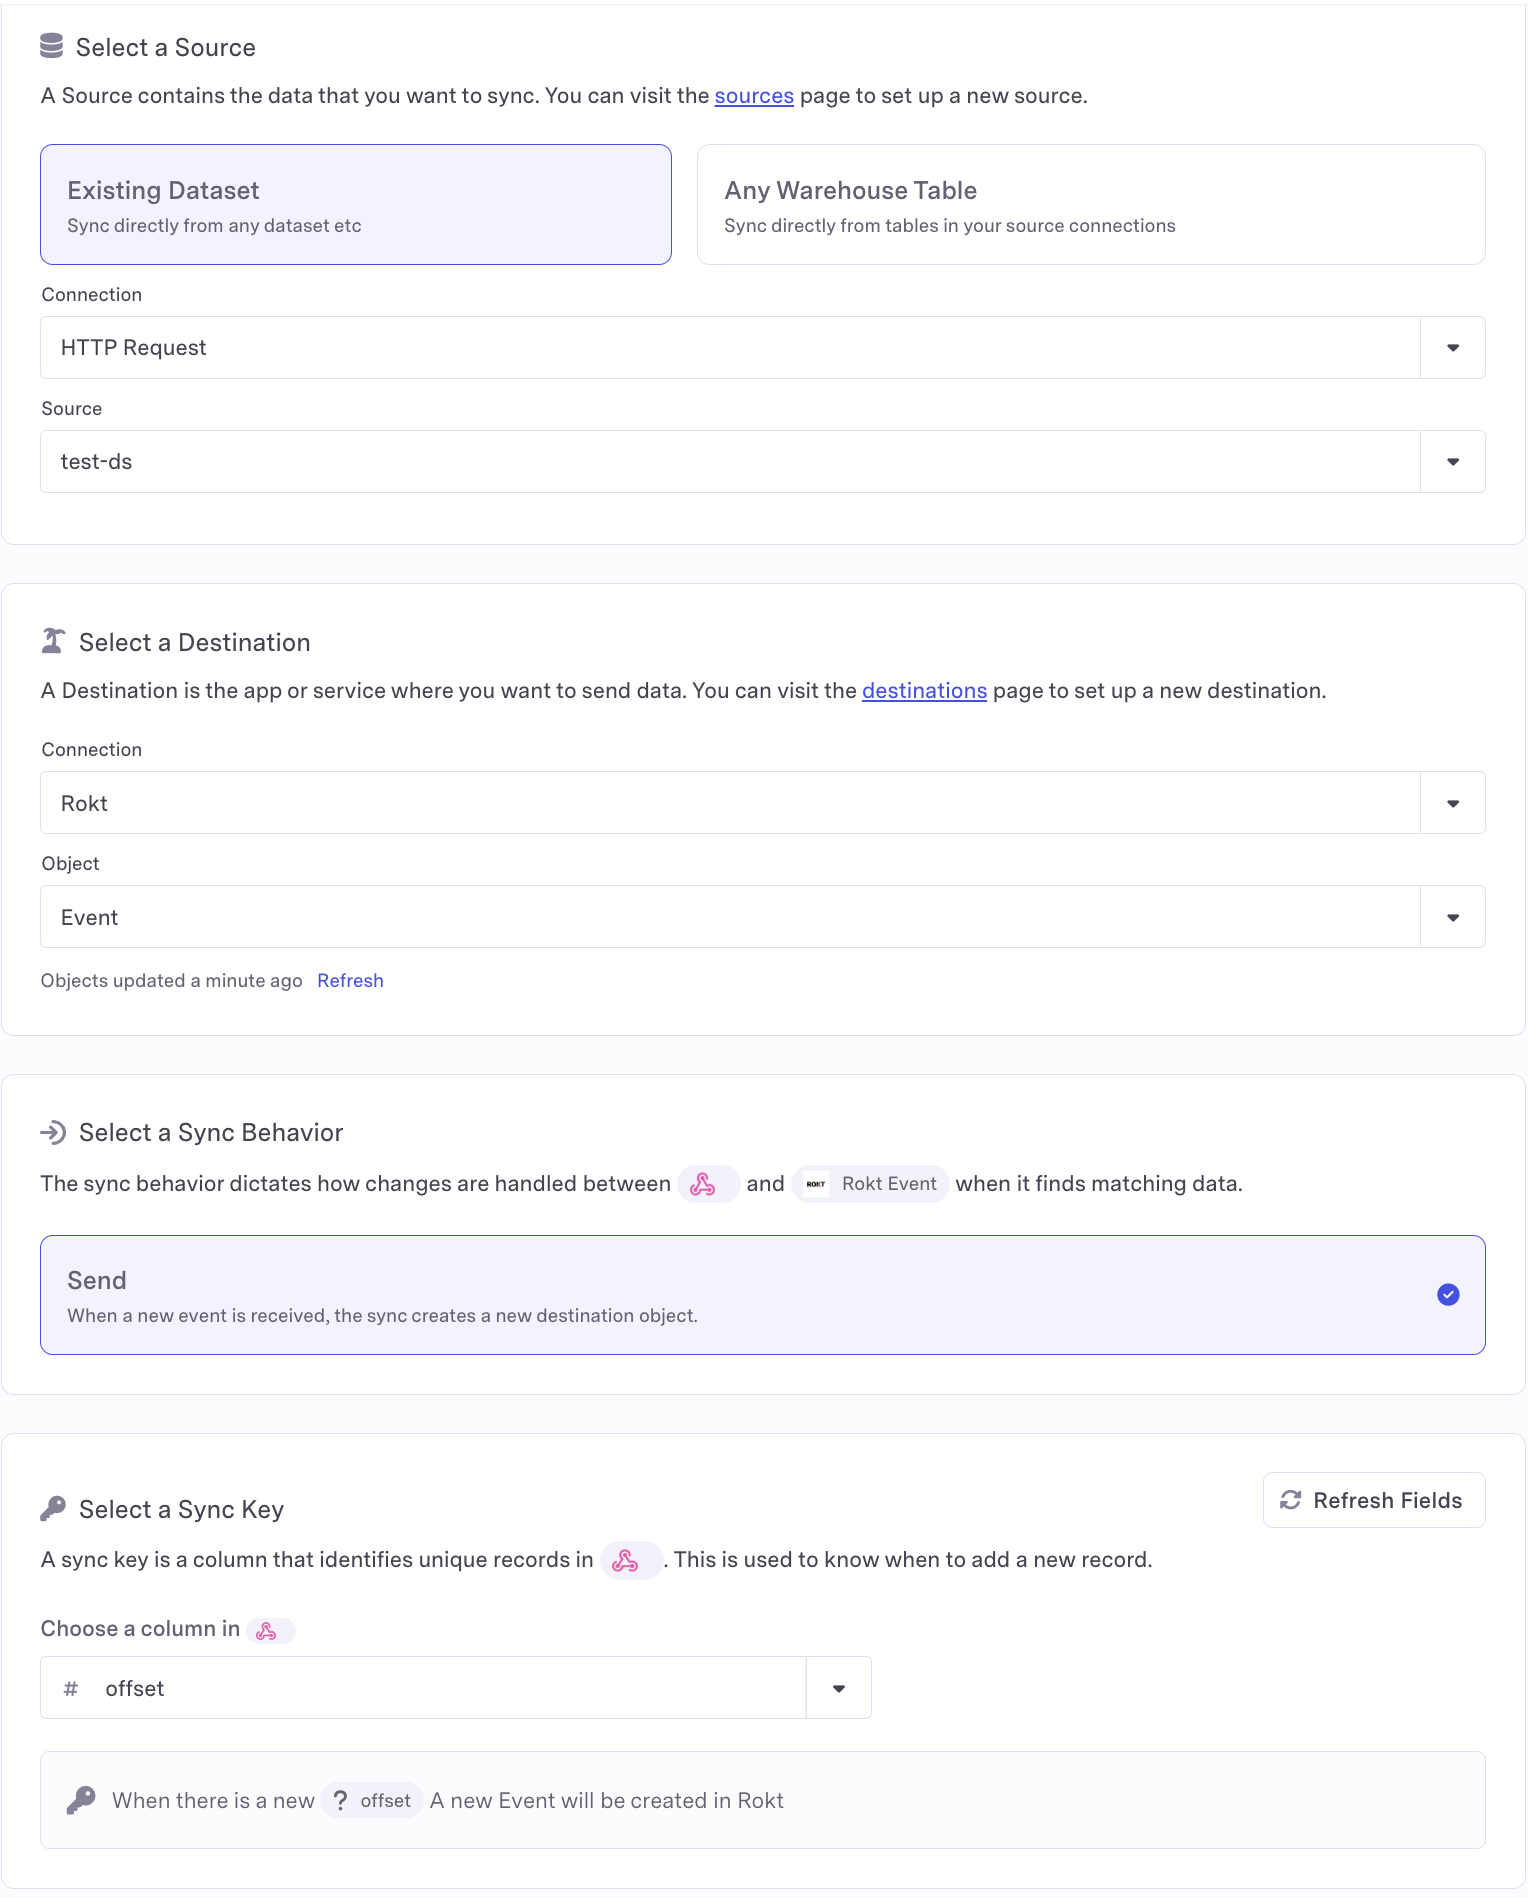
Select your desired Data Connection & Source. For Destination, set Connection to Rokt and Object to Event. Ensure that the Sync Behavior is set to Send and set your desired Sync Key.
-
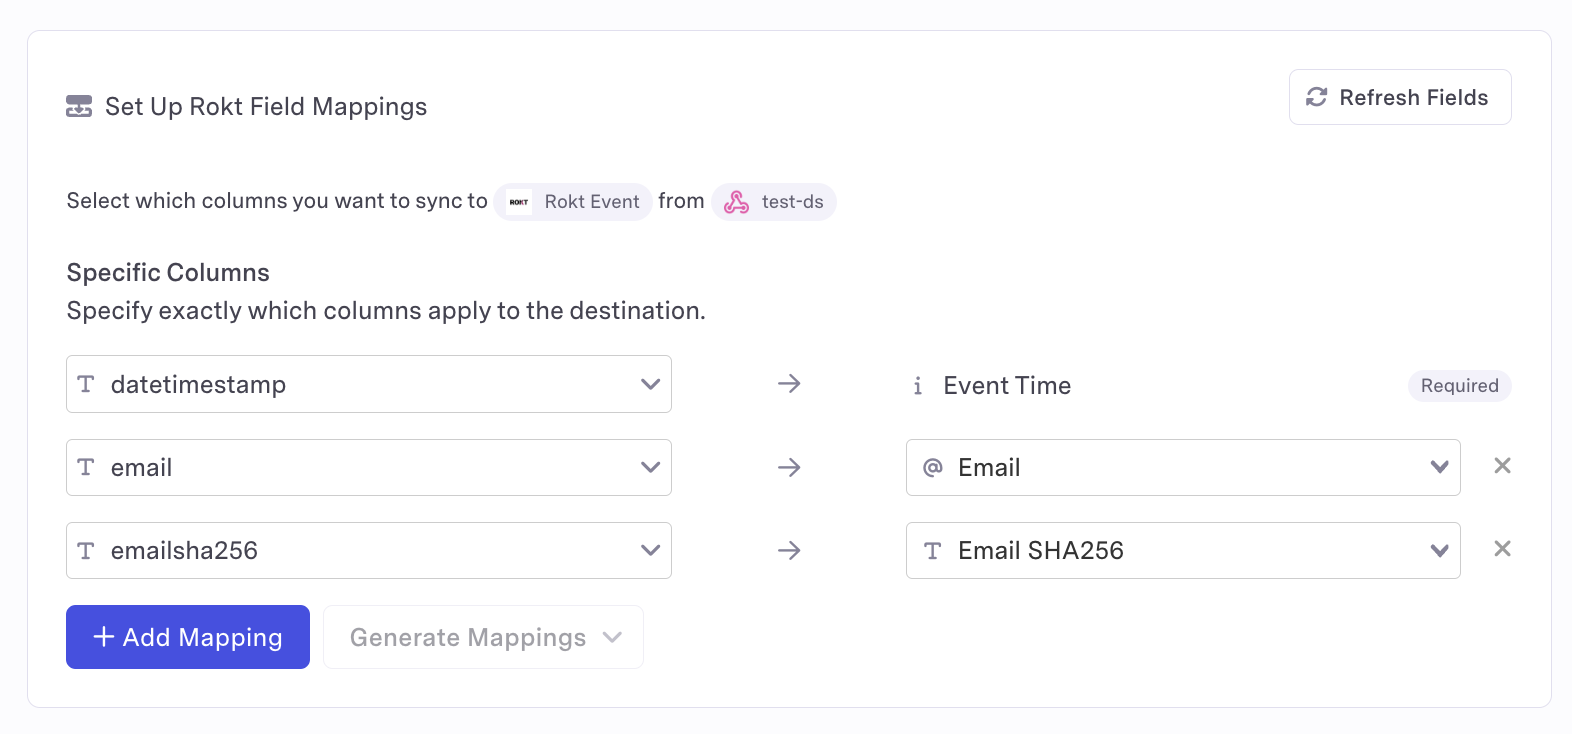
Add Rokt Field Mappings
To ensure conversions and associated metadata is sent to Rokt in the correct format, the following elements must be captured and ultimately received by Rokt:
| Parameter | Description | Required / Recommeneded |
|---|---|---|
| Event Type | Type of Event or Action | Required |
| Event ID | An identifier used to uniquely identify an event | Required |
| Event Time | Time of the event in UTC | Required |
| Email passed as plain text, lowercase and without trailing spaces | One email field is necessary. Raw is preferred but hashed is acceptable. Raw and hashed is recommended. | |
| Email (already SHA256 hashed) | SHA-256 hash of email address, already hashed | See Above |
| Email (apply SHA256 hash) | SHA-256 hash of email address. Tealium will hash | See Above |
| Rokt Tracking ID | A Rokt-generated ID used to match conversion events to the originating click | Recommended |
| Mobile | Mobile phone number of converting customer | Recommended |
| First Name | Customer's first name | Recommended |
| Last Name | Customer's last name | Recommended |
For a full list of supported parameters, refer to the Event API documentation. We recommend you include fields like transaction amount, currency code, product details, and payment method to provide context for better targeting and optimizations.
-
Click Run Test. A successful test will show Sync test succeeded along with checks for Fetching a record from data source and Loading into Rokt
-
The Show API Inspector will show the status code and response from the Rokt Event API. This is a tool that can be used to understand why the test failed. Success will return an HTTP status code 200.
You are now finished! For questions and concerns, please reach out to your Rokt contact or account manager.
Integration Setup (Audiences)Direct link to Integration Setup (Audiences)
AuthenticationDirect link to Authentication
Authenticating with the Rokt Audiences Destination requires an Rokt Public Key (rpub), Rokt Secret Key (rsec) and Account ID. Read V2 Authentication for more information.
Creating a Rokt DestinationDirect link to Creating a Rokt Destination
-
Login to your Census account
-
Click on Destinations on the left navigation bar and click New Destination
-
Search for the Rokt Destination
-
Add the Account ID you want to send conversions to using your rpub and rsec values. Ask your Rokt account manager for these values.
-
Click Connect to run the connection verification step
-
A successful connection will look like this:
-
Click Test to create a Healthy destination connection
-
If the connection succeeds, you will see Rokt Destination as Healthy
Creating an Audience SyncDirect link to Creating an Audience Sync
The most important component in your Census integration is defining a Sync. A Sync defines the rules of how data should be synced, from your selected Data Source to your Destination. For detailed documentation on Syncs, refer to the Census Sync Overview.
-
Click on Syncs and then click + Create a sync
-
Select your desired Data Connection & Source. For Destination, set Connection to Rokt and Object to Audience. Ensure that the Sync Behavior is set to Send and set your desired Sync Key.
-
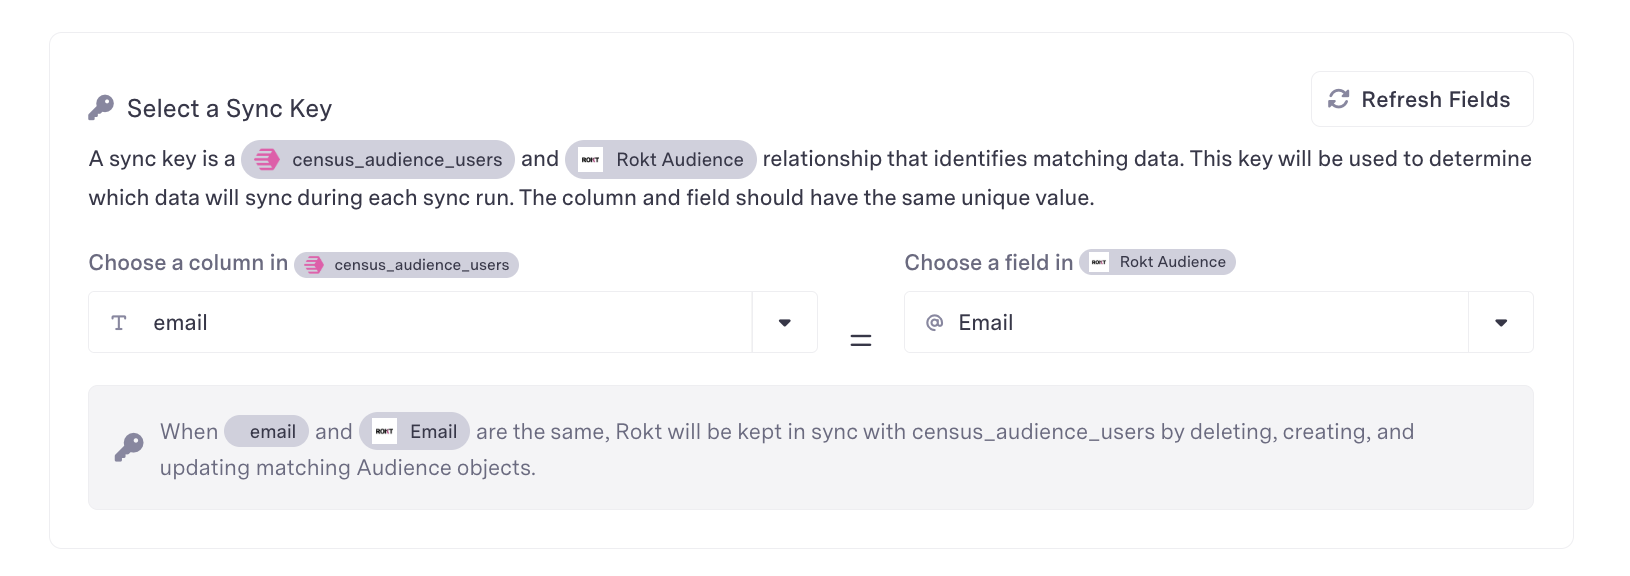
Define your Sync Key to use the field in your source and map to your desired email format.
-
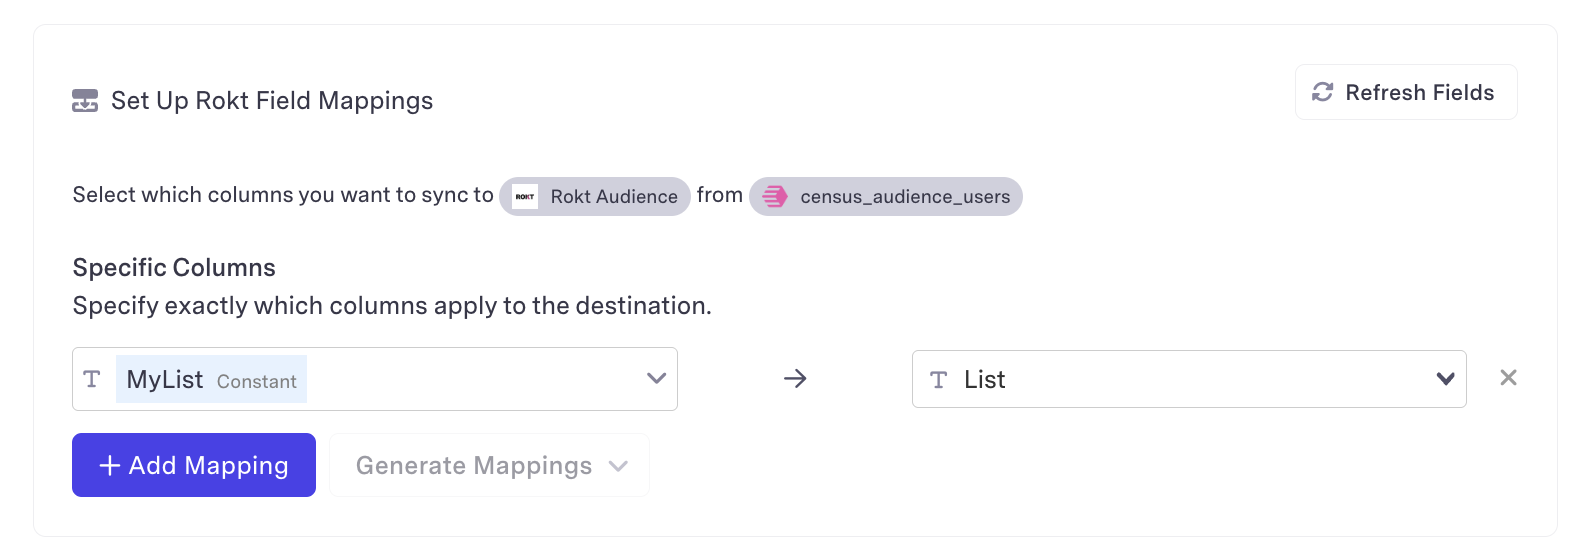
Define your Audience List Name.
-
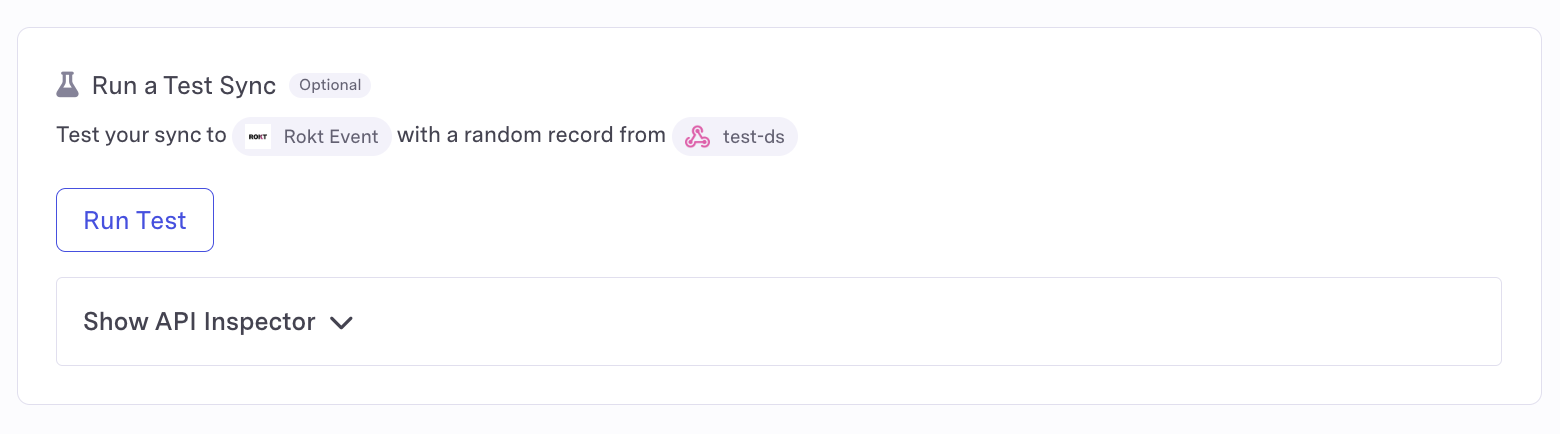
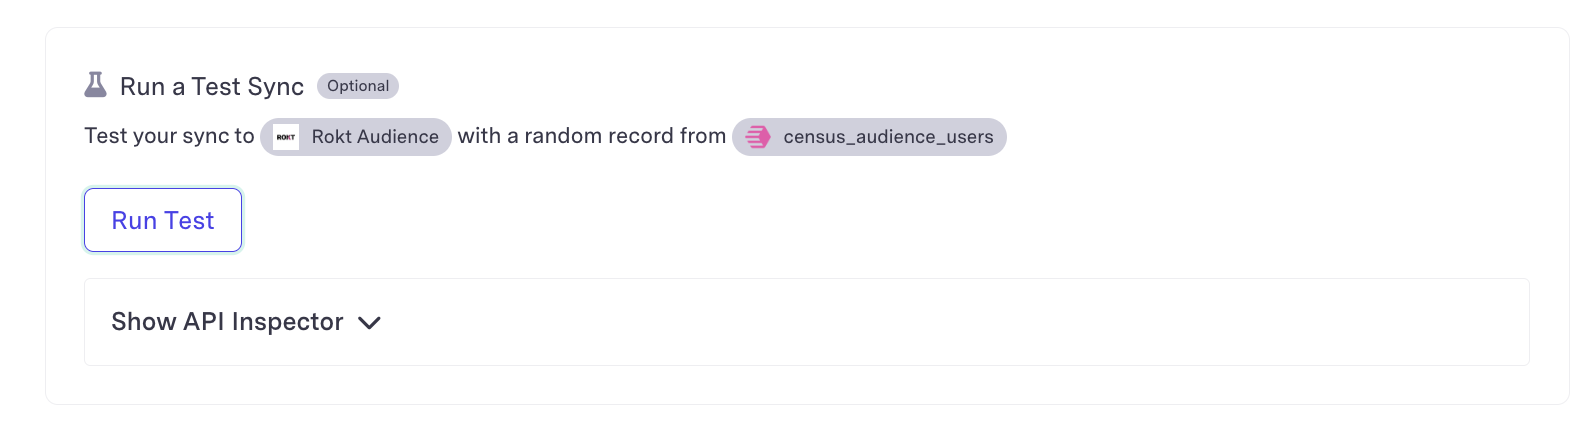
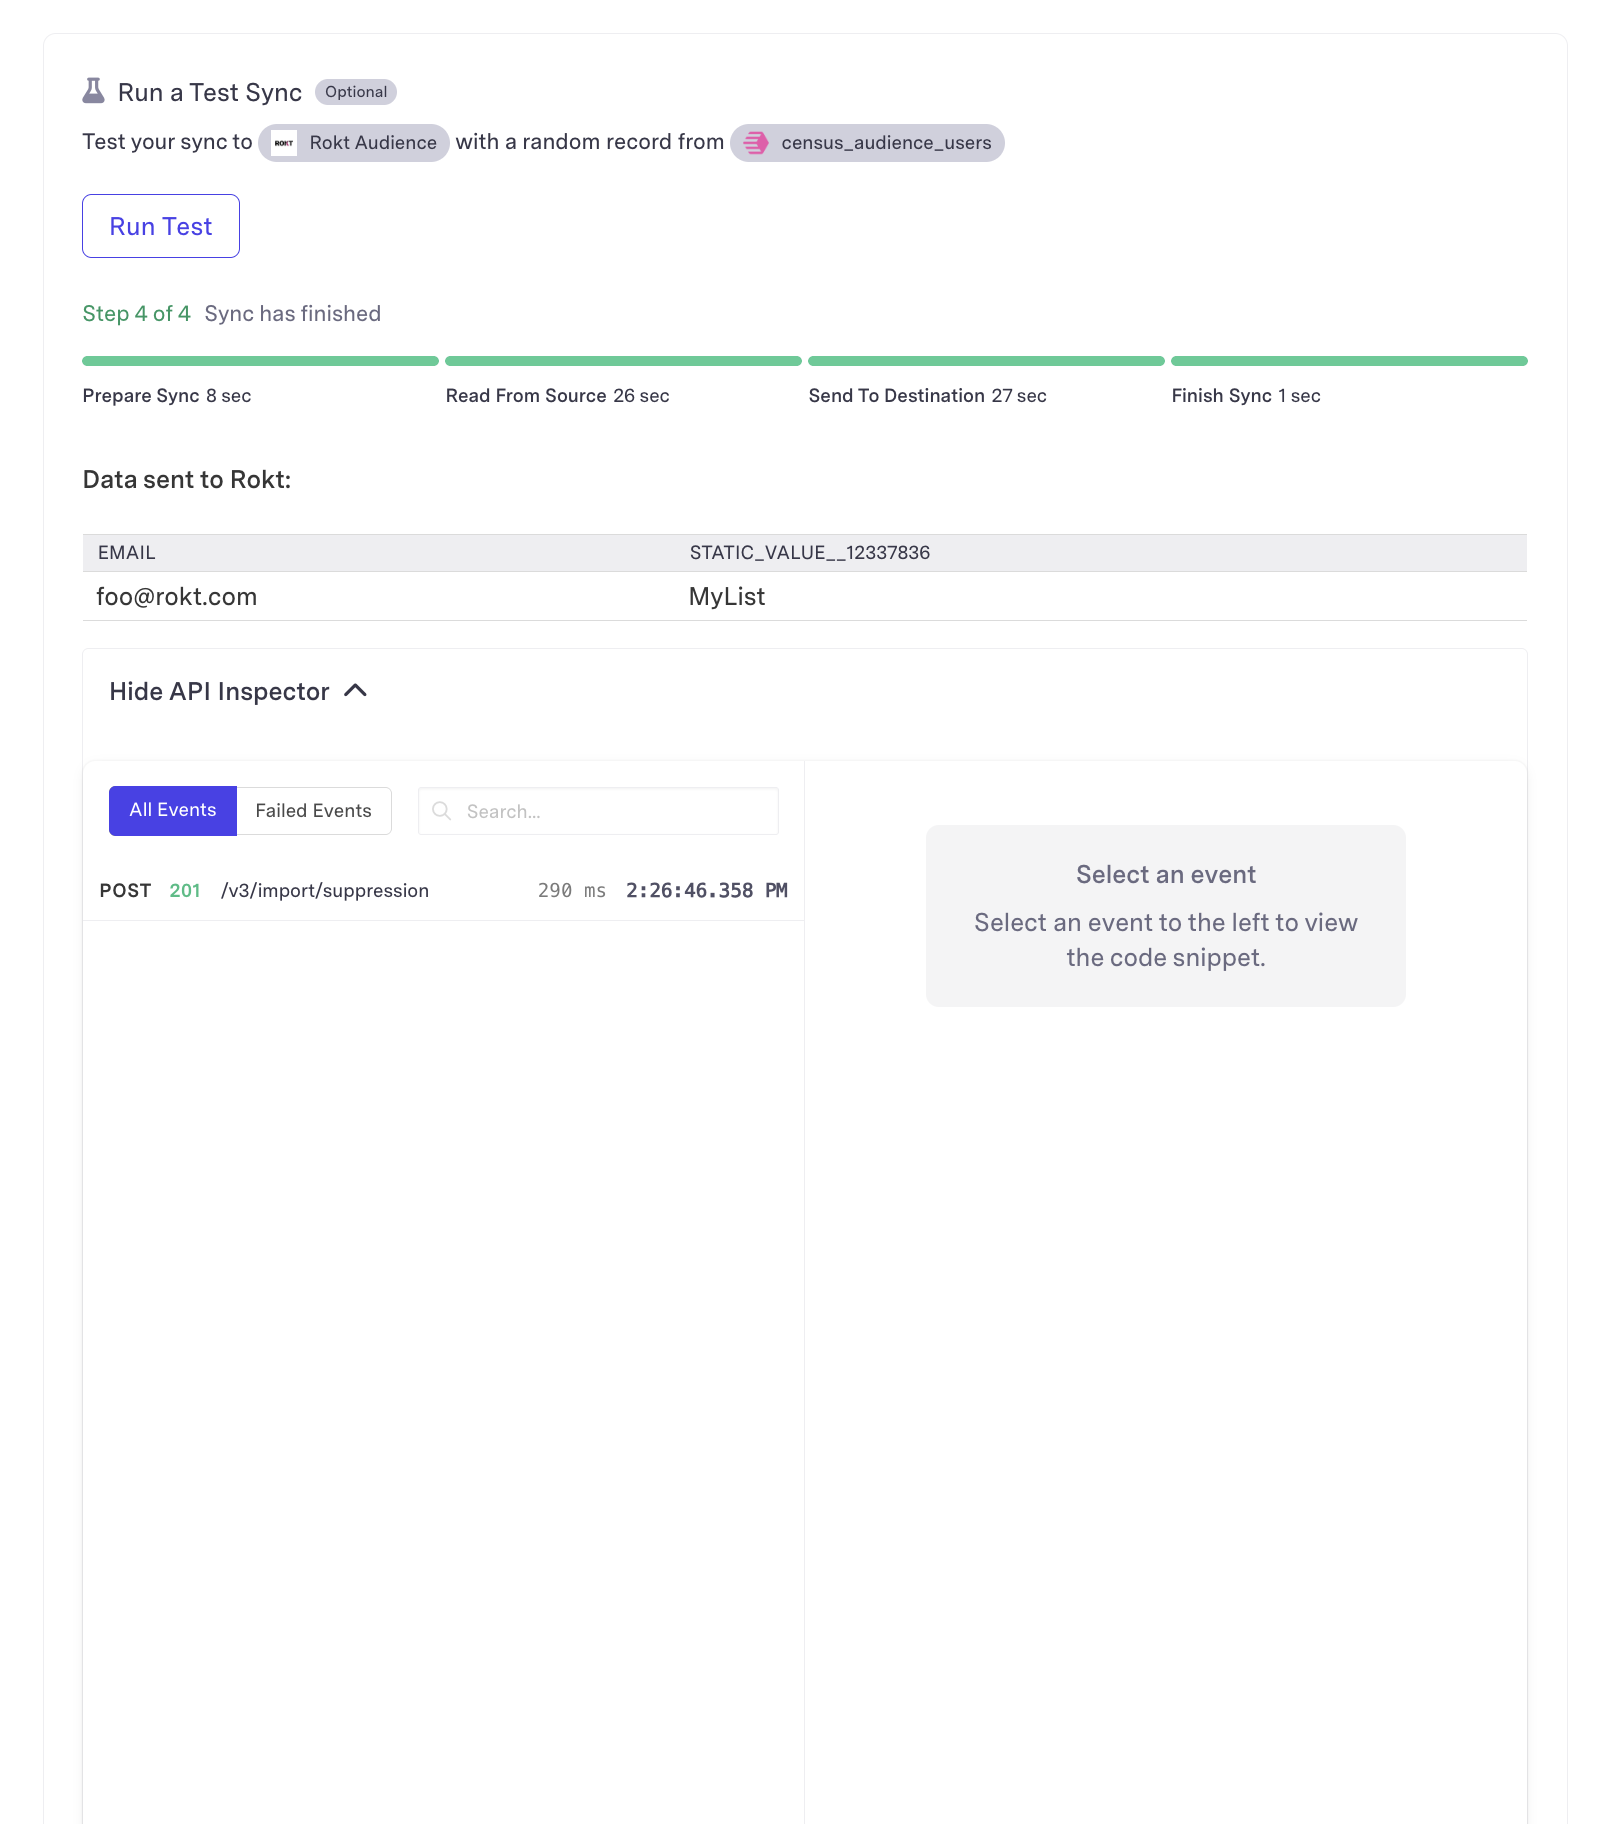
Click Run a Test Sync to test your integration. NOTE: This will sync a live record to your destination
-
The Show API Inspector will show the status code and response from the Rokt Audiences API. This is a tool that can be used to understand why the test failed. Success will return an HTTP status code 200.
You are now finished! For questions and concerns, please reach out to your Rokt contact or account manager.