Segment

The Rokt Conversions API (CAPI) Destination for Segment allows you to send event data or audiences from Segment to Rokt. Both use cases use the same destination in Segment, but the setup process differs for each. This page provides step-by-step instructions for configuring both.
Integration Setup (Events)Direct link to Integration Setup (Events)
The Rokt CAPI destination improves campaign performance by sending conversion data to Rokt Ads, enabling Rokt's models to learn from every conversion and continuously optimize campaign targeting and bidding.
Step 1: Create the Rokt CAPI DestinationDirect link to Step 1: Create the Rokt CAPI Destination
Before you begin, reach out to your Rokt Account Manager to receive your API key and secret.
- Log into your Segment account.
- Click Connections > Catalog in the left navigation, and click Destinations.
- Search for Rokt Conversions API and click the tile to create the destination.
Please use the Rokt Conversions API for all new integrations to receive improved performance and ongoing support. The legacy Rokt and Rokt Audiences destinations will be deprovisioned at a future date.
- Click Add Destination, then select the source you want to connect to the new destination.
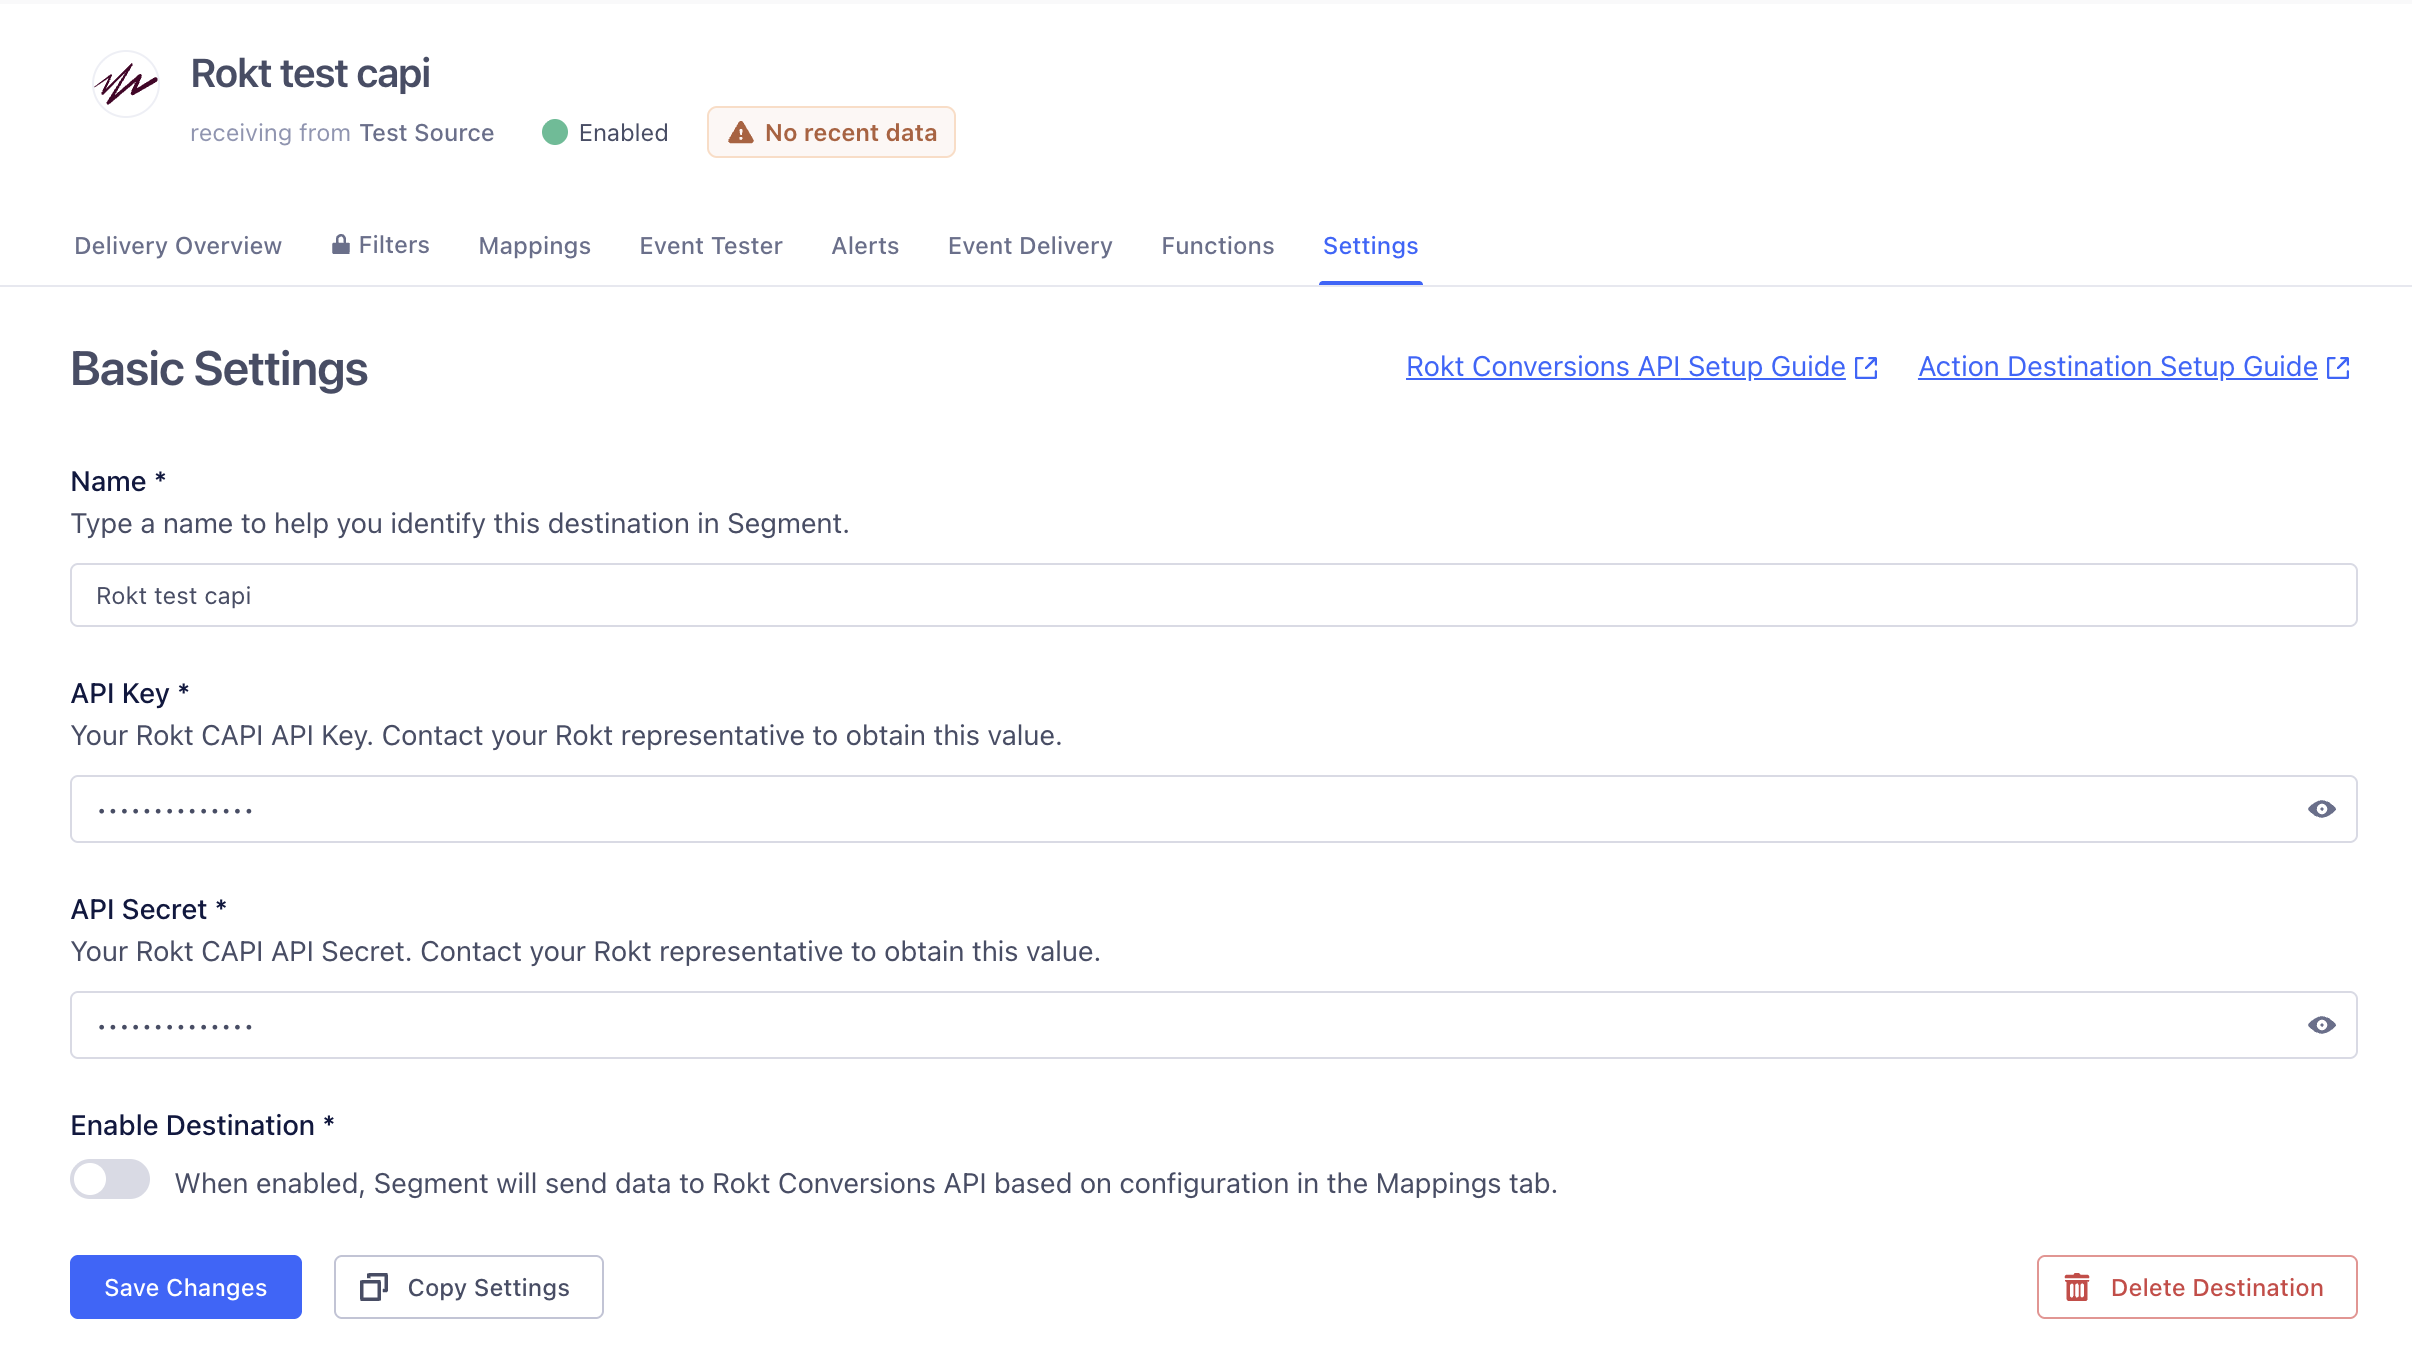
- Enter your Rokt API key and secret in the subsection Settings of your new destination, and click Save Changes.
Step 2: Configure and Test the Rokt CAPI DestinationDirect link to Step 2: Configure and Test the Rokt CAPI Destination
This section explains how to map your event data in Segment to Rokt and test the destination.
- In your Rokt destination, navigate to the subsection Mappings. Two preconfigured mappings will be created:
- Rokt Browser Plugin: automatically captures the Rokt Click ID (RTID) from the page URL and forwards it alongside your conversion event. To learn more, see Rokt Click ID.
- Send: sends conversion data to Rokt
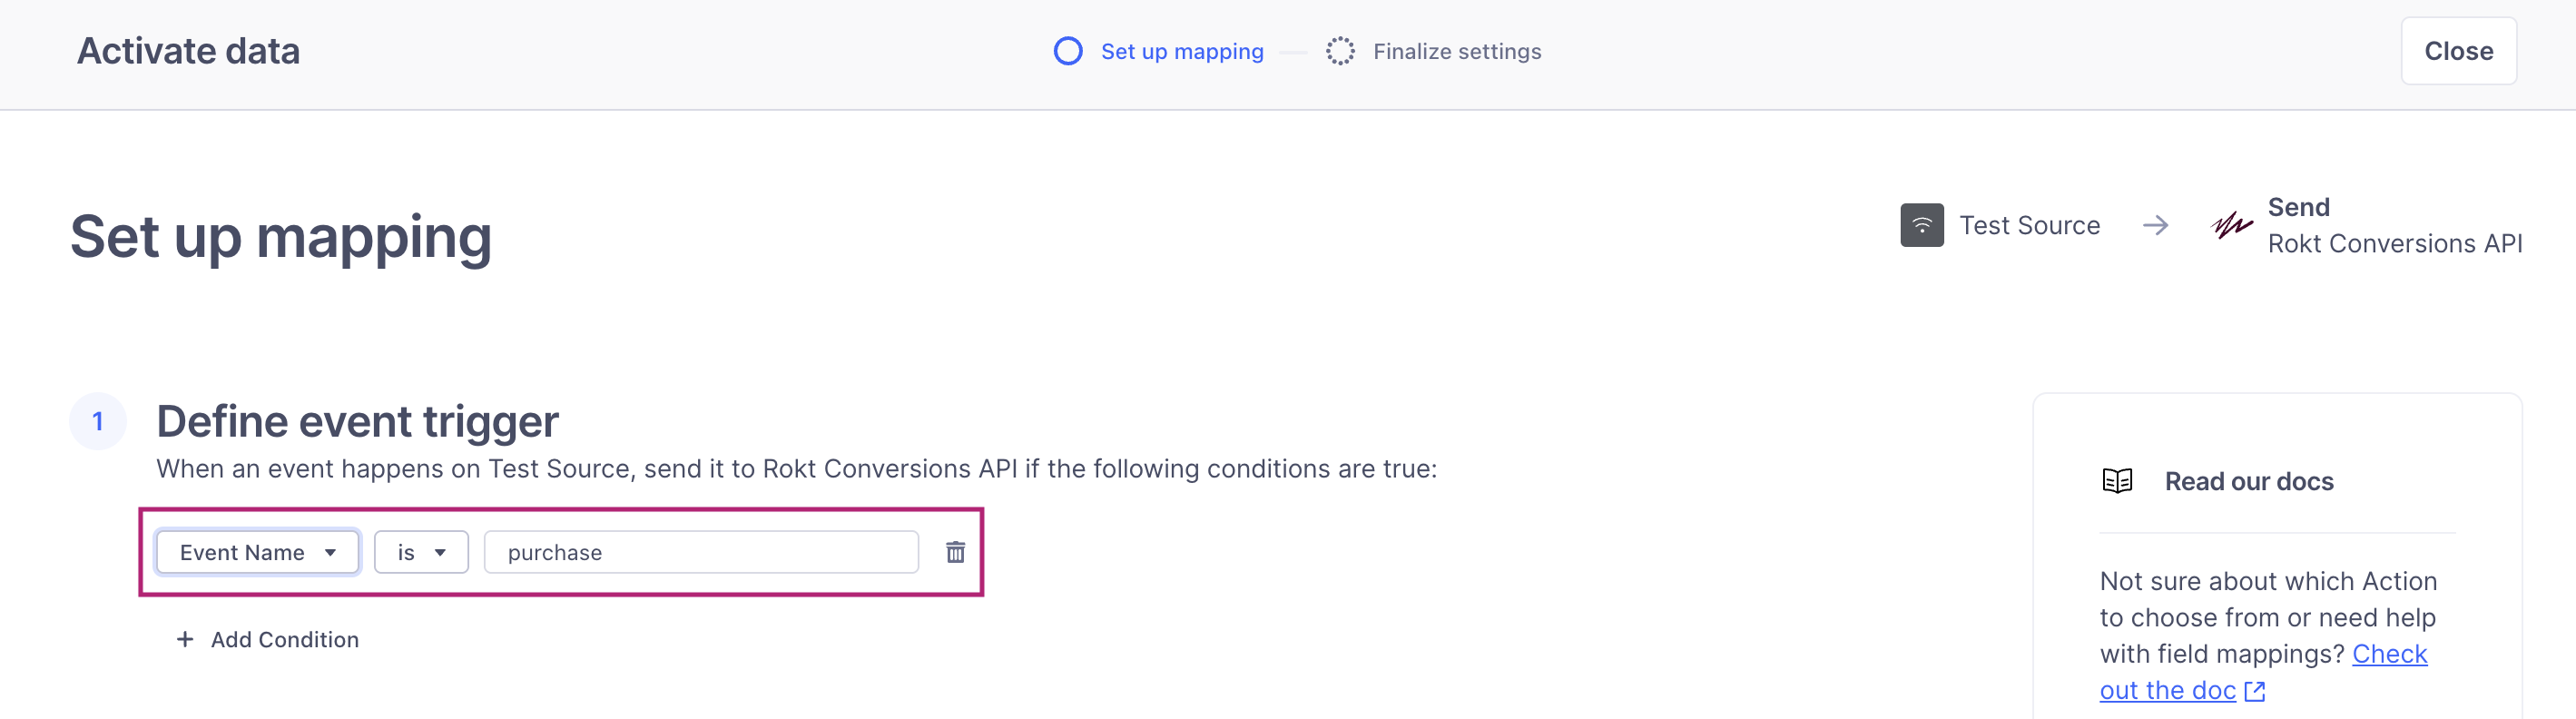
- Edit the preconfigured Send Mapping.
- Under the section Define event trigger, edit the trigger condition to forward the desired conversion event to Rokt. In the dropdown, select Event Name is
your event name.
Forward all events that represent meaningful conversions in your business funnel. The more conversion data Rokt receives, the better it can optimize your campaigns.
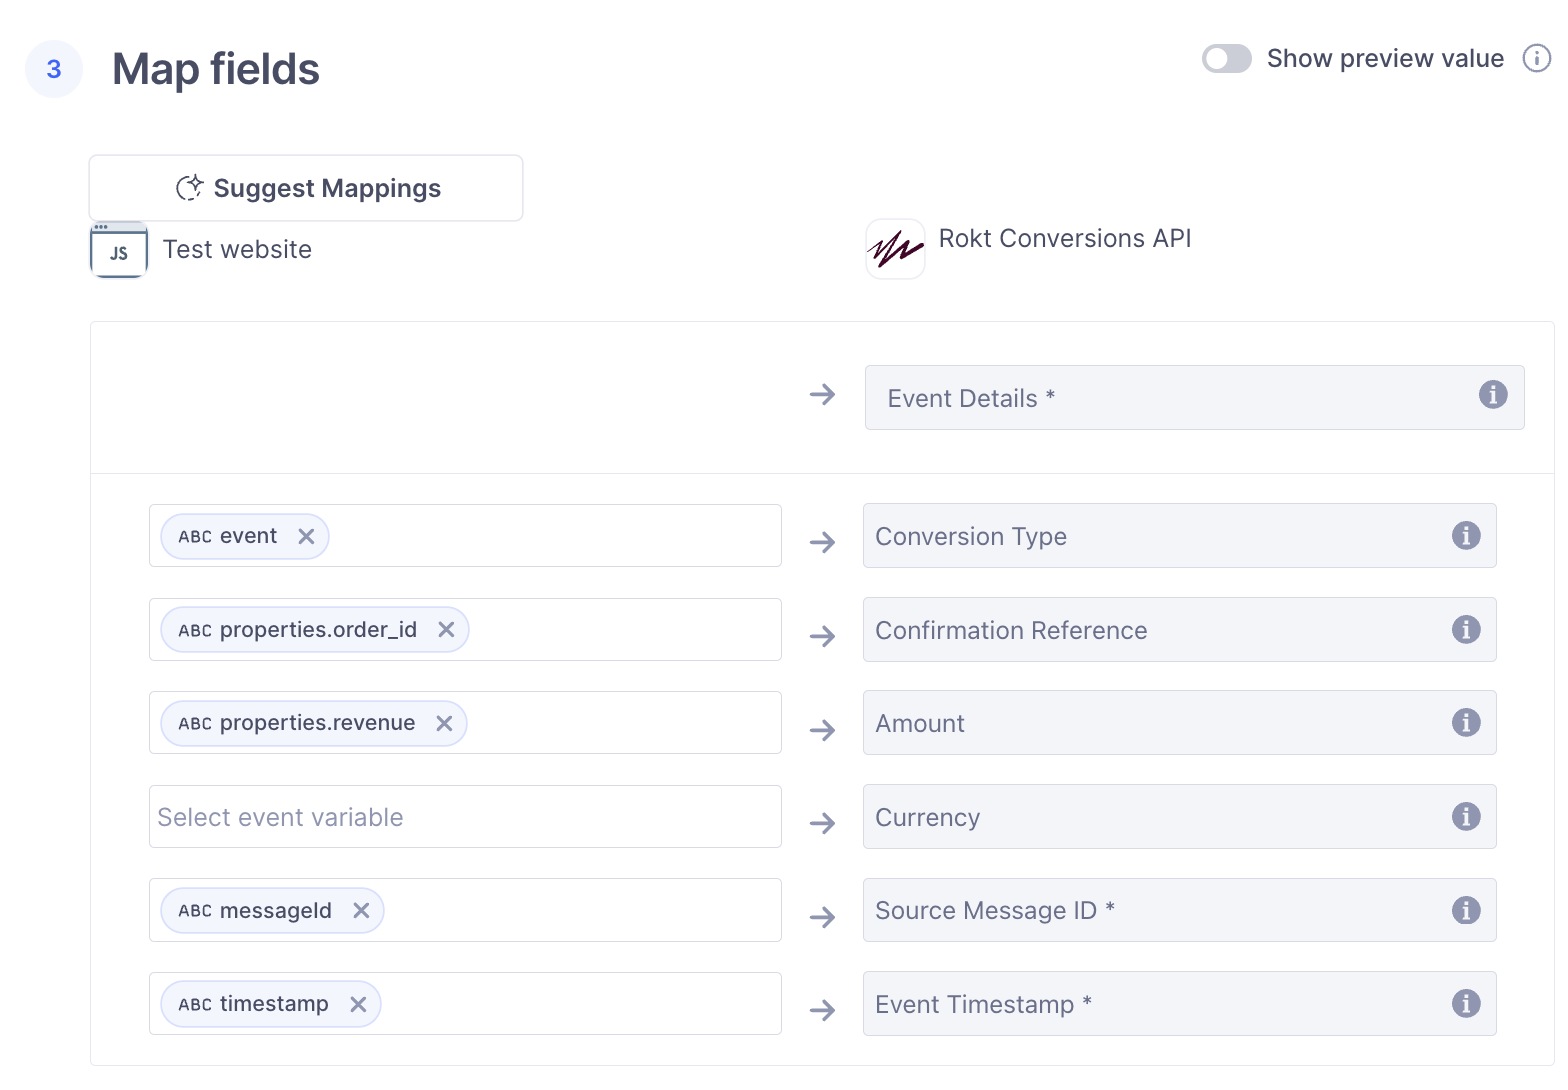
- Under Map fields, set up the data mapping from the Segment format to the Rokt CAPI format.
- Segment’s “event” field should always map to Conversion Type.
- If your source collects properties that represent confirmation reference/order ID, amount, or currency code, map them to the respective Rokt CAPI properties. If these attributes are not collected, you may remove the Segment property reference from the mapping by clicking the X icon.
- Email, First Name, Last Name, Mobile Phone Number, and Billing Zip Code can optionally be SHA256 hashed before forwarding to Rokt. To opt into SHA256 hashing, select Yes/True under the Hashing Configuration section.
- By default, Segment’s User ID is mapped to Rokt’s Customer ID.
- By default, Email and user attributes are mapped to Segment’s
context.traitsobject as a primary key; if unavailable, it will fall back to Segment’s properties object. - The following properties can be mapped to Rokt:
- Customer ID
- Email (raw/sha256)
- Rokt Click ID (RTID)
- Mobile Phone Number (raw/sha256)
- Billing Zip Code (raw/sha256)
- First Name (raw/sha256)
- Last Name (raw/sha256)
- Date of Birth
- Gender
- IP Address
- User Agent
- Identifier for Vendors (IDFV)
- Identifier for Advertisers (IDFA)
- Android Universally Unique Identifier (UUID)
- Google Advertising ID (GAID)
- Confirmation Reference
- Amount
- Currency
- Click Next and add a mapping name. Click Save.
- To test the event, navigate to the Rokt CAPI destination and select the subsection Event Tester.
- Select Track from the Call Type drop-down menu.
- Review your test event payload for key-value pairs to be forwarded to Rokt. For example, if you are integrating attributes such as email, first name, last name, zip, etc, they are defined according to your configured mappings.
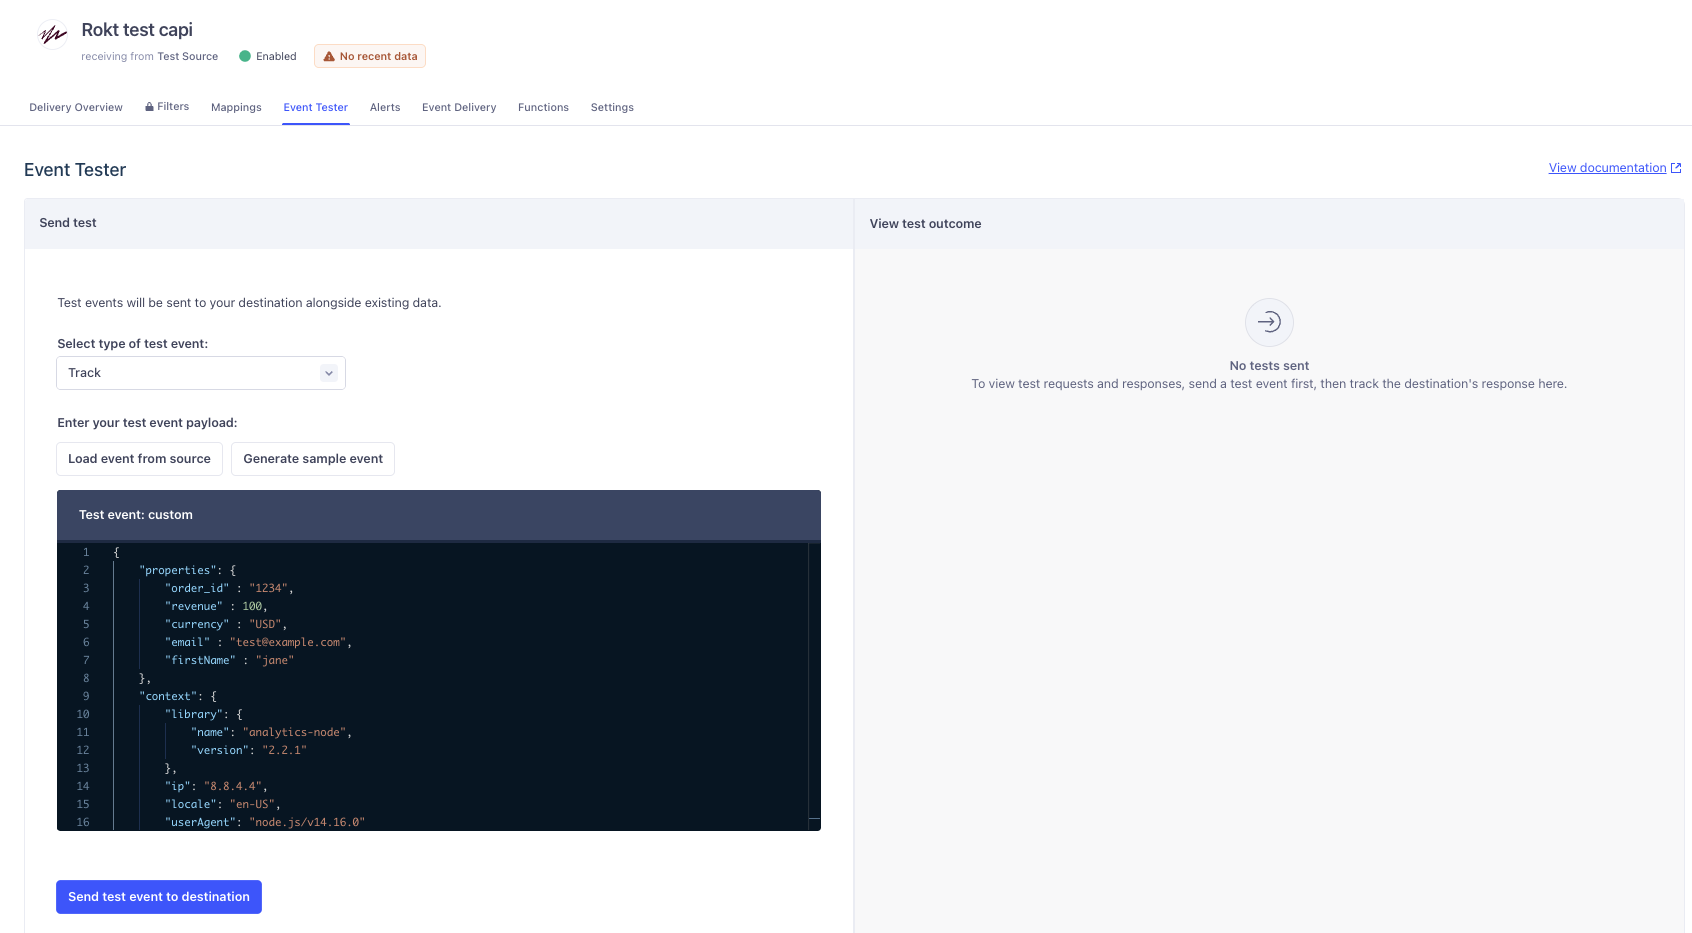
- Click Send test event to destination.
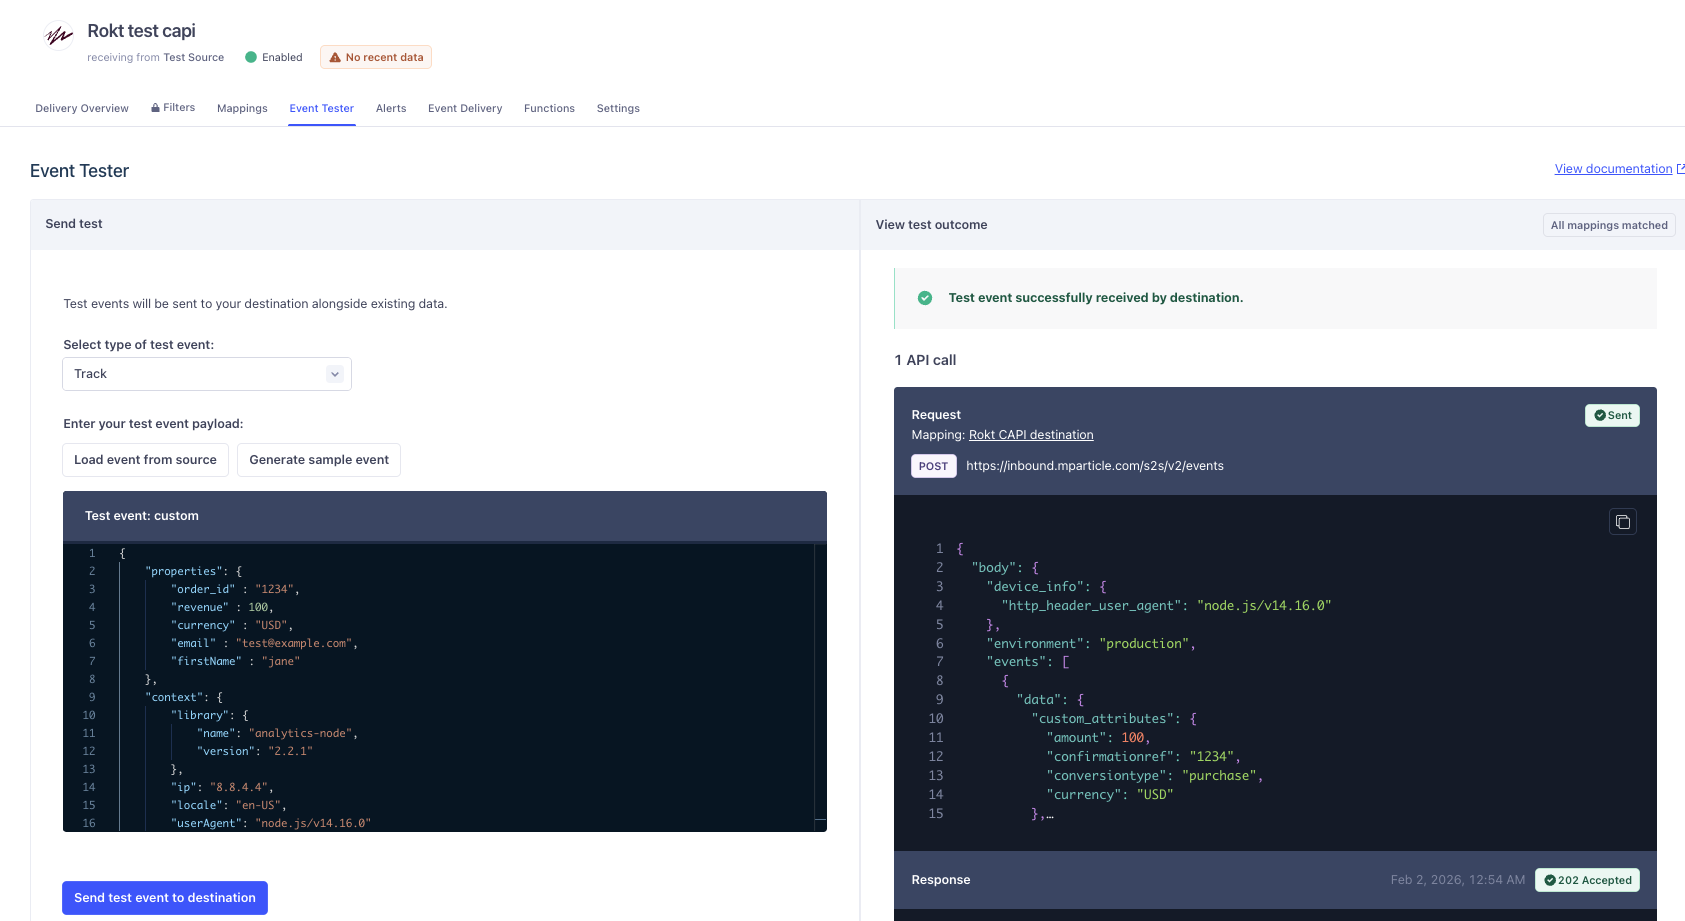
You should receive a "202 OK" response if you've successfully connected to Rokt. Please contact your Rokt Account Manager to check that the data attributes were correctly captured in Rokt’s system for the test event. If any other response besides “202 OK” is received, please reach out to your Rokt Account Manager to troubleshoot the issue.
Step 3: Activate the Rokt CAPI DestinationDirect link to Step 3: Activate the Rokt CAPI Destination
This section explains how to activate your destination and confirm it is connected to your sources.
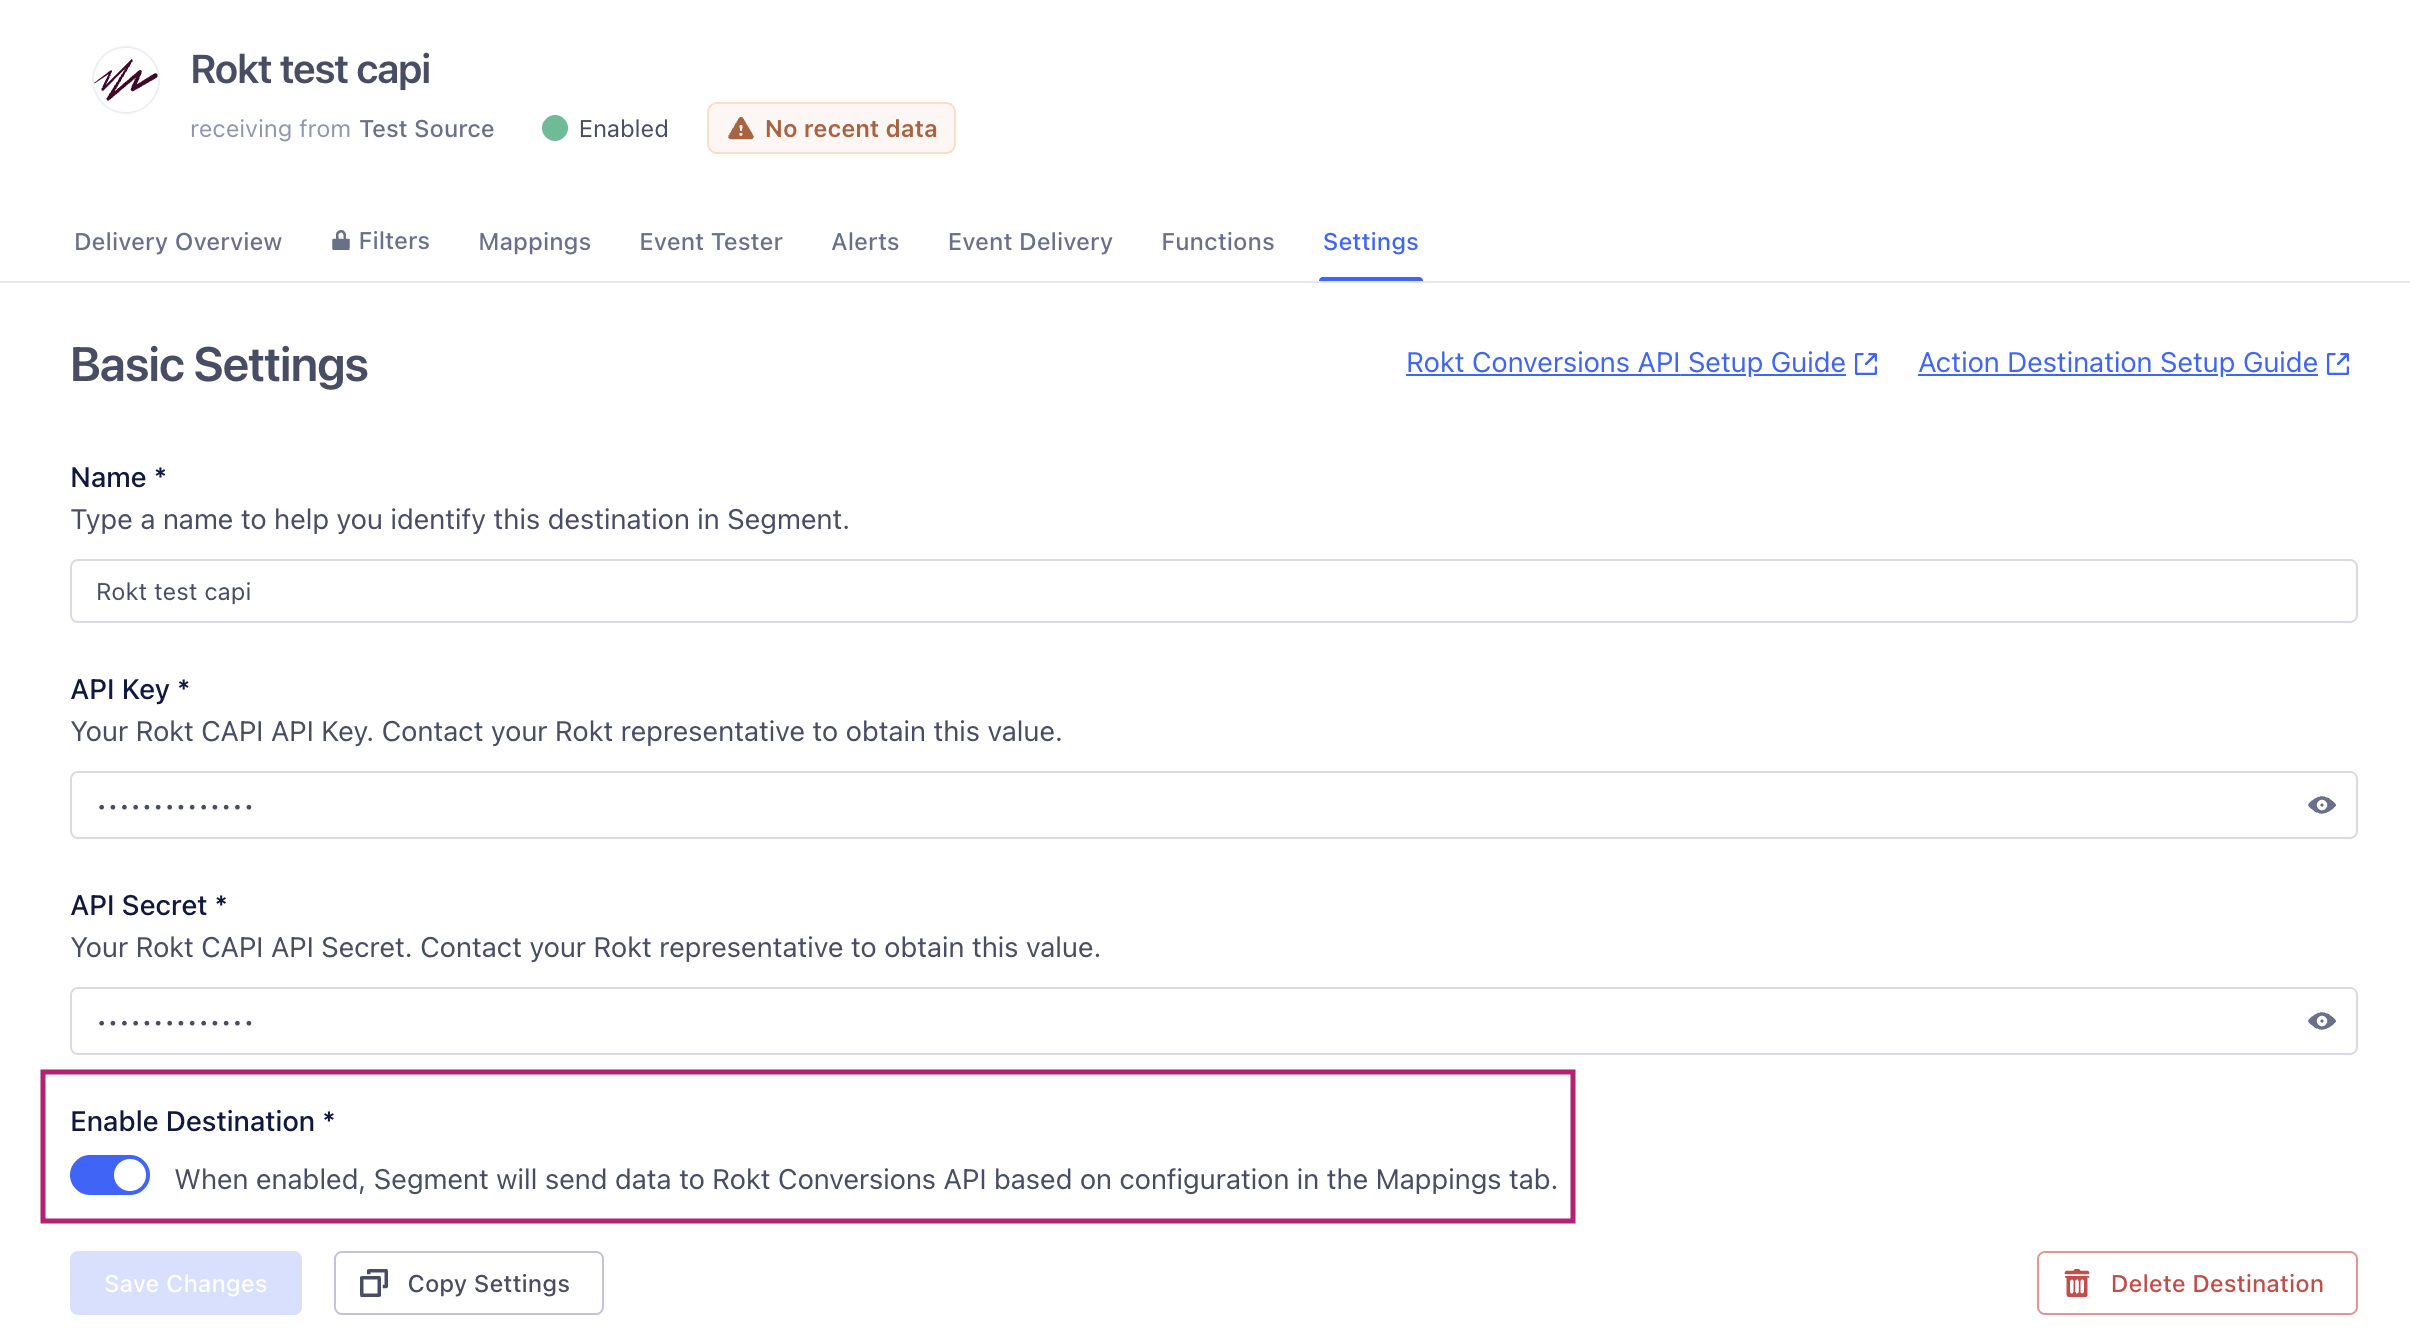
- From your Rokt CAPI destination, navigate to Settings and enable the toggle to activate the destination.
- Under Connections, confirm that the Rokt Conversions API destination is connected to your sources.
Integration Setup (Audiences)Direct link to Integration Setup (Audiences)
The Rokt CAPI destination improves campaign performance by sending audiences from Segment to Rokt, enabling suppression and retargeting use cases that help ensure that you reach the right people at the right time.
Step 1: Create the Rokt CAPI Destination Connected to your Engage SpaceDirect link to Step 1: Create the Rokt CAPI Destination Connected to your Engage Space
Before you begin, reach out to your Rokt Account Manager to receive your API key and secret.
- From the Segment app, navigate to Engage > Engage Settings > Destinations.
- Click Add Destination and search for “Rokt Conversions API” in the search bar. Click on the tile and add the destination.
- Select your Engage space source and click Confirm Source.
- In Basic Settings, name this destination, input the Rokt API key and secret, then toggle Enable Destination on. Click Save Changes when done.

- Open your newly created destination and navigate to Mappings. Ensure the “Sync Engage Audience” mapping is added to this destination.
Step 2: Connect the Audience to the Rokt CAPI DestinationDirect link to Step 2: Connect the Audience to the Rokt CAPI Destination
This section explains how to send your audience to the Rokt CAPI destination.
- From the Segment app, navigate to Engage > Audiences. Select the audience to be sent to Rokt.
- From the audience’s overview page, click Add Destination.
- Select your Rokt CAPI tile, then click Add Destination.
- Under Connection Settings, ensure the Send Identify toggle is enabled.
- Under Event Settings, choose a Default Setup or configure a customized setup.
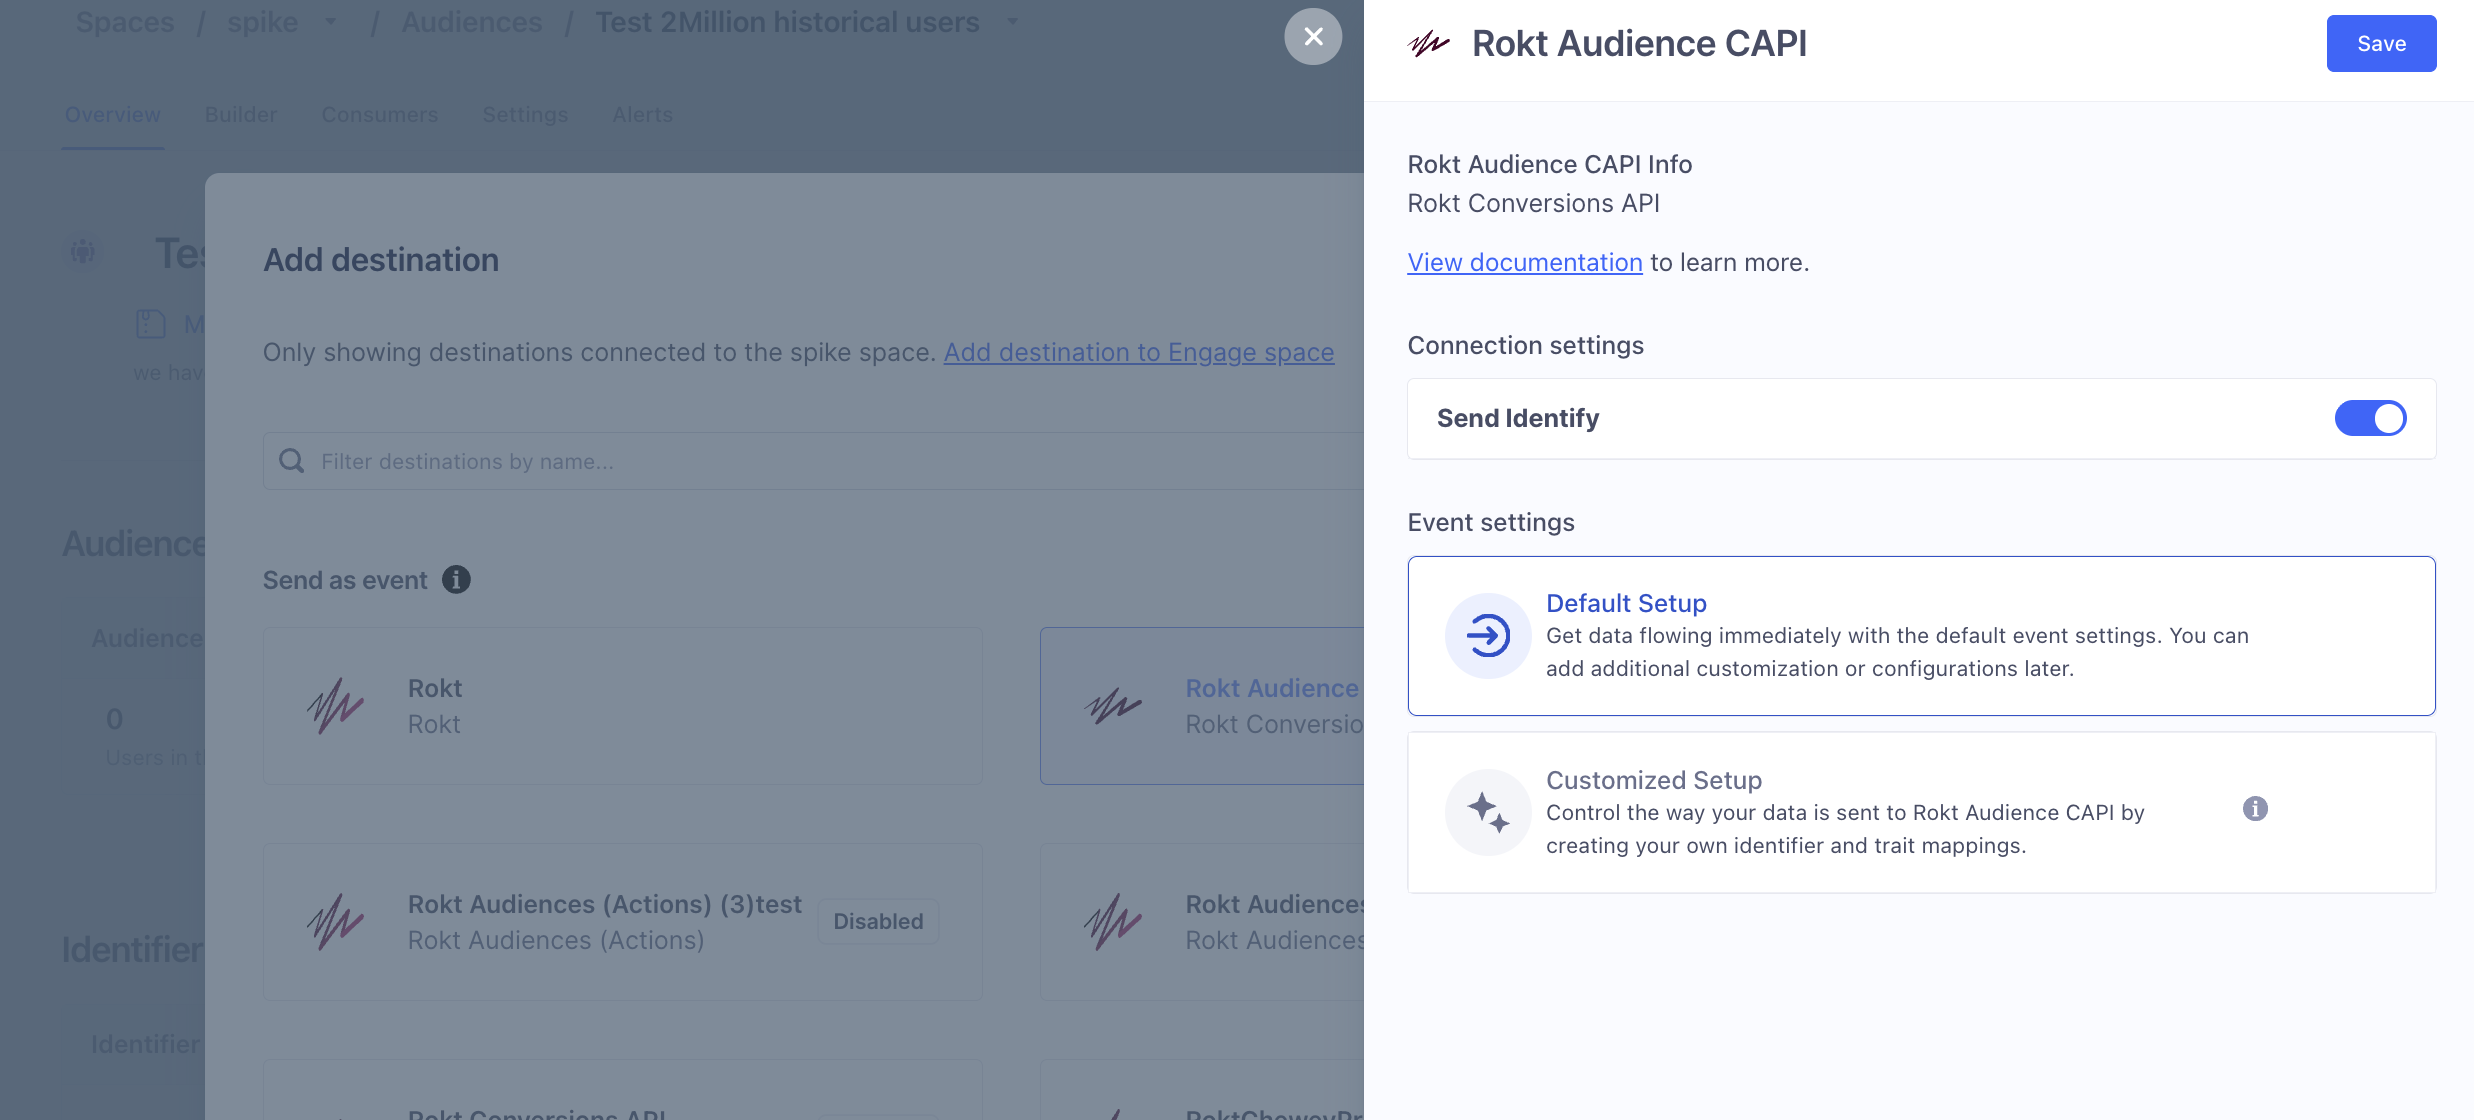
- Click Save, then click Add 1 destination to complete the connection. Segment will begin its initial sync to the Rokt CAPI destination.
It may take between 10-20 minutes for the sync to start. Audience memberships will be forwarded from Segment with the attribute name segment_{audience_name}.