Impact.com
To set up your integration with Rokt, configure your Impact tracking link and conversion postback using the instructions below.
-
Log in to your Impact.com account.
-
Invite Rokt to your affiliate program on Impact.
- Rokt account name: Rokt_US
- Rokt Media Partner ID (US only): 2666683
- Note: Rokt has different Media Partner IDs for different geographies. If you are running campaigns outside the US, contact your Rokt account manager for the correct Media Partner ID.
-
After sending the invitation, inform your Rokt account manager.
-
Once Rokt has accepted the invitation, proceed with the integration setup.
-
Create the ad link. When generating the tracking link in Impact:
-
Select Rokt.com (Website) under Property. This associates the Rokt property with the generated Impact tracking link, so you do not need to manually add the Rokt property ID to the URL.
-
Add the following parameter, which carries the Rokt Click ID:
subId1={rokt.rclid|}For example:
https://advertiser.pxf.io/c/1111111/222222/3456?subId1={rokt.rclid|} -
Generate the tracking link.
-
Review the generated URL before using it. If Impact has URL-encoded the Rokt Click ID macro as
%7Brokt.rclid%7C%7D, replace it with{rokt.rclid|}. -
Confirm that there are no other unintentionally encoded dynamic Rokt parameters in the URL.
A final generated link may look similar to:
https://advertiser.pxf.io/c/1111111/222222/3456?subId1={rokt.rclid|}&partnerpropertyid=2457107The
partnerpropertyidvalue is generated through the Rokt.com (Website) property selection and does not need to be manually appended. -
-
Set up the conversion postback.
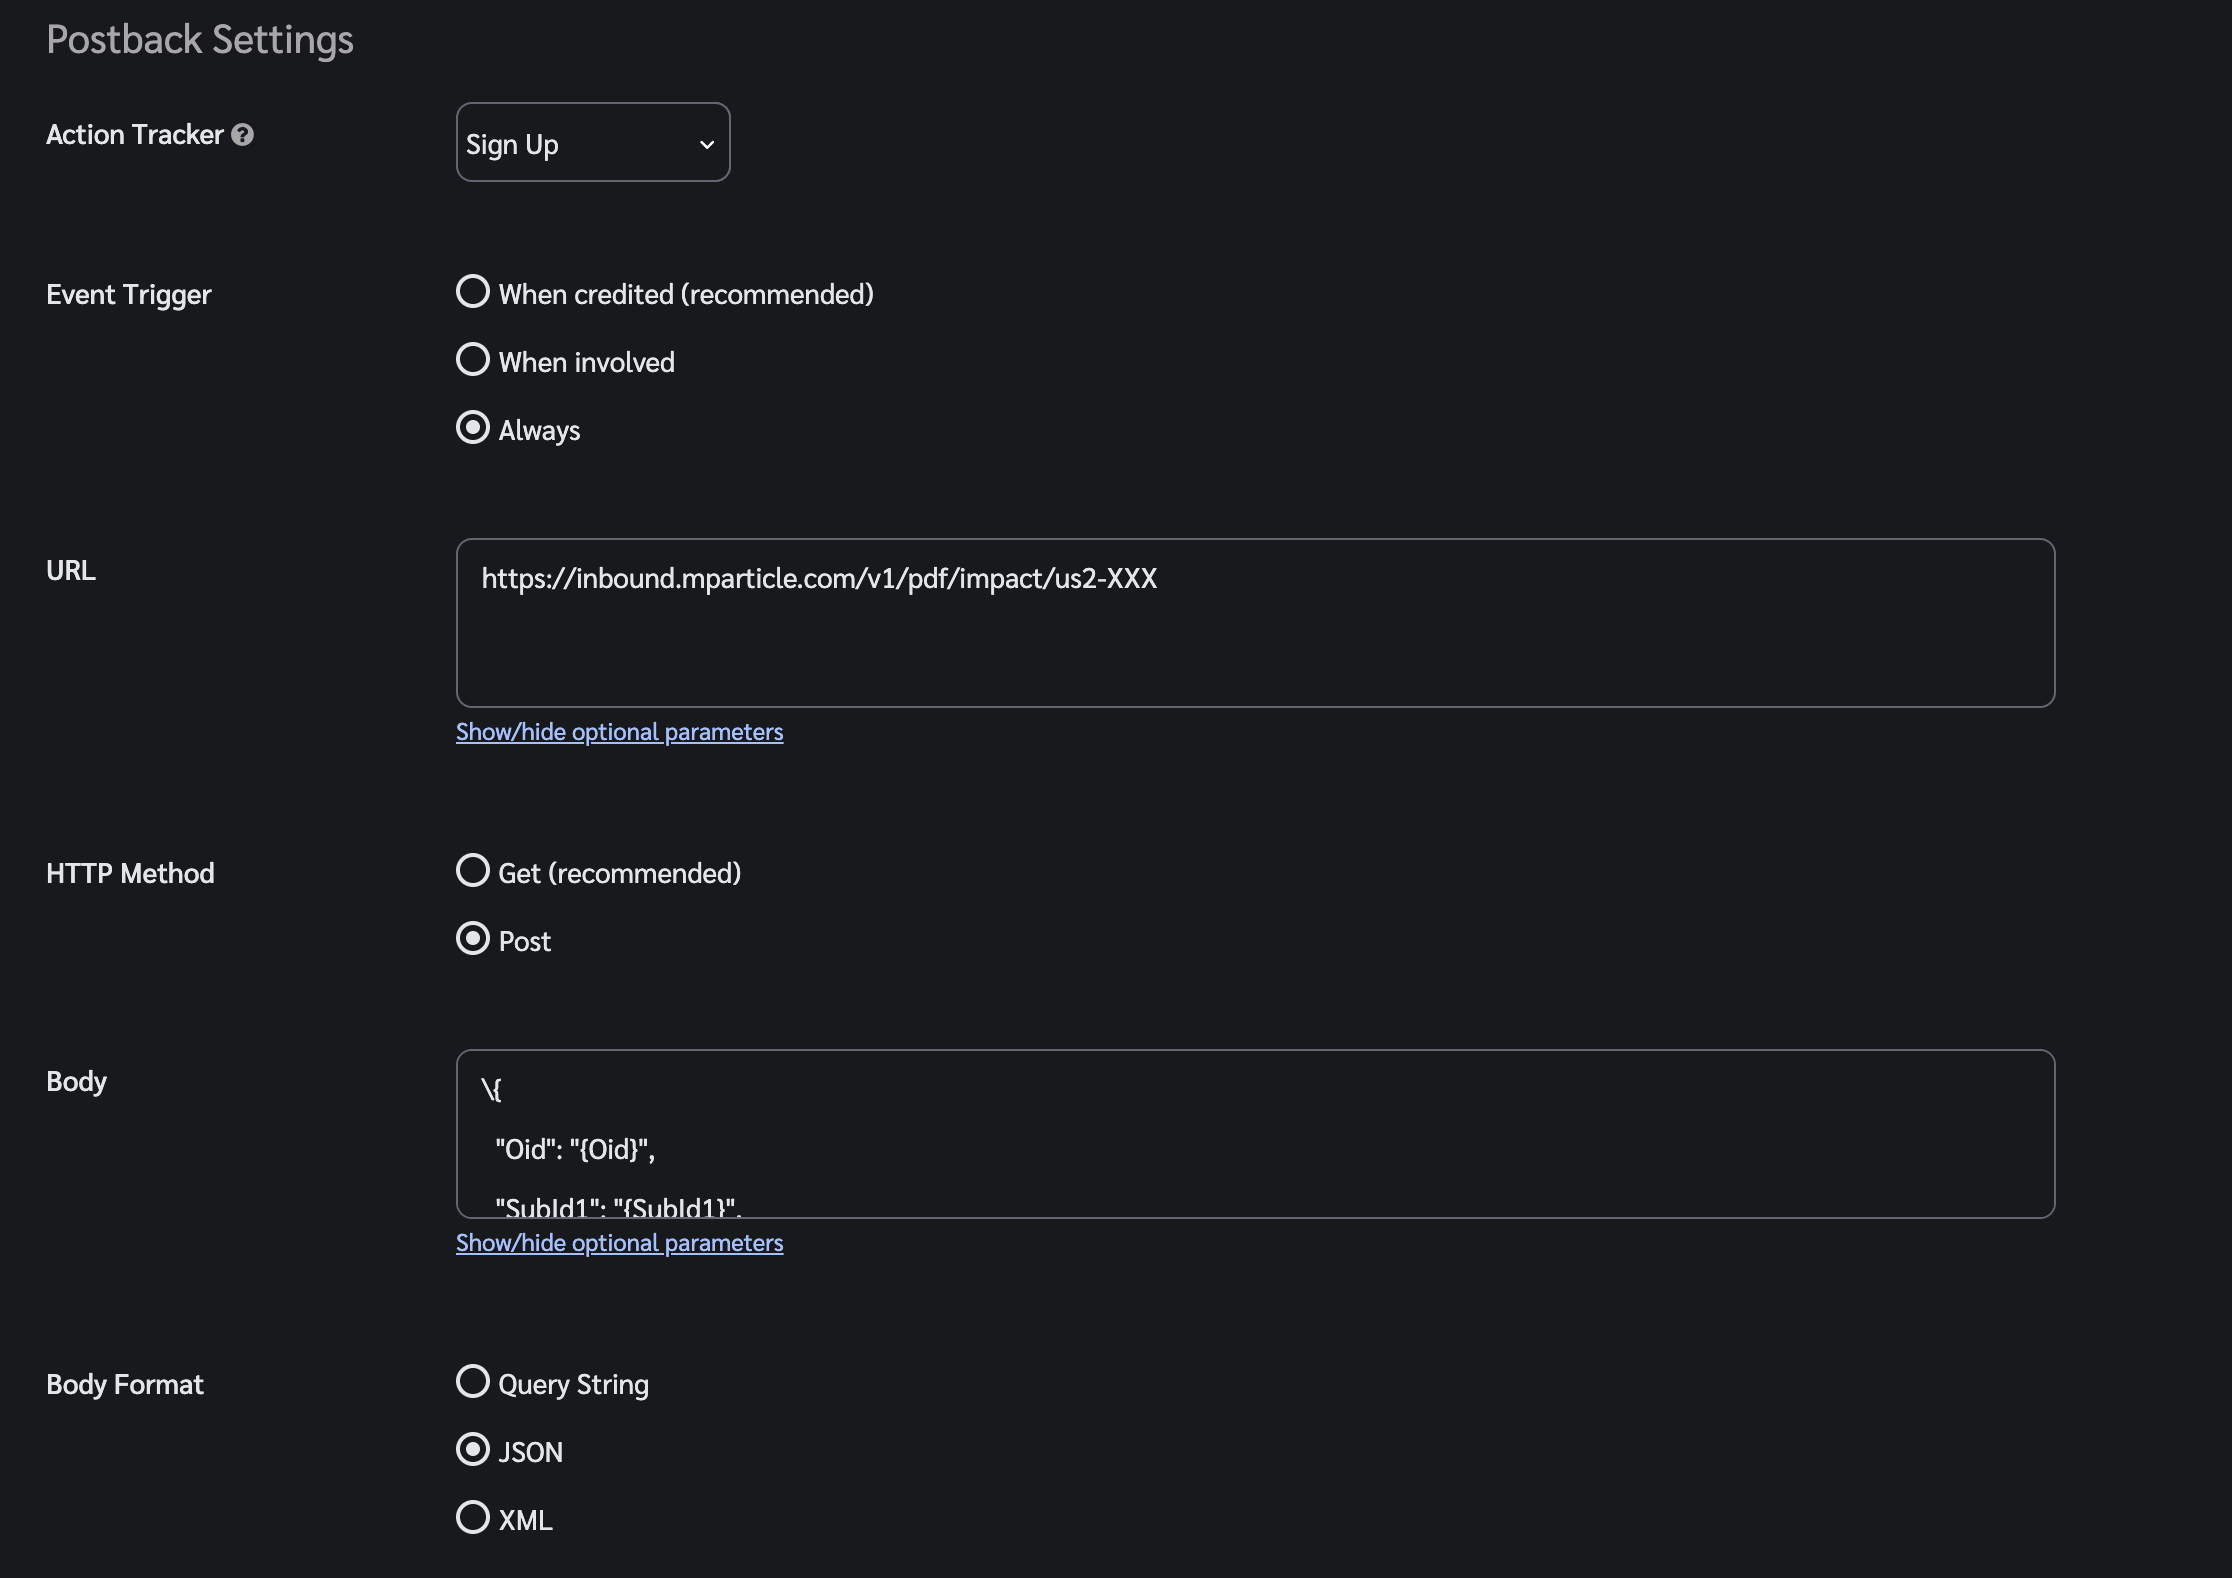
-
Select the Action Tracker for the conversion event you want to optimize for, such as Purchase, Signup, or Install. Confirm the appropriate event with your Rokt account team.
-
For Event Trigger, select Always. Rokt recommends this to improve matching, targeting, and campaign optimization.
-
For URL, enter
https://inbound.mparticle.com/v1/pdf/impact/us2-XXX, replacingus2-XXXwith the unique account token provided by Rokt. Contact your Rokt account manager if you do not have one. -
For HTTP Method, select Post.
-
Copy and paste the following template into Body exactly as shown, including the
\and{}characters. Replace<<ENTER CONVERSION TYPE HERE>>with your conversion event name, such aspurchase. The template includes additional attributes that help Rokt with matching and personalization.\{
"ActionId": "{ActionId}",
"Oid": "{Oid}",
"SubId1": "{SubId1}",
"ConversionType": "<<ENTER CONVERSION TYPE HERE>>",
"Amount": "{Amount}",
"Currency": "{Currency}",
"EventDate": "{EventDate}",
"CustomerEmail": "{CustomerEmailSha256}",
"CustomerPostCode": "{CustomerPostCode}",
"CustomerCity": "{CustomerCity}",
"IpAddress": "{IpAddressPlain}",
"useragent": "{UserAgent}",
"iosIfa": "{IosIfa}",
"GoogleAdvertisingId": "{googleAdvertisingId}",
"items": [{join(items, i, "\{\"sku\":\"{i.sku}\",\"cat\":\"{i.cat}\",\"qty\":\"{i.qty}\",\"amt\":\"{i.amt}\",\"name\":\"{i.name}\"\}")}]
\}Replace
<<ENTER CONVERSION TYPE HERE>>with a descriptive name for the conversion event associated with the selected Action Tracker, for examplepurchase. If you are unsure which conversion type to use, confirm with your Rokt account manager. -
For Body Format, select JSON.
-
Keep the default values for the remaining settings and click Save.
-
-
Share the completed tracking link with Rokt. After the ad link and postback are configured, send the final Impact tracking link to your Rokt account manager so Rokt can validate the setup and coordinate end-to-end testing.