Rokt Click ID
The Rokt Click ID can be used for conversion attribution in the event you'd like to track conversions without sharing customer data. Here's how it works:
- For each accepted offer, Rokt generates a unique Rokt Click ID that you'll use as a dynamic field in the destination URL (UTM parameter).
- Then, you maintain the Rokt Click ID via either:
- your own storing mechanism, such as a third party attribution system
- the Rokt referral tag on your landing page described below
- Finally, you return the Rokt Click ID (
passbackconversiontrackingID) to us when the customer converts. There are several options for returning the Rokt ID, which we've outlined below.
Update your campaign traffic URL to support Rokt Click ID passthrough
To generate the unique Rokt Click ID, please ensure that the destination URL of your creative includes the following as a URL parameter: rtid={rokt.rclid|}. Read more about building creatives.
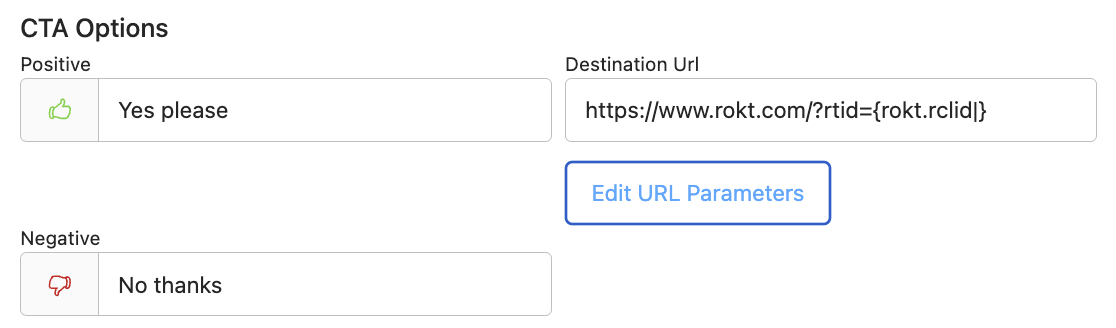
In the Destination URL, you will need to add & or ? before rtid={rokt.rclid|}. This is determined by the original traffic link. If the original traffic link contains a ?, add an & before the rtid.
rok
Example: www.landingpage.com/?hello=world&rtid={rokt.rclid|}
If the original traffic link does not contain a ?, add a ? before the rtid
Example: www.landingpage.com/?rtid={rokt.rclid|}
Add the Rokt Click ID tag to your landing page
View our integration guide on setting up the Rokt Click ID tag in Google Tag Manager.
Capture the Rokt Click ID on your confirmation page
Setting up automatic conversion reporting helps you clients measure the impact of your campaigns on your business. Rokt offers a variety of ways to integrate your conversion data. For greatest accuracy, we recommend using the Rokt Web SDK and Event API.
If you are capturing conversions using the Web SDK, please ensure the data attribute passbackconversiontrackingID is integrated.
Though less accurate, we also support conversion reporting through third-party measurement tools, file transfer, and manual upload.
Premium integration: Combining the Web SDK and Event API
If possible, we recommend setting up conversion reporting through both the Web SDK and Event API. This helps identify any anomalies and provides redundancy if there are any issues on the frontend or backend.
If you choose to set up both integrations, ensure you populate one of transactionid or confirmationref in both the Web SDK and Event API integrations. Rokt can then deduplicate incoming your conversion events using these variables, ensuring your reporting is accurate.
Test the Rokt Click ID
Please feel free to check in with your account manager to have Rokt validate the implementation for you.
To check that the Rokt Click ID is functioning correctly on your campaign’s landing page:
- Go to your campaign’s landing page.
- Navigate to your browser’s Developer Tools.
- Go to the “Network” tab and check that
referral-tag.jsnetwork request have a status code of 200. - Go to the “Application” tab and select Local Storage. Verify that the
RoktTransactionIdis present and matched thertidUTM parameter in the URL.
To check that the Rokt Web SDK is correctly attributing conversions with the Rokt Click ID:
- Navigate to a confirmation page from your campaign’s landing page after accepting an offer.
- Navigate to your browser’s Developer Tools.
- Go to the “Network” tab. Once there, select the experiences asset.
- From there, go to the “Payload” tab and check that the
passbackconversiontrackingidfield contains the value from thertidin Local Storage.