TagTemplateIntegration
Using the template for Google Tag Manager, you can configure the Rokt SDK without needing to change any code on your page. Once installed, the template accesses the data layer and event triggering to succesfully render placements or match referrals to conversion events. You can configure the template to include a variety of attributes related to your use case.
Add the Rokt Tag templateDirect link to Add the Rokt Tag template
-
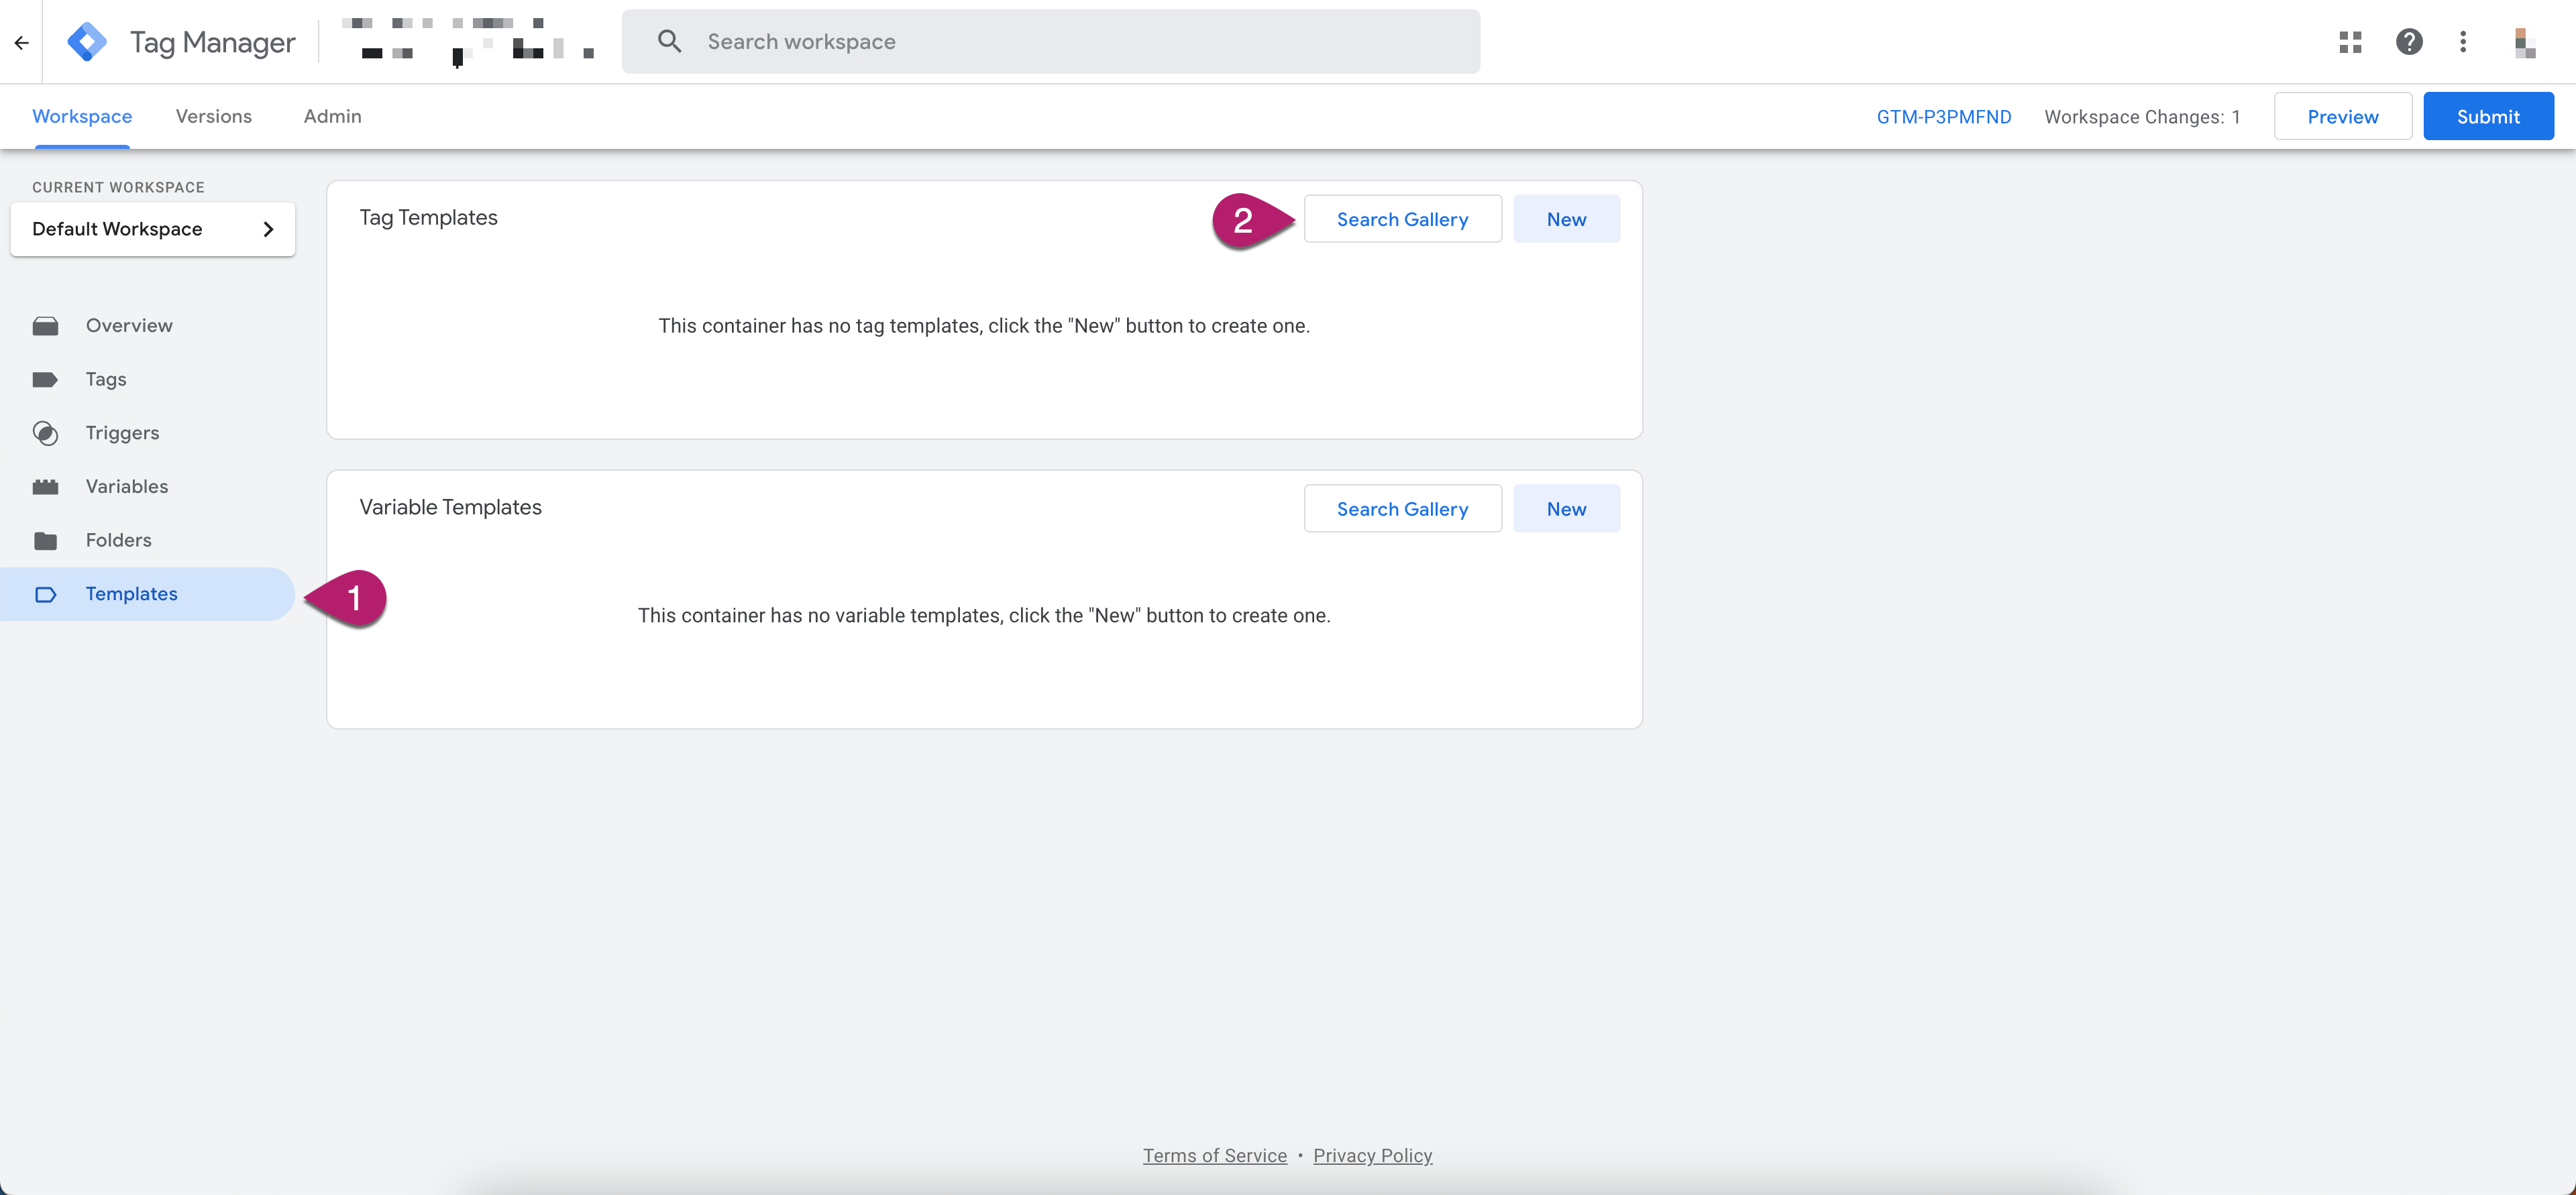
In your Google Tag Manager Container, click Templates.
-
Click Search Gallery.
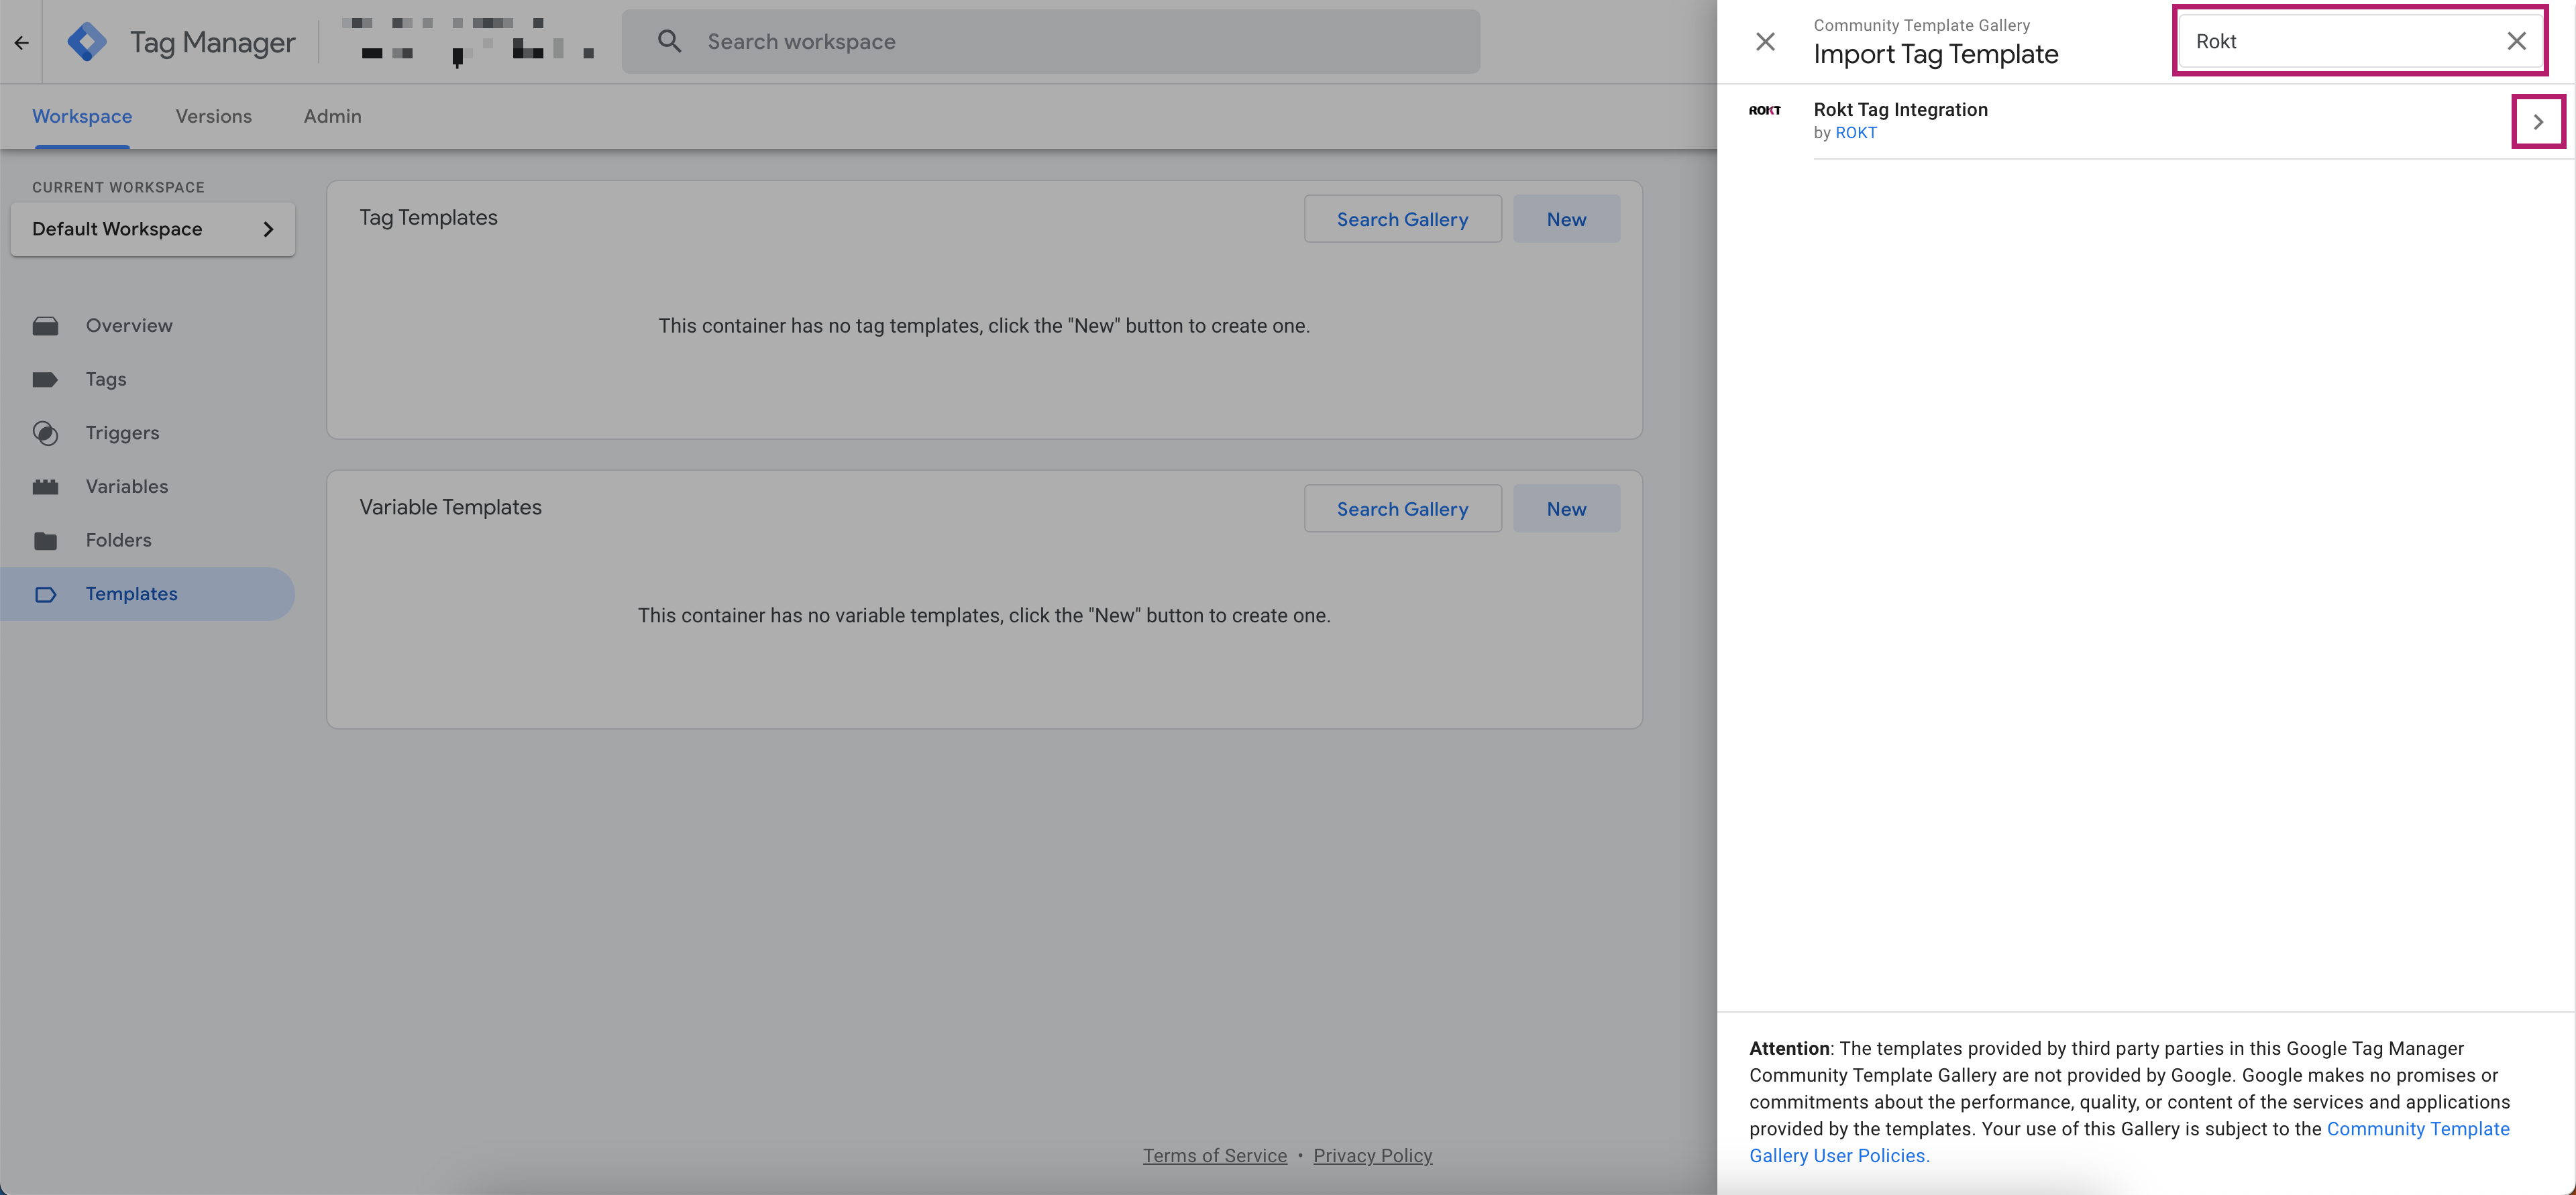
- Search for Rokt in the search box and select the Rokt Tag Integration.
-
Click Add to workspace.
-
Click Add.
Configure the Rokt Tag templateDirect link to Configure the Rokt Tag template
-
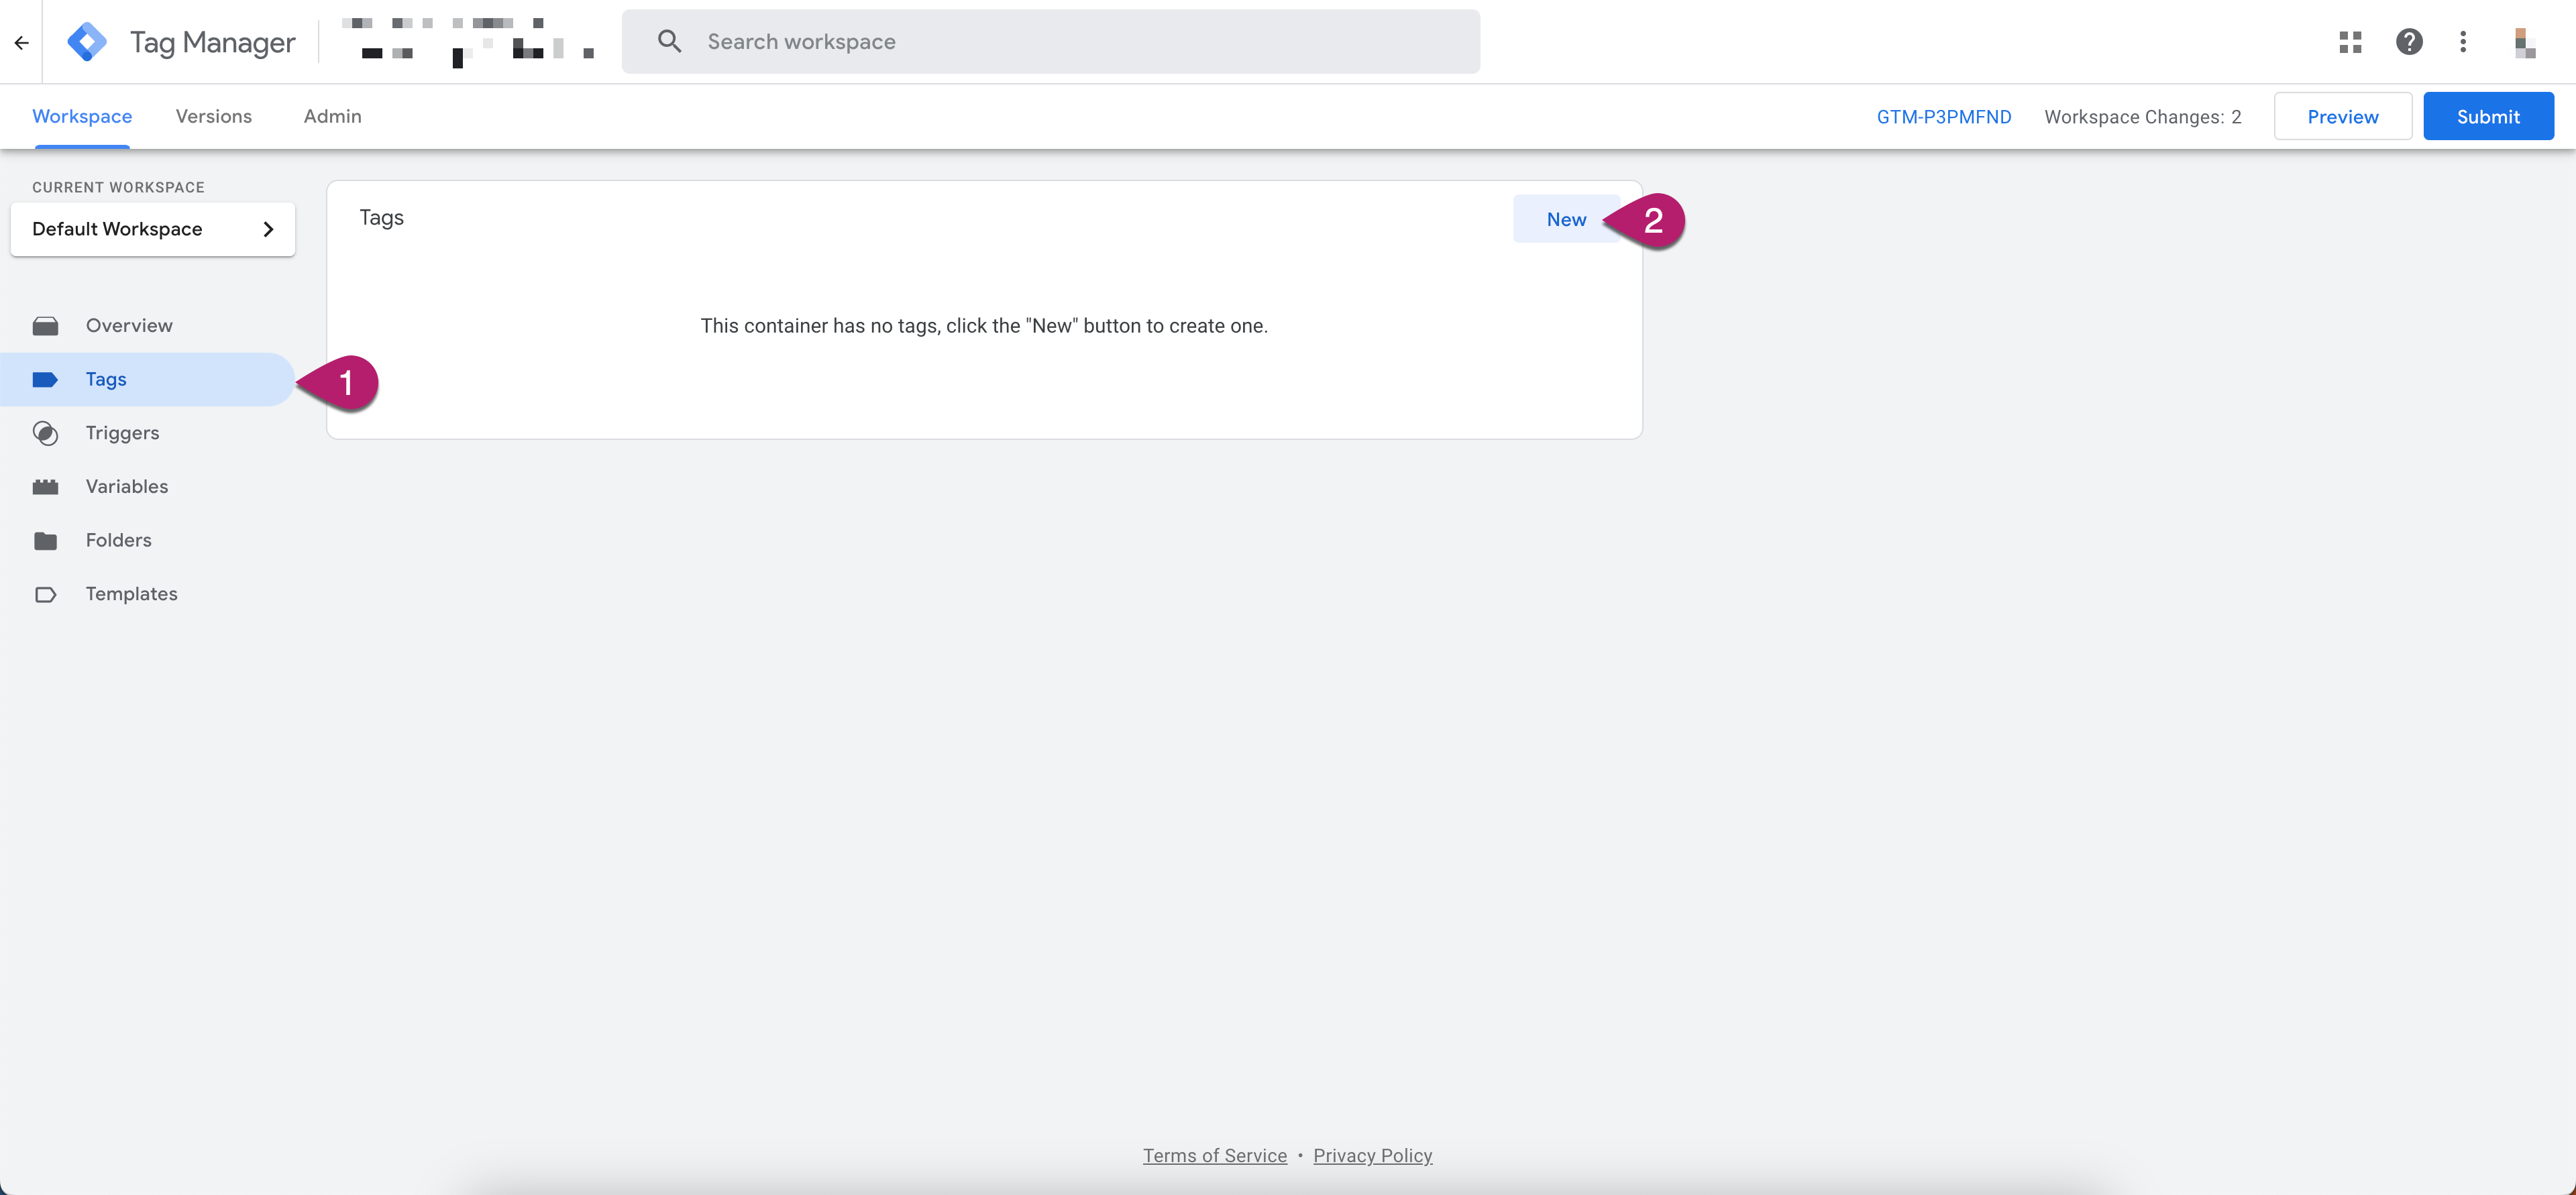
Click Tags.
-
Click New.
-
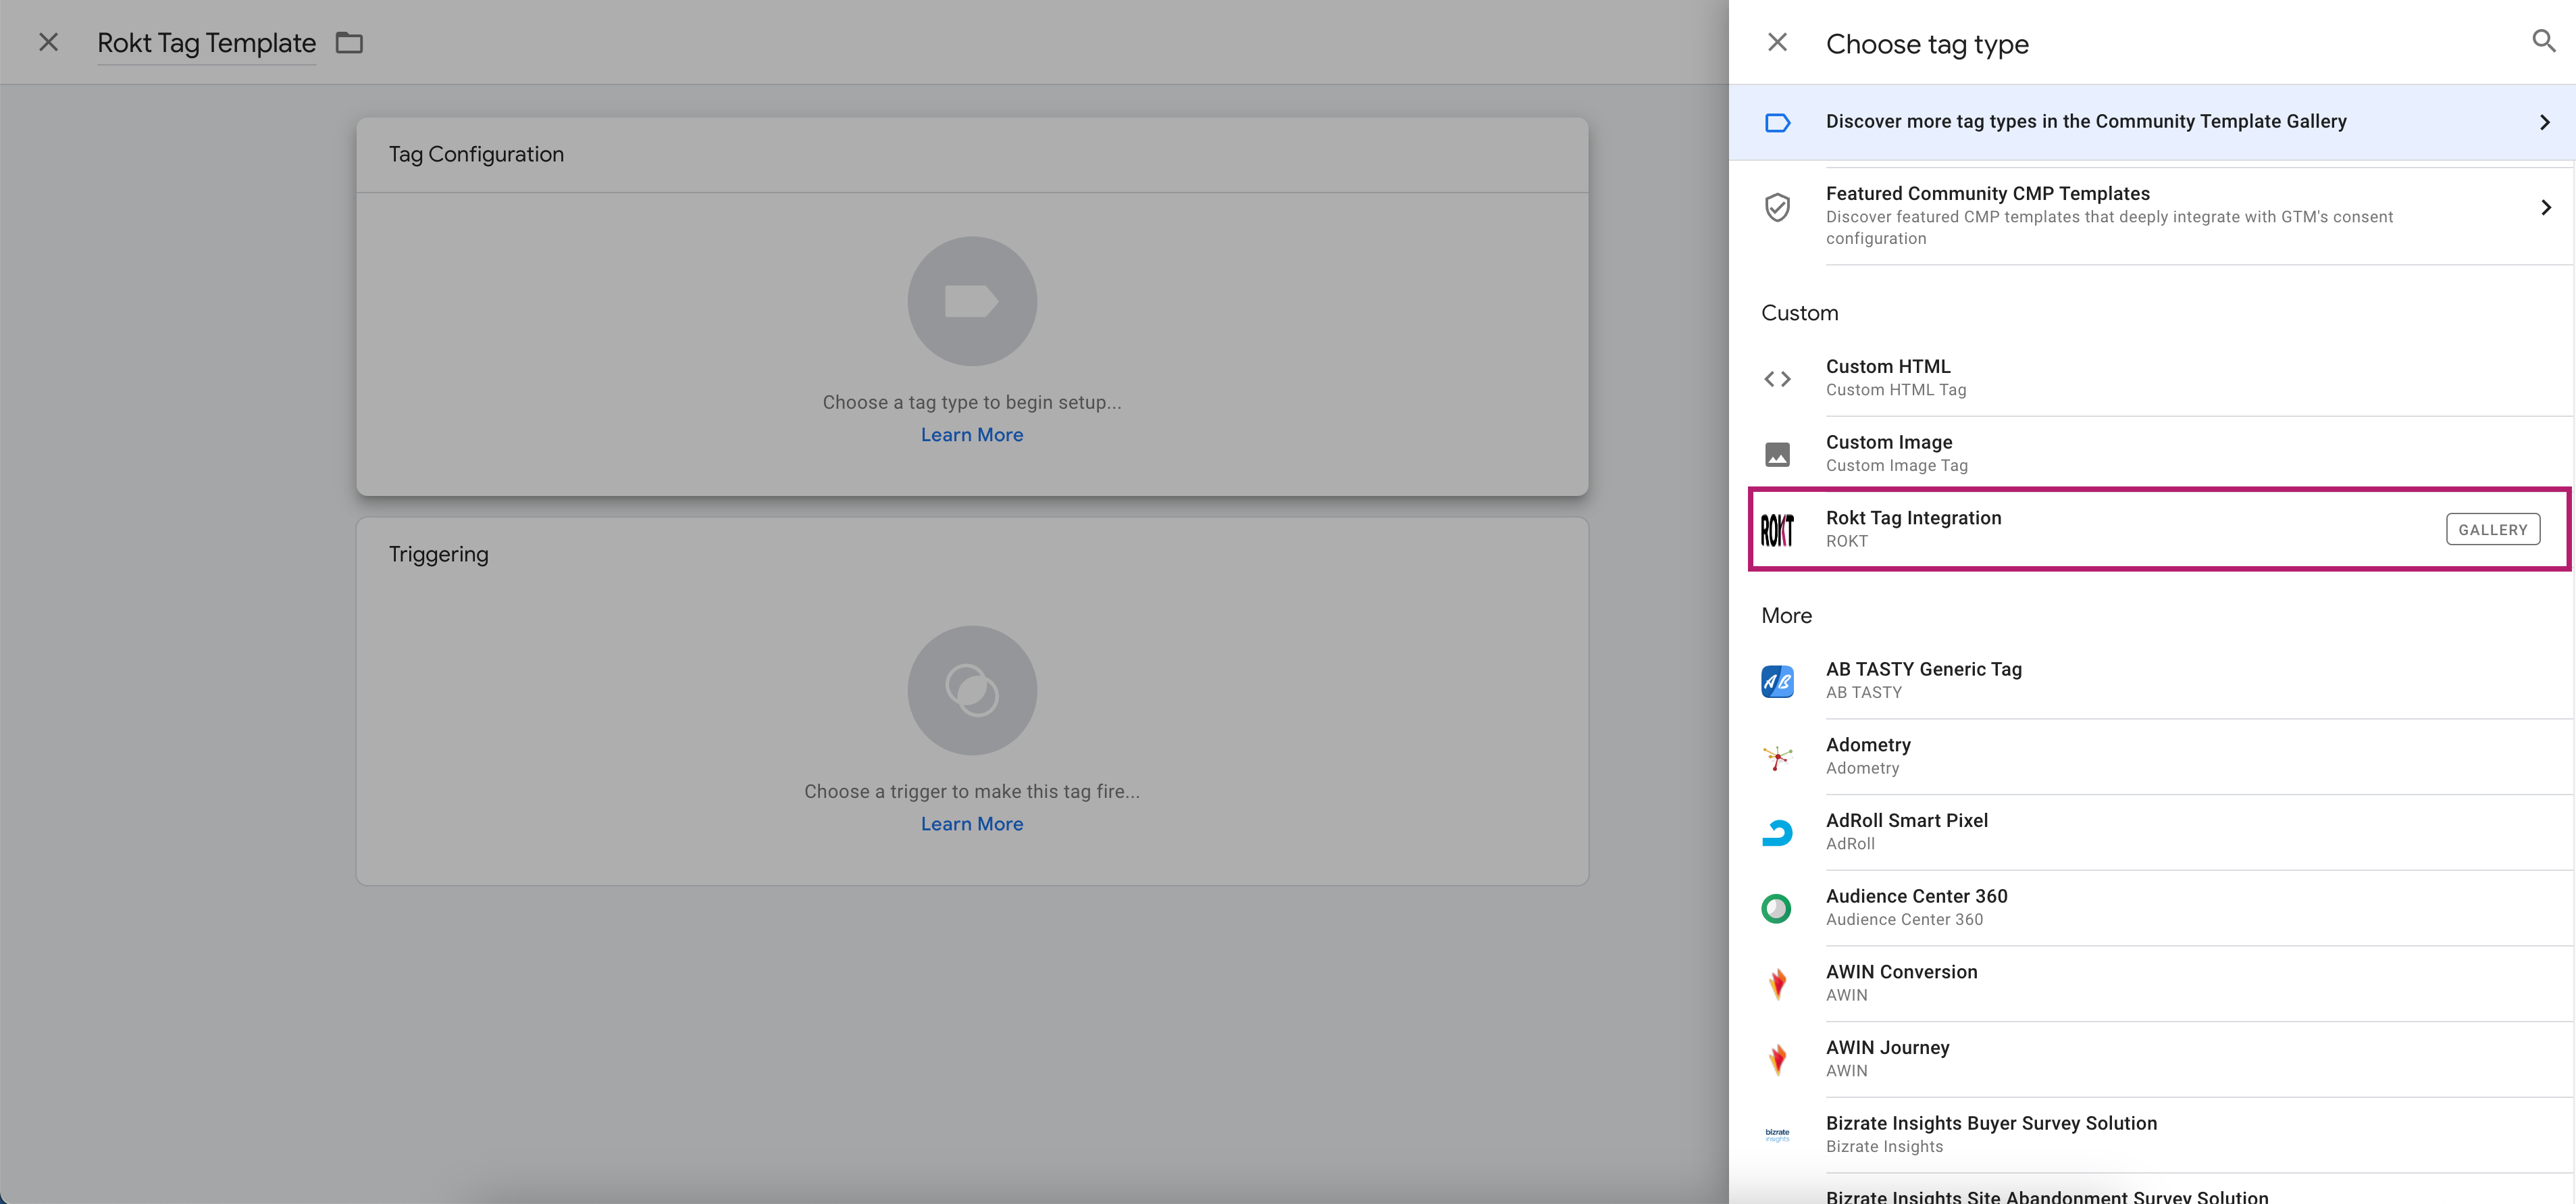
Name the tag “Rokt Tag Template”, then select Tag Configuration.
-
Scroll to the Custom section and choose the Rokt Tag Integration.
-
Configuration settings:
Section Required/Optional Description Configuration Required Enter your Rokt Account ID.
Ensure the sandbox checkbox is selected.Core Attributes Required For each of the attributes click the add icon beside the text box to expand the list of attributes in your data layer.
Select the appropriate variable in your data layer for the field. For example, select the correct dl_email variable in your data layer for the email field.
If the appropriate variable is not showing in your data layer see how to set up attributes in the Google Tag Manager data layer.Custom Attributes Optional Click Add Row.
Click the add icon beside the Attribute Name text box to expand the list of attributes in your data layer.
Click the add icon beside the Attribute Value text box to expand the list of attributes in your data layer.
Click Add.More Integration Options Optional Add a Page identifier.
Check Send raw email only on positive engagement if needed.
Check Hash raw email attribute (SHA-256) if needed.
Event Listeners are custom variables that subscribe to Rokt events. When that Rokt event is triggered, the custom variable will be added to the data layer.Advanced settings Optional Enter a Tag firing priority Tags with higher numbers for priority will be fired first. Priority defaults to 0 if none is specified. Tags will still be fired asynchronously, i.e., a tag will be fired whether or not the previous tag has finished.
Enable custom tag firing schedule allows you to set a start and end date for the tag to fire.
Only fire this tag in published containers If firing this tag results in a fee being charged, you can avoid firing it in testing environments (e.g., during previewing and debugging). Instead, when applicable, Google Tag Manager will tell you when the tag would have fired. For the most accurate testing, leave this option unchecked.
Select your Tag firing options from the drop-down
Tag Sequencing allows you to specify tags that will fire immediately before and after the current tag.
Additional Tag Metadata Specify additional tag metadata to be included in the event data when a tag is fired.
Consent Settings Understand and modify how this tag behaves alongside your consent tools.