Google Tag Manager
Initial SetupDirect link to Initial Setup
Understanding the data layerDirect link to Understanding the data layer
The data layer should have been implemented on your web page by your developers.
A data layer is an object that contains all of the information that you want to share with Google Tag Manager (GTM). Information such as events or variables can be shared to Google Tag Manager via the data layer, and triggers can be set up in Google Tag Manager based on the values of variables (e.g., fire a remarketing tag when purchase_total > $100) or based on the specific events. Variable values can also be shared through to other tags (e.g., add purchase_total into the value field of a tag).
Refer to the GTM developer guide for comprehensive details on how the data layer works.
Example of a data layer:
window.dataLayer = window.dataLayer || []

window.dataLayer.push({
    'email':'jenny.smith@rokt.com',
    'consumer': {
        'firstname' : 'Jenny',
        'lastname' : 'Smith'
    },
    'ecommerce': {
        'transaction': {
            'amount' : '12.36'
        }
    },
    'event':'gtm.transactionComplete'
});
Identify your variable nameDirect link to Identify your variable name
Variables are set up in your GTM and are matched to the data layer. Refer to the GTM developer guide for more details about variables.
The structure of your data layer on your page affects the data layer variable name in your GTM.
Example data layer script 1:
window.dataLayer.push({
    'email':'jenny.smith@rokt.com'
});
Data layer variable name: email
Example data layer script 2:
window.dataLayer.push({
    'consumer': {
        'firstname' : 'Jenny'
    }
});
Data layer variable name: consumer.firstname
Example data layer script 3:
window.dataLayer.push({
    'ecommerce': {
        'transaction': {
            'amount' : '12.36'
        }
    }
});
Data layer variable name: ecommerce.transaction.amount
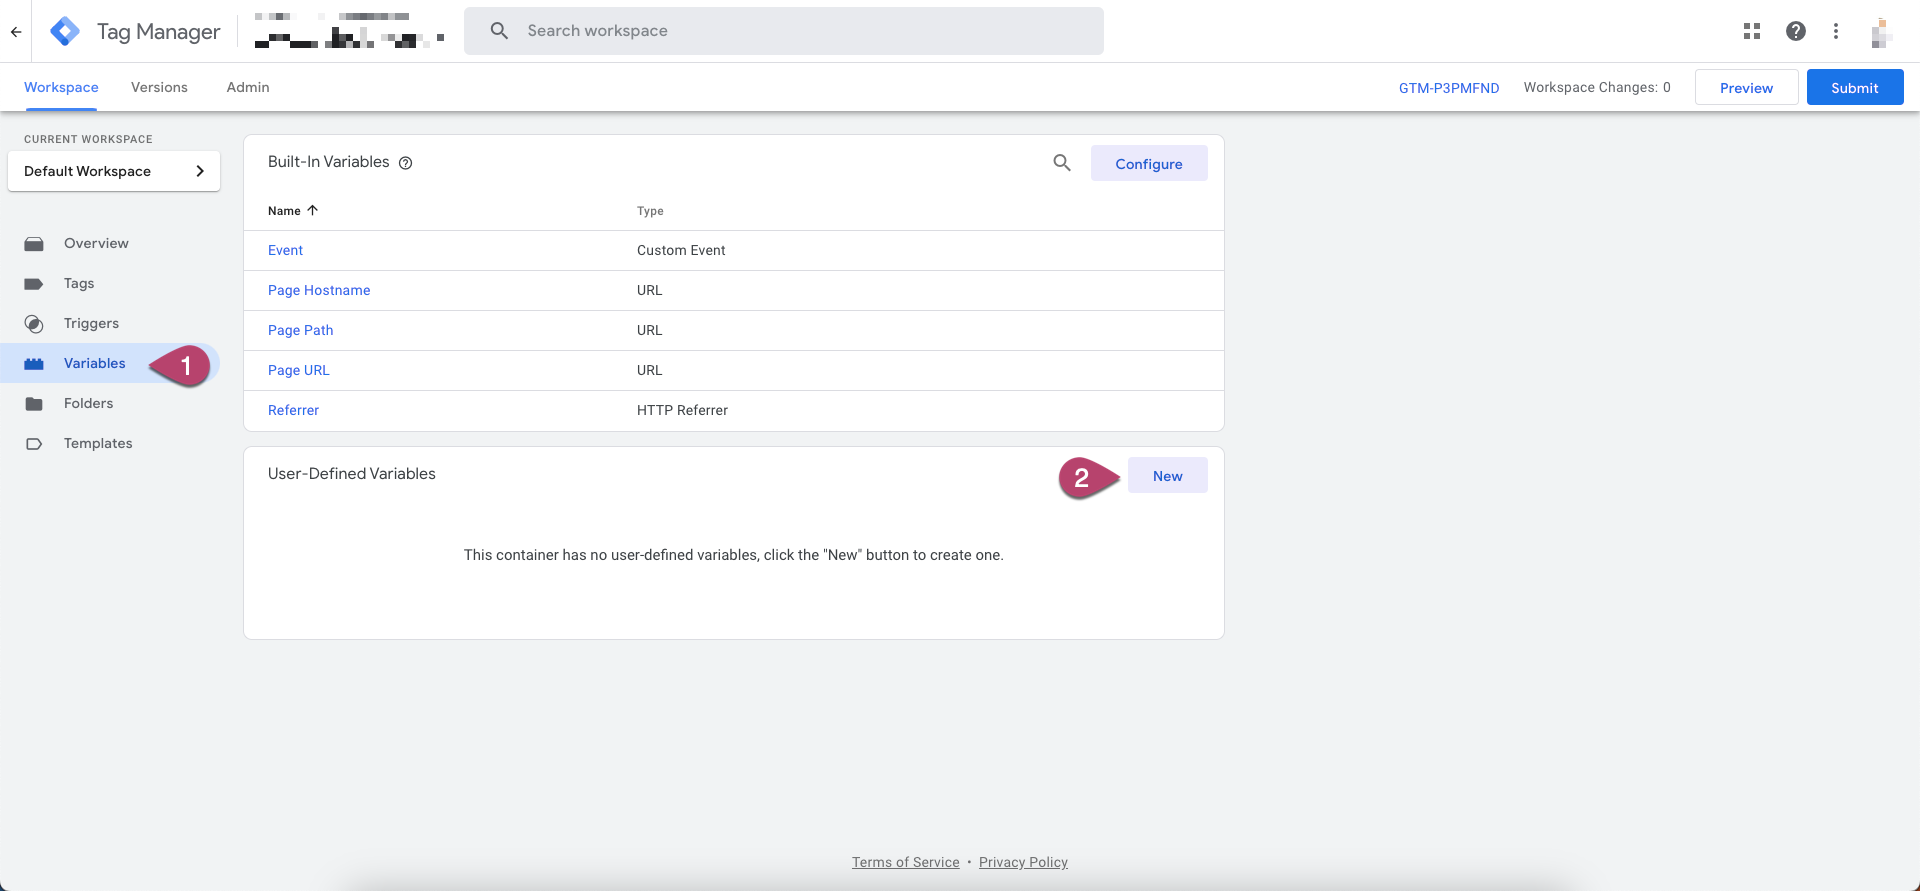
Set up variables in GTMDirect link to Set up variables in GTM
-
Open Google Tag Manager.
-
Click Variables,
-
Under User-defined variables, click New.
-
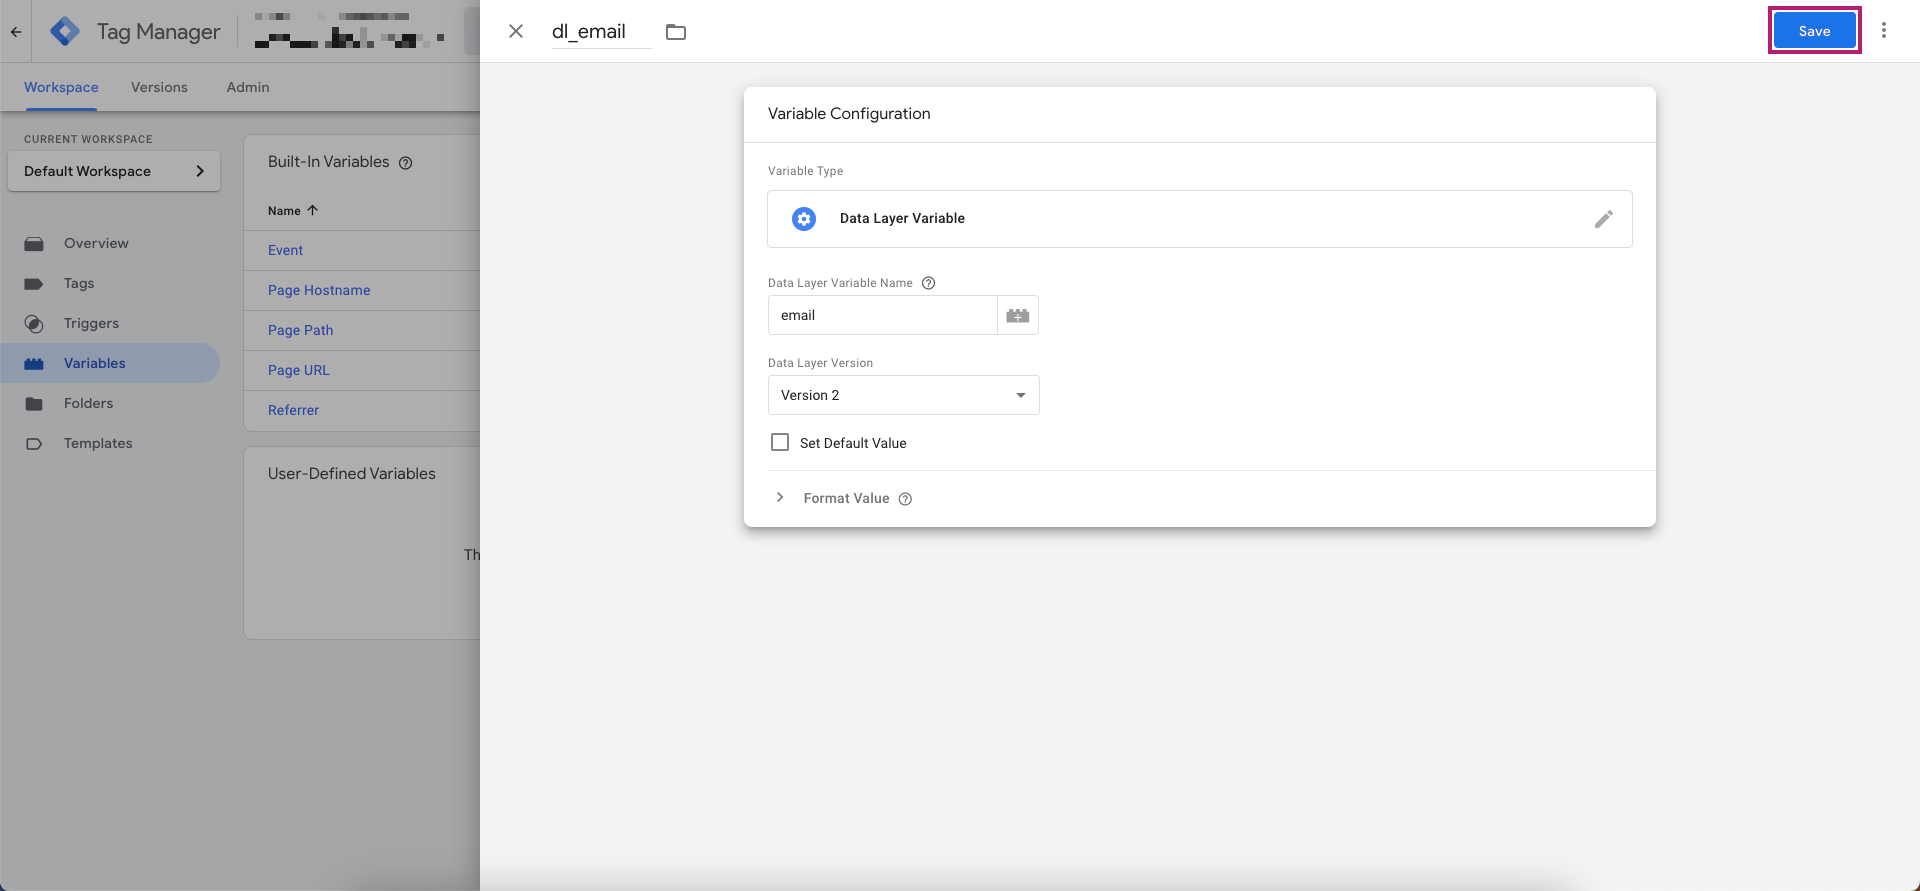
Name your variable.
In the example below, the name is
dl_email -
Set Variable Type as Data Layer Variable.
-
Enter the Data Layer Variable Name. See the examples above to identify the variable name based on your data layer structure.
-
Click Save.
Add Rokt integrationDirect link to Add Rokt integration
Add the Rokt Click ID tag to your landing pageDirect link to Add the Rokt Click ID tag to your landing page
The Rokt Click ID can be used for conversion attribution in the event you'd like to track conversions without sharing customer data. Please reach out to your Account Manager if you'd like to confirm your attribution methodology. If you are integrating with the Rokt Click ID, follow the integration steps below.
Capture the Rokt Click ID on your conversion pageDirect link to Capture the Rokt Click ID on your conversion page
If using the Rokt Tag Template on Google Tag Manager, no additional changes need to be made to the Tag Template once the Rokt Click ID tag is integrated on your landing page. The Rokt Click ID will be passed back as the passbackconversiontrackingID attribute.
If you are adding the Rokt wSDK as a custom tag in Google Tag Manager, please ensure the data attribute passbackconversiontrackingID is integrated.
Add a triggerDirect link to Add a trigger
Click Triggering.