Set up other third-party measurement providers
Measurement providers enable quick and easy close-the-loop integrations with Rokt. The setup process for each provider is slightly different, but in general can be broken down into the following steps:
- You will typically provide campaign links generated by the measurement provider that include a UTM parameter for a click ID.
- Rokt will populate that click ID parameter with the Rokt Tracking ID, which the measurement provider will then postback to Rokt when the user converts via one of our data integration APIs.
- The API used (Conversion API or Event API) is chosen based on the measurement provider’s requirements and does not affect outcomes.
Some measurement providers have preconfigured integrations that simplify the integration process.
If a preconfigured integration is not available, please reach out to data-setups@rokt.com or your account manager.
Appsflyer
If you are using the measurement provider Appsflyer for attributions, follow the steps below to connect with Rokt.
- Log in to your Appsflyer account.
- Go to Configuration > Integrated partners.
- Search and select Rokt to continue.
- After selecting, its setup page opens.
- Under the Integration tab, turn on Activate partner and click Save.
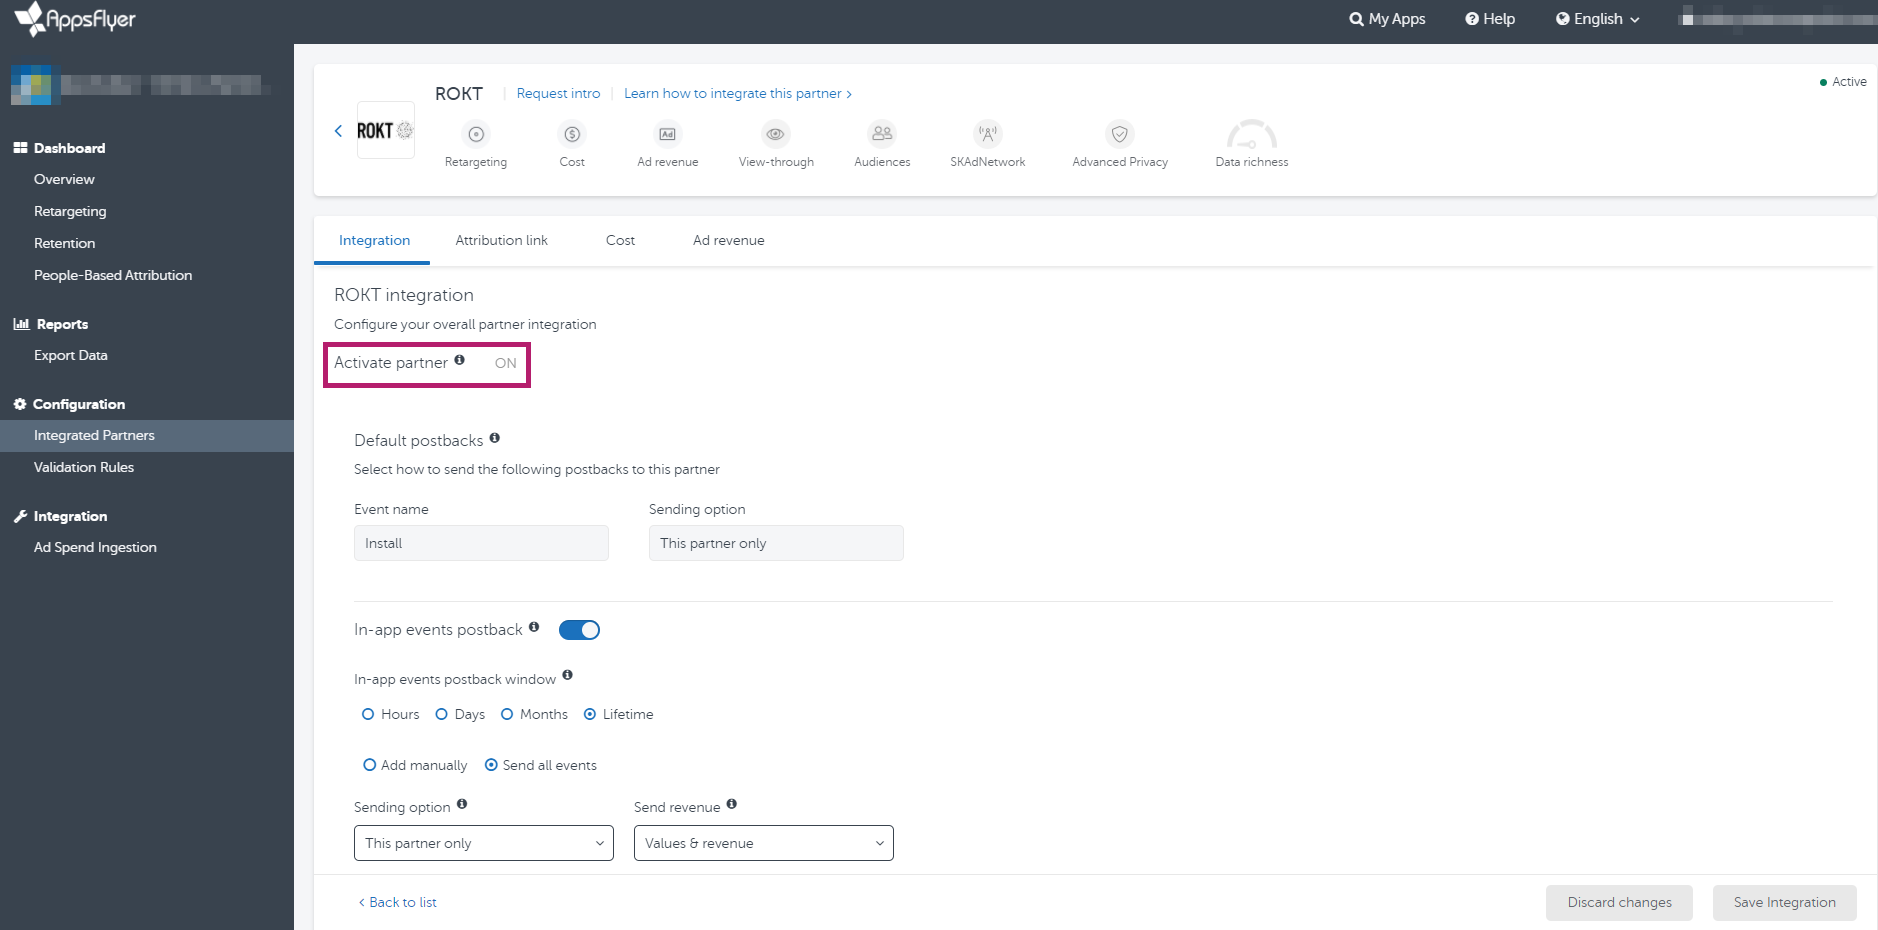
- Define any in-app events postback. This is only relevant if you desire Rokt to receive in-app event postback. If not, skip this step. Learn more about in-app events postback on Appsflyer’s website.
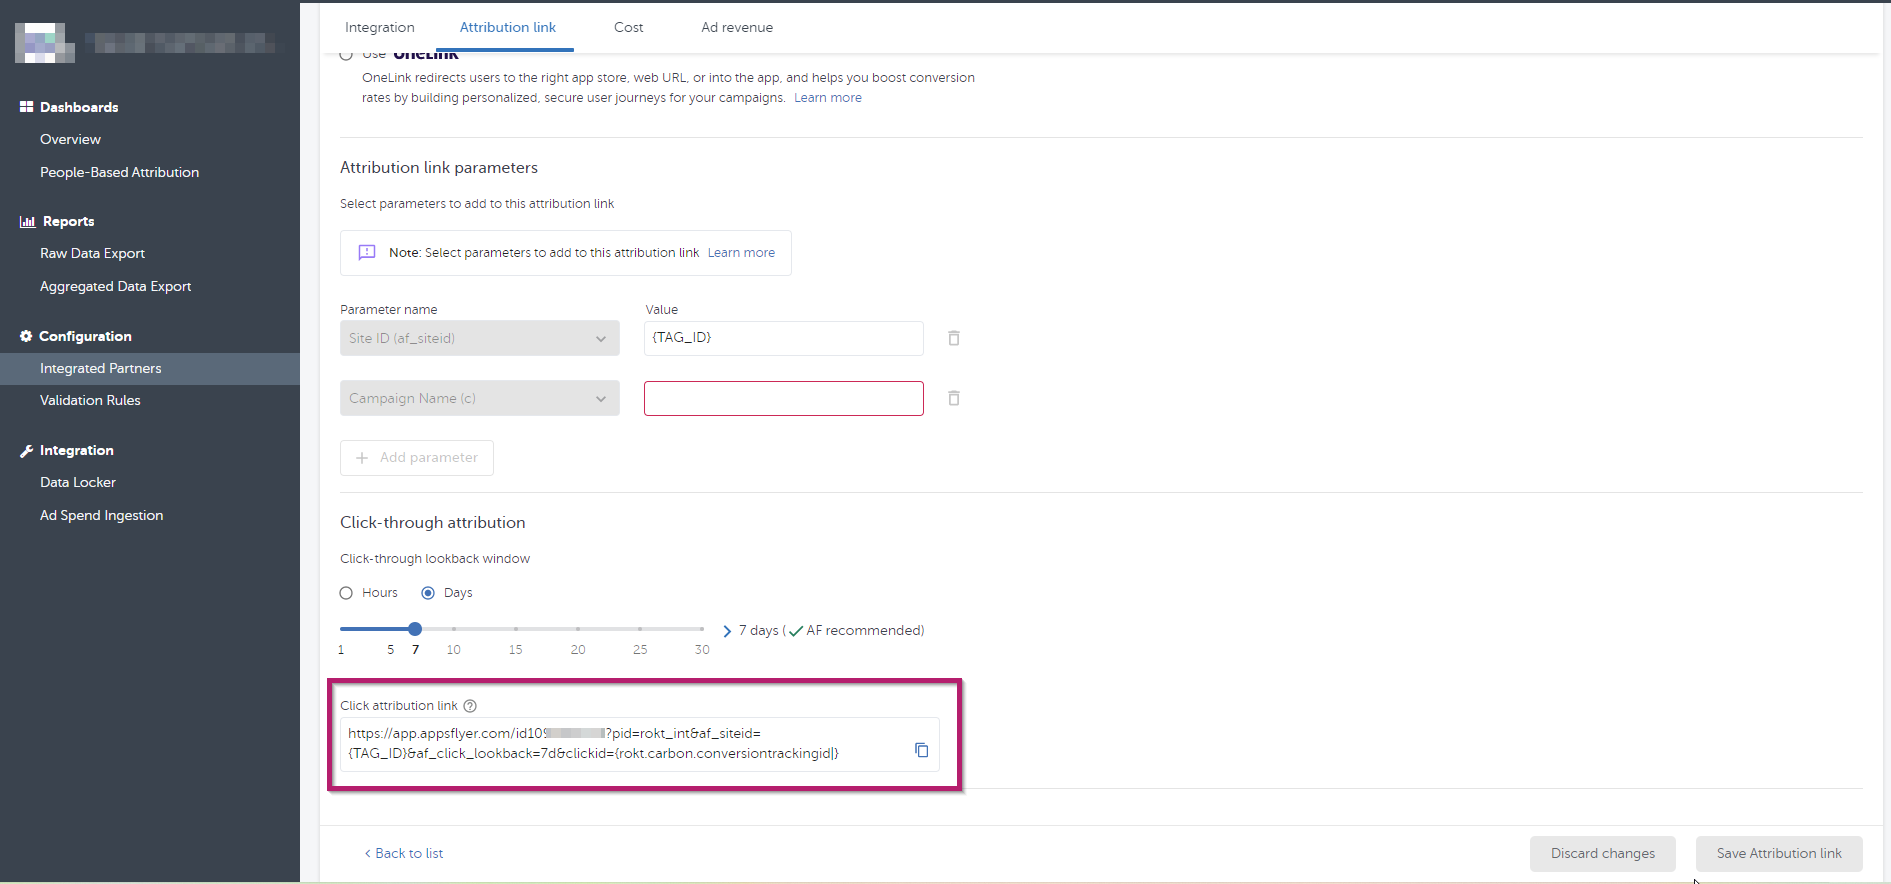
- In the Attribution link tab, you can update the parameters and Click-Through Lookback window. Learn more from Appsflyer’s website.
- After configuring your attribution, go to the Attribution link tab and find your Click attribution link. Copy the generated link and send it to your Rokt account manager.
Kochava
If you are using the measurement provider Kochava for attributions, follow the steps below to connect with Rokt.
- Log in to your Kochava account.
- Add an app. Learn how to set up an app from Kochava’s website.
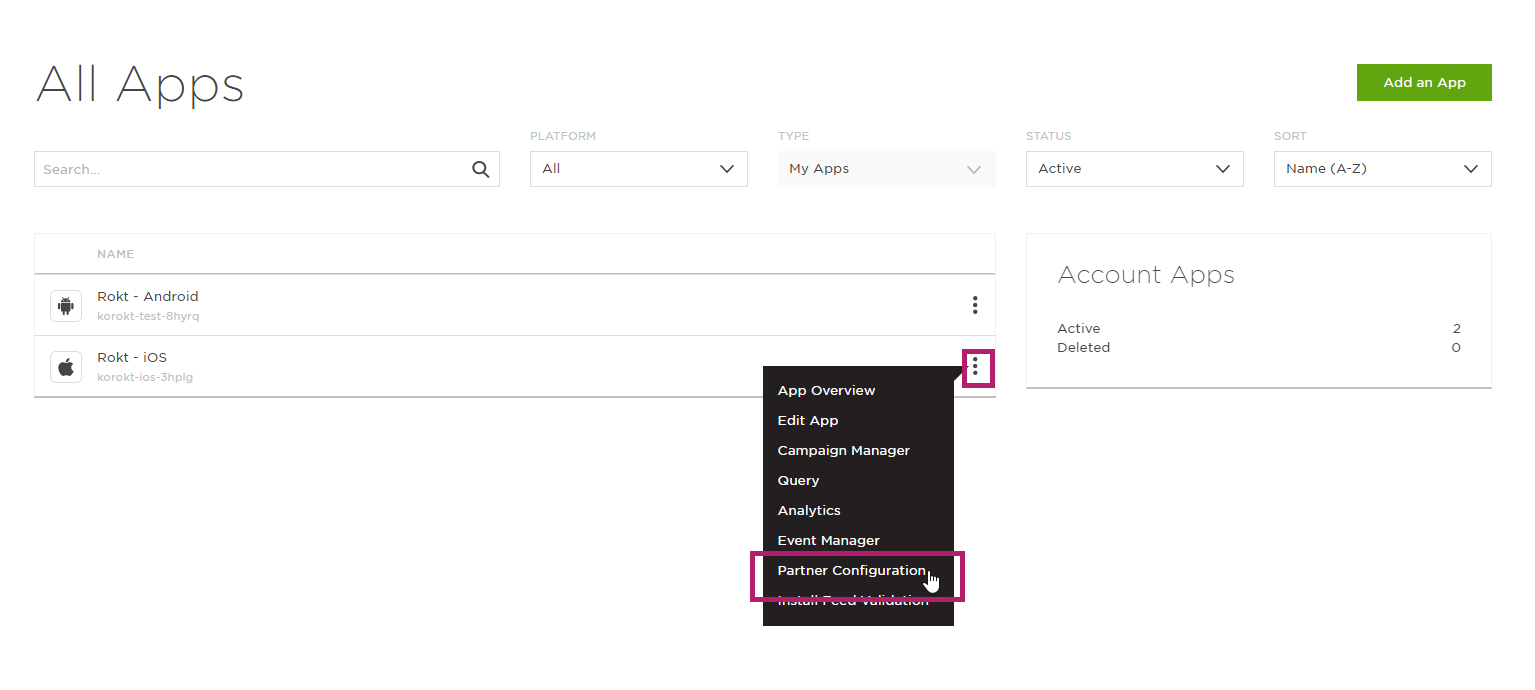
- On your desired app, click on the three dot menu and select Partner Configuration.
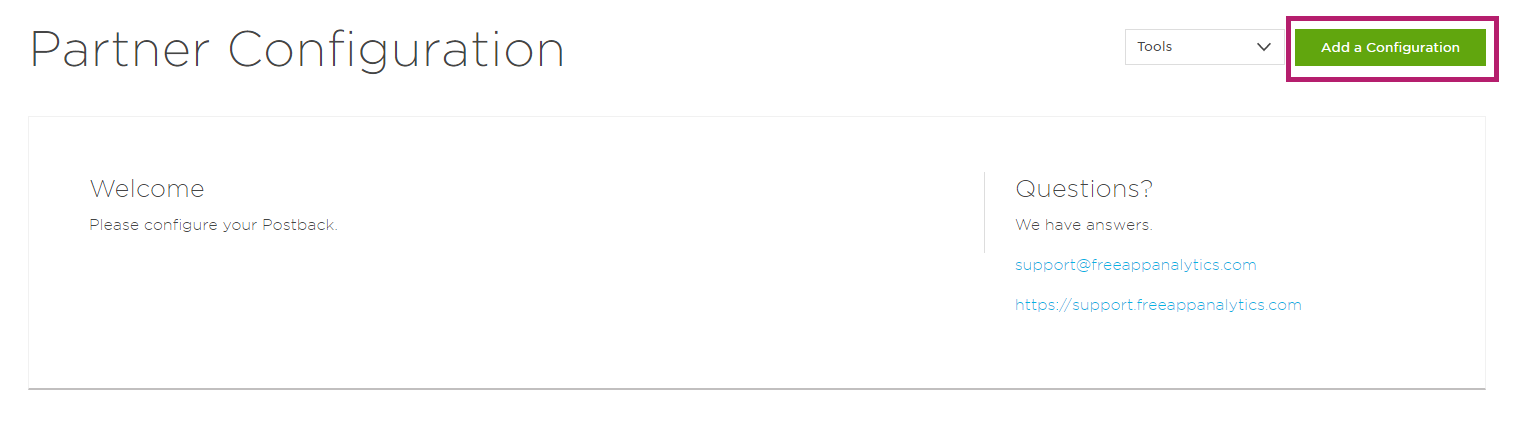
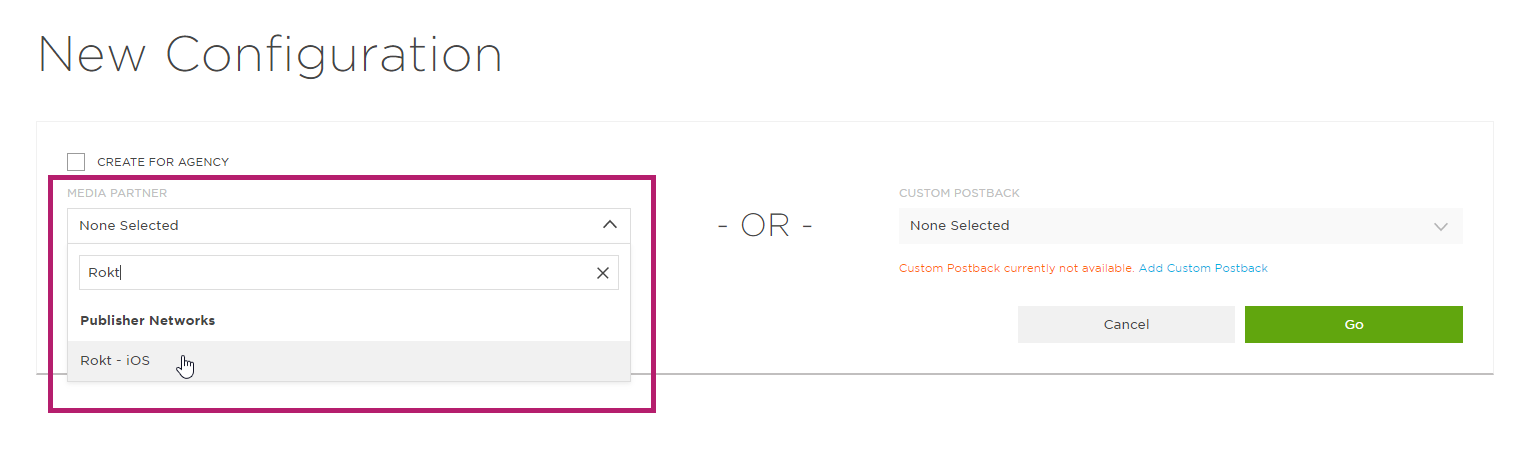
- Click Add a Configuration.
- Under Media Partner, select Rokt, and click Go.
- On your desired postback, click the three dot menu and select Edit.
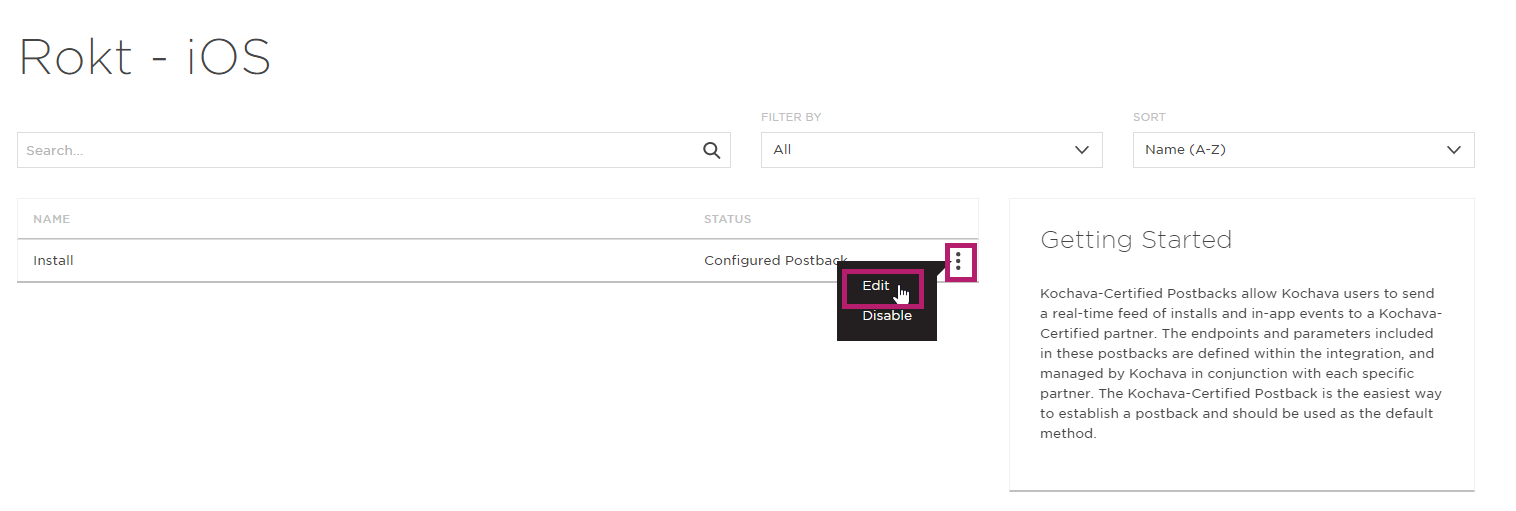
- Update your postback. Learn more about editing postbacks from Kochava’s website.
- After you have updated your postback, go back to All Apps.
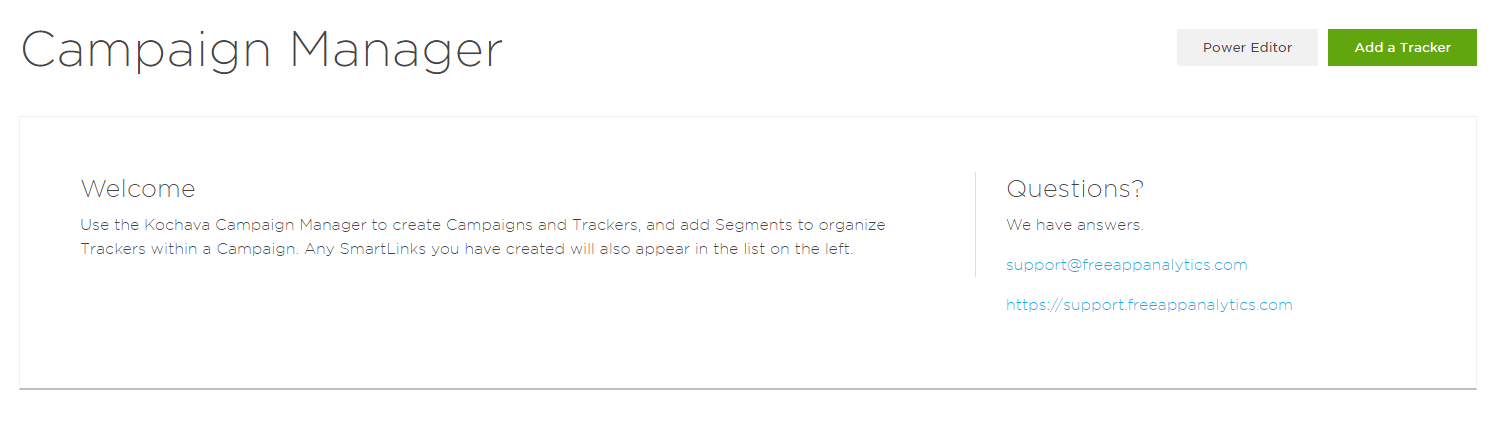
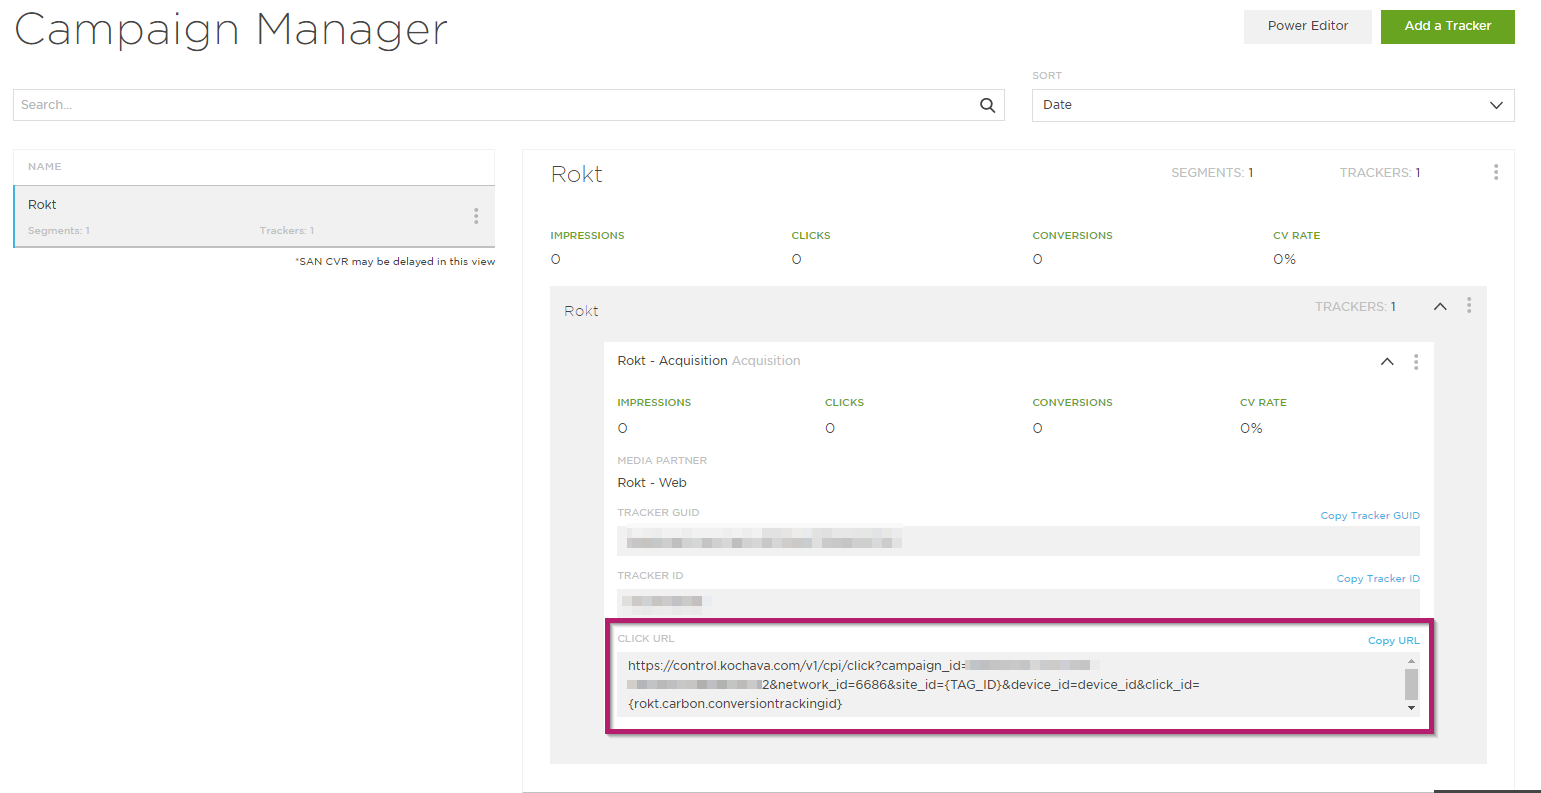
- On your desired app, click the three dots menu and select Campaign Manager.

- Click Add a Tracker.
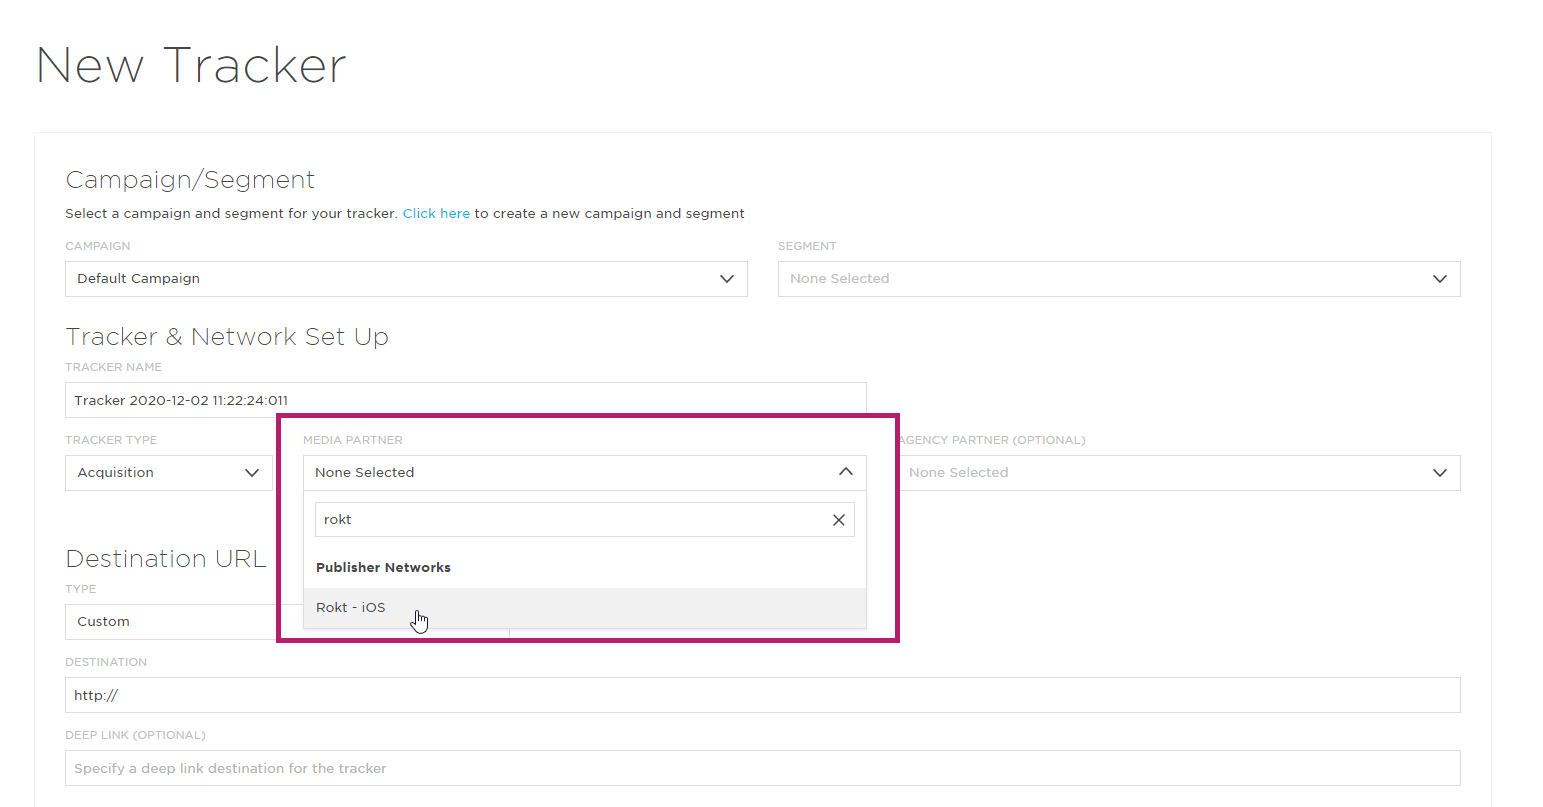
- Learn how to set up a campaign on Kochava’s website.
- Under Media Partner, select Rokt.
- After you have saved your tracker, select your desired tracker and click the arrow to open up.
- Copy the generated Click URL and send it to your Rokt account manager.
Singular
If you are using the measurement provider Singular for attributions, follow the steps belowto establish the preconfigured integrations with Rokt.
- Log in to your Singular account.
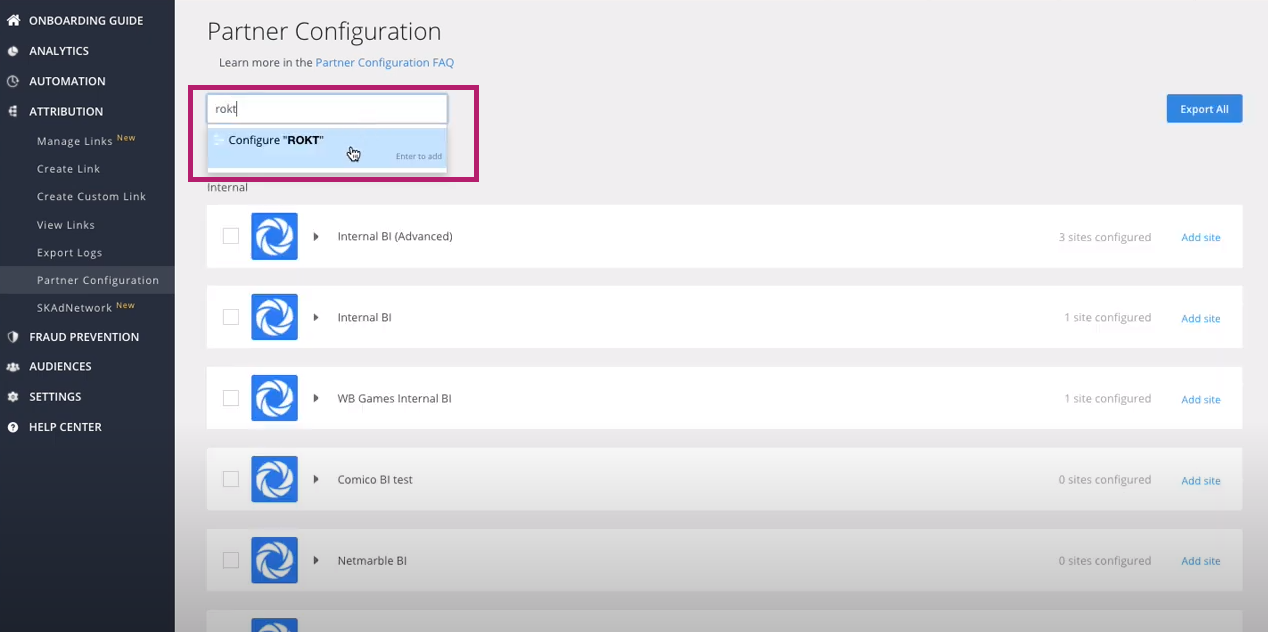
- Go to Attribution > Partner Configurations.
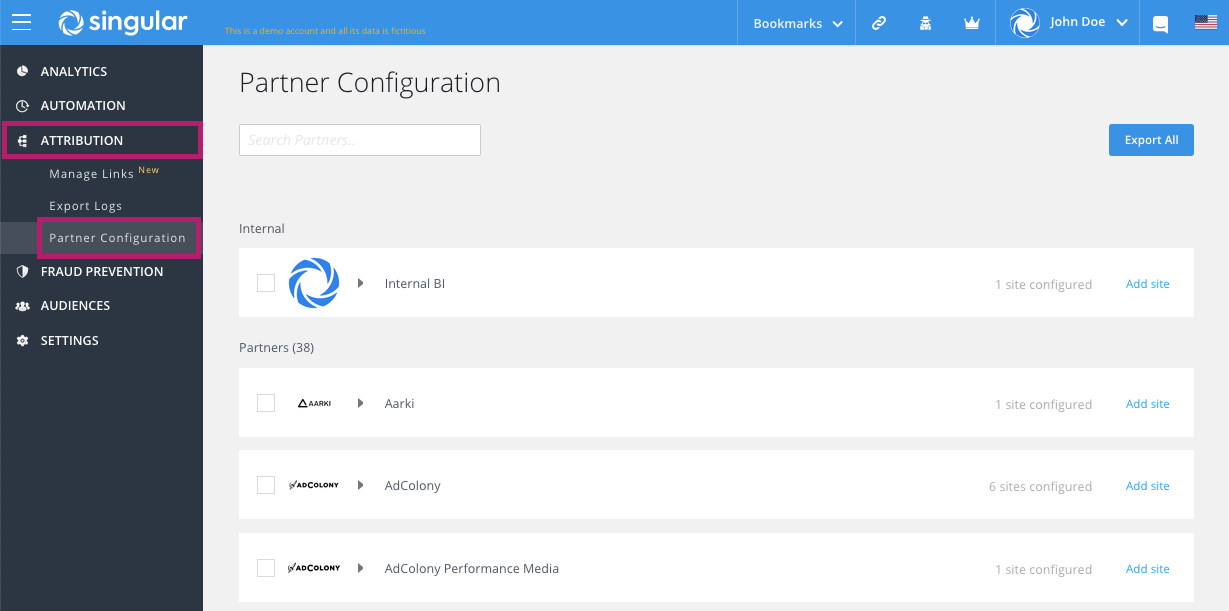
- Search and select Rokt to continue.
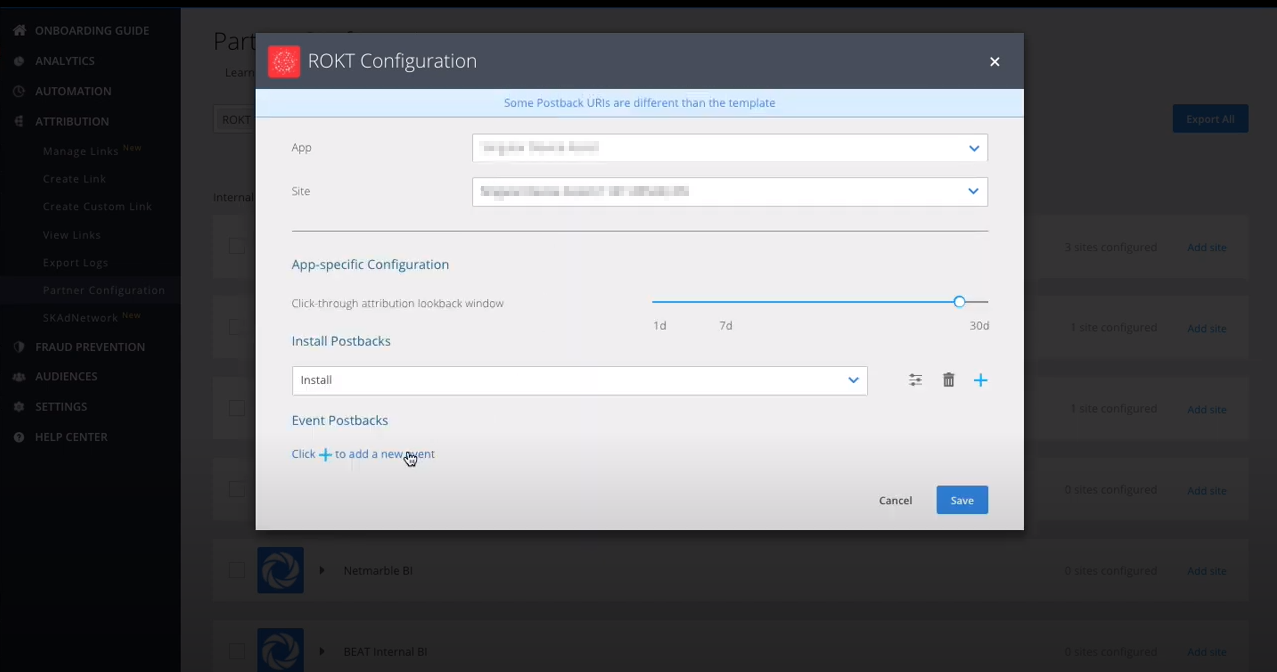
- In the configuration window that opens:
- Select the App.
- Select the App site.
 **
**
- Under App-specific configuration:
- Set up your event postbacks.
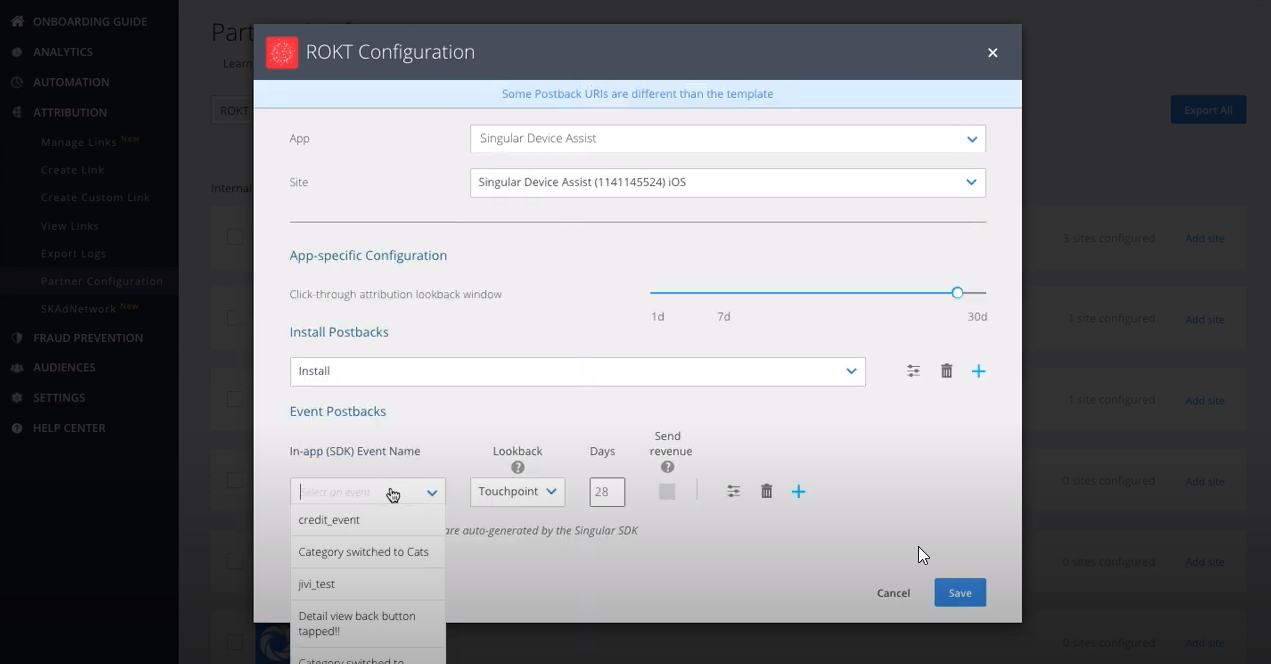
- Set up your event postbacks.
- Click Save.
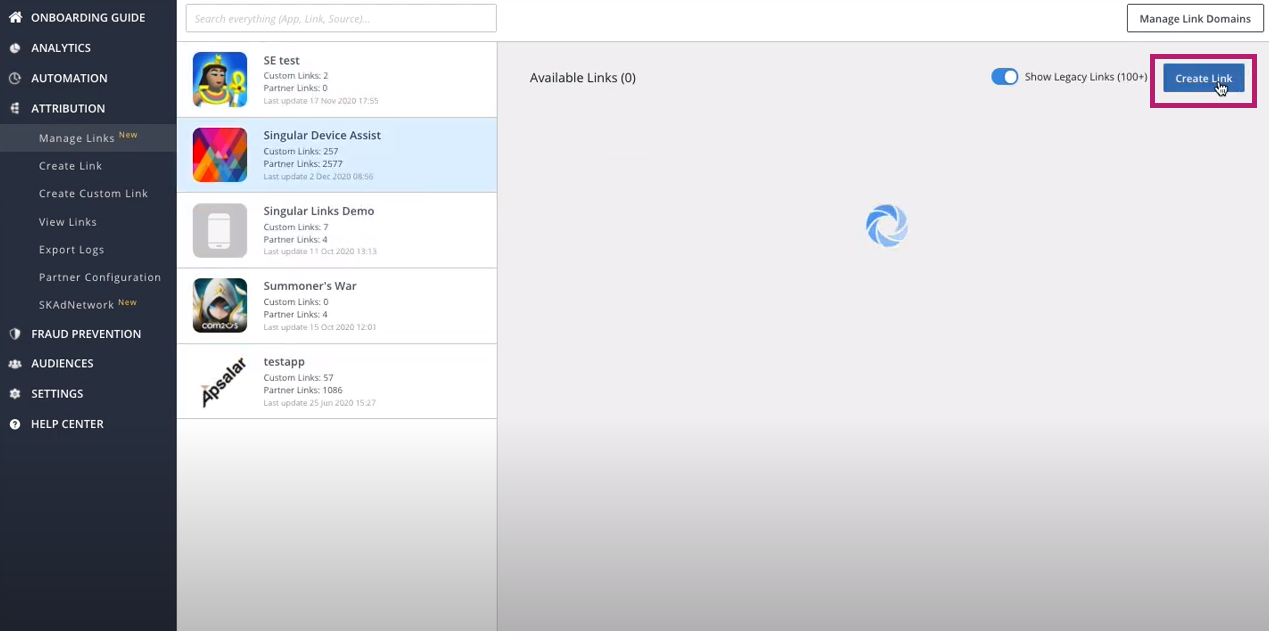
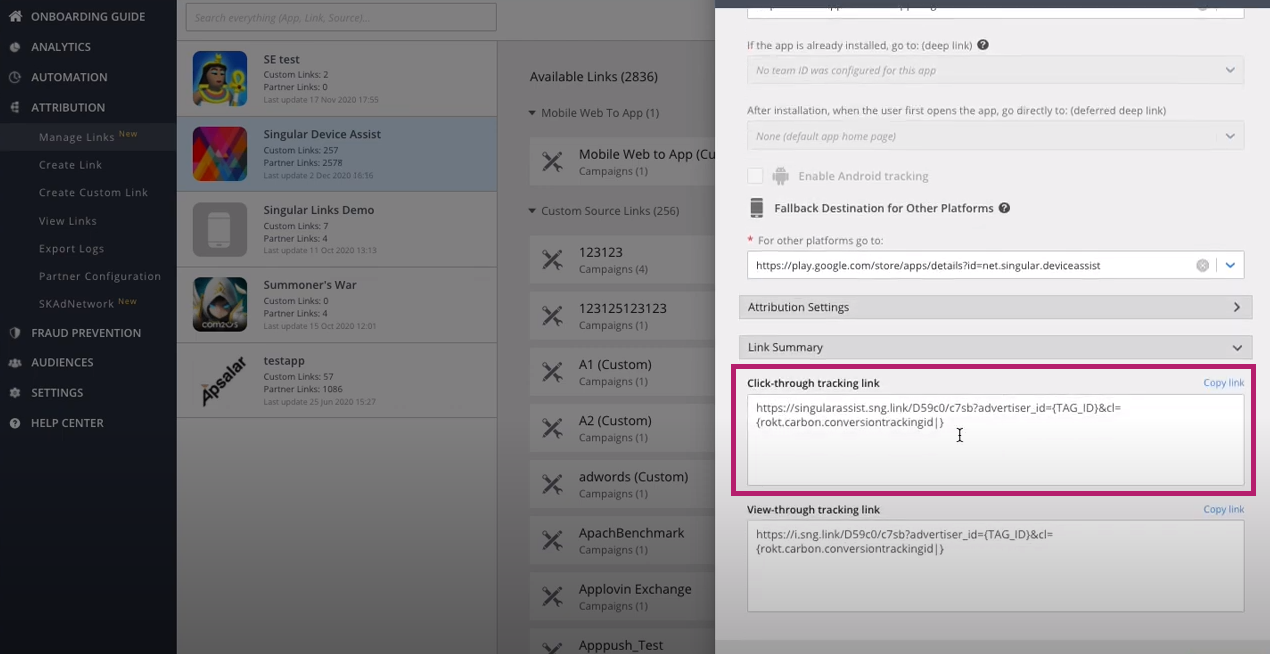
- Go to Attribution > Manage Links.
- Select your desired app and click Create Link.
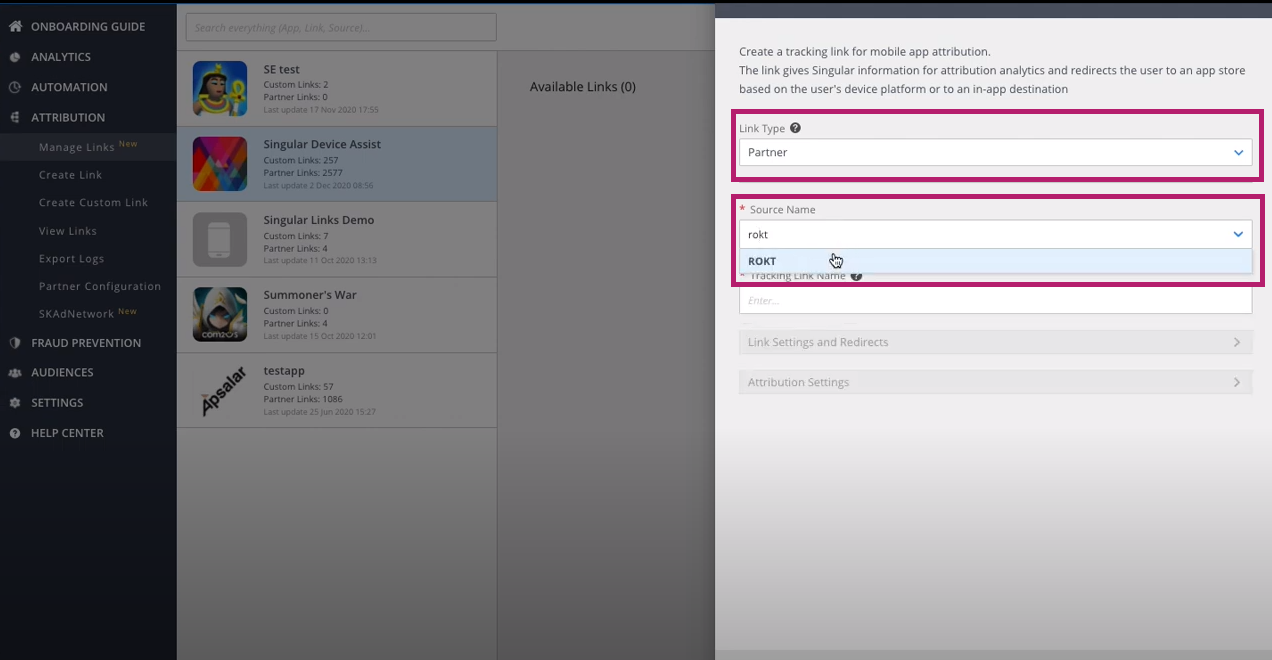
- Set Link Type to “Partner”.
- Set Source Name to “Rokt”.
- Enter a tracking link name and select iOS/Android tracking.
Note: Rokt supports both platforms but requires you to create a separate link for each.
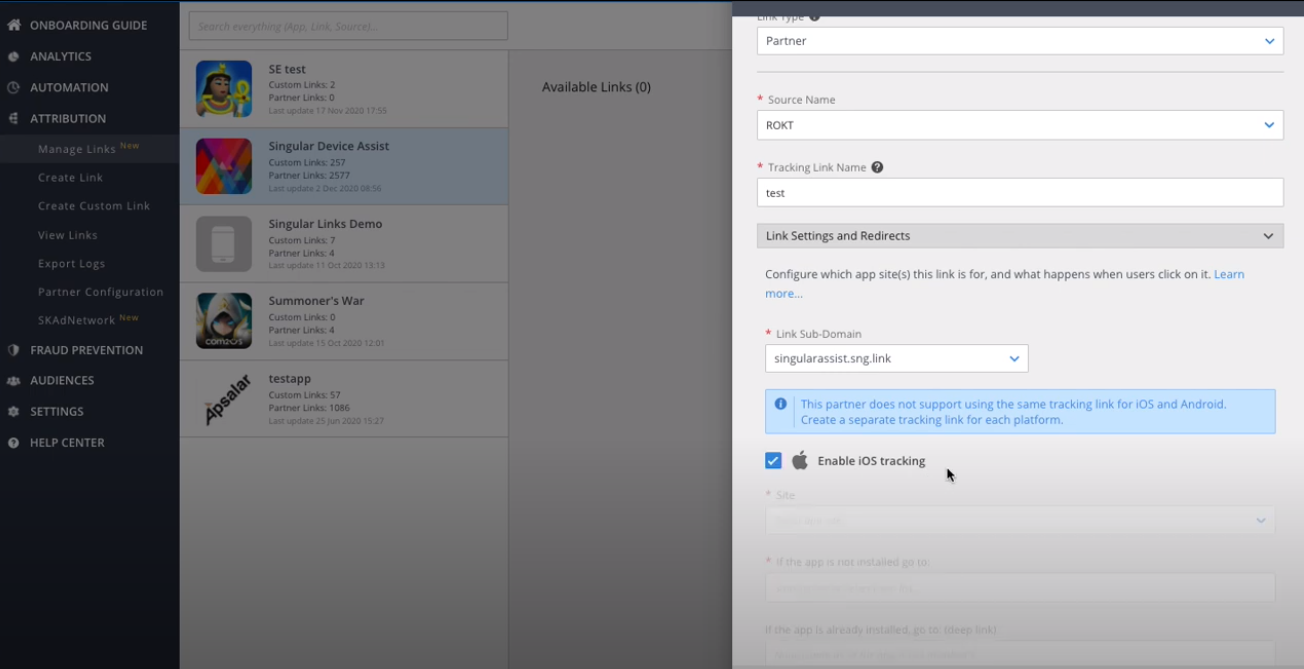
- Enter all other relevant details.
- Click Generate.
- Scroll down to find Link Summary. Copy the generated Click-through tracking link and send it to your Rokt account manager.
TUNE (formerly HasOffers)
TUNE does not a preconfigured integration with Rokt, however, you can manually integrate with the following instructions.
Send your TUNE signup link to your Rokt account manager. Once Rokt signs up, this will send a request to your TUNE account for acceptance.
Accept Rokt as a partner to your account.
Log in to your TUNE account.
Go to Offers > Create Offer. Update your offer details, revenue, and payout. Learn more about creating an offer on TUNE’s website.
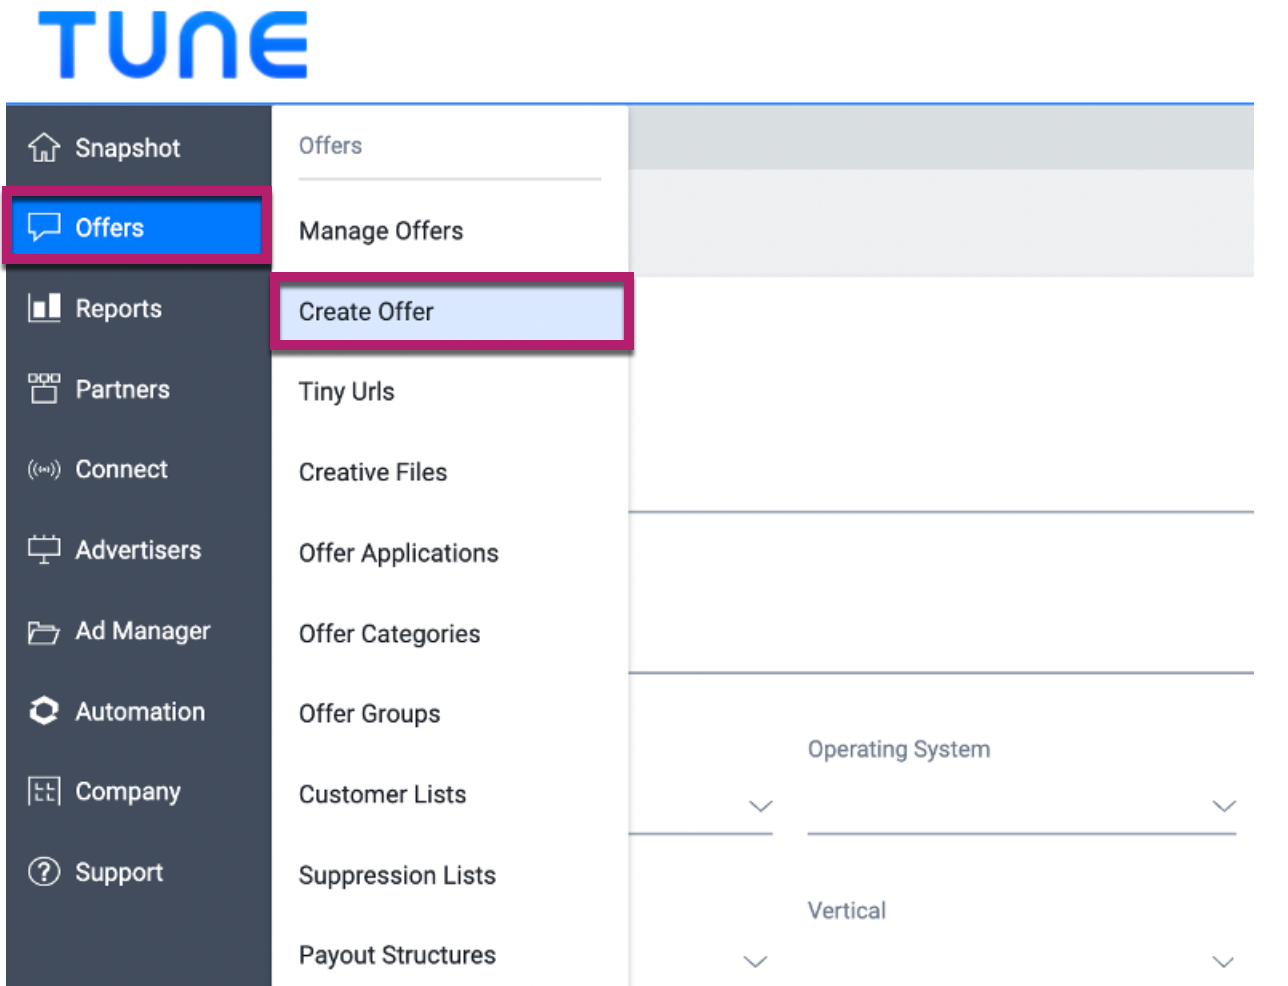
Once you have created an offer, you need to generate tracking links. Go to Offers > Manage offers, and select the offer you want to use.
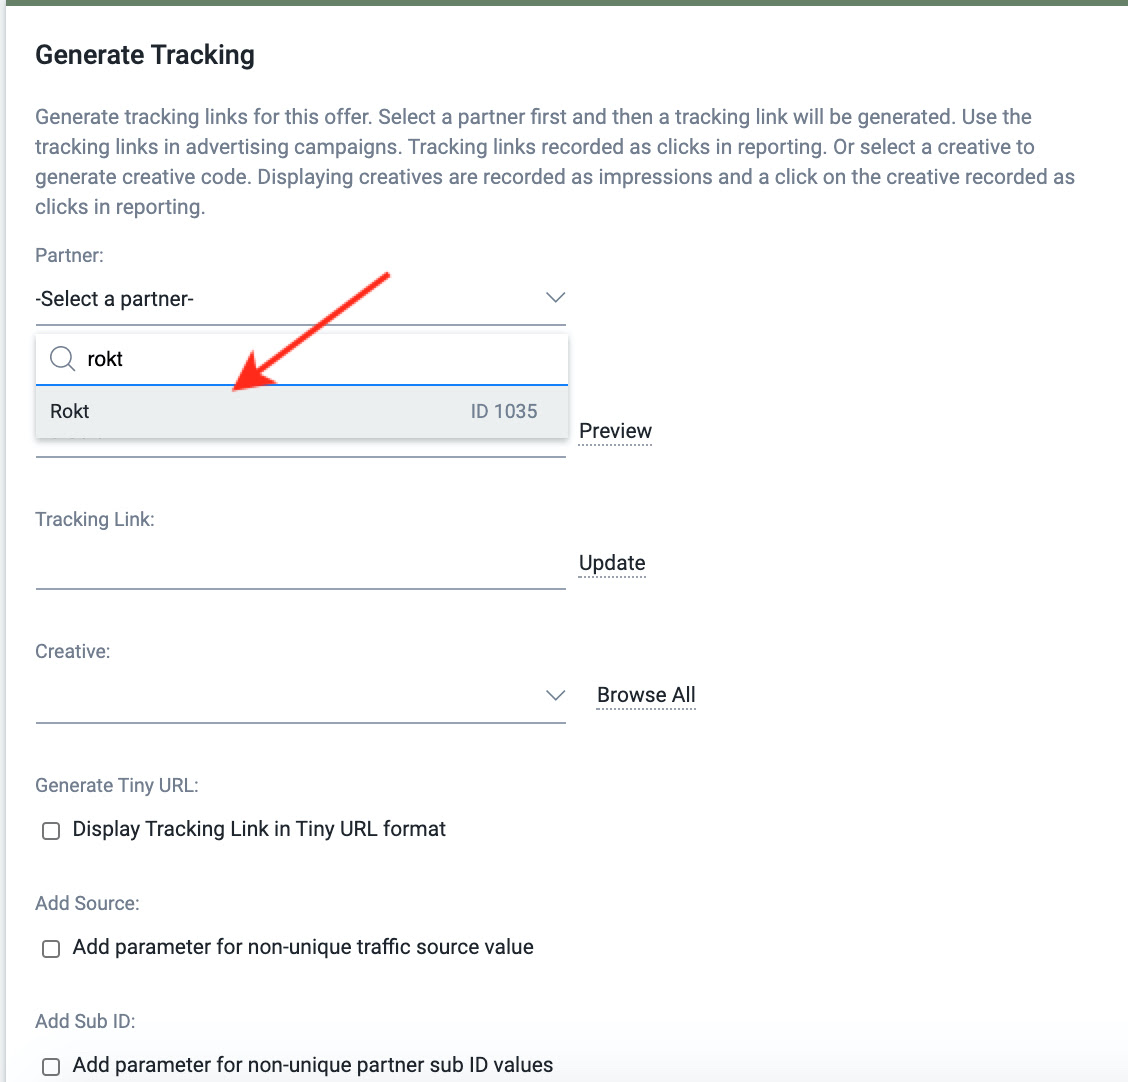
Go to Generate Tracking > Partner, search for and select Rokt to continue.
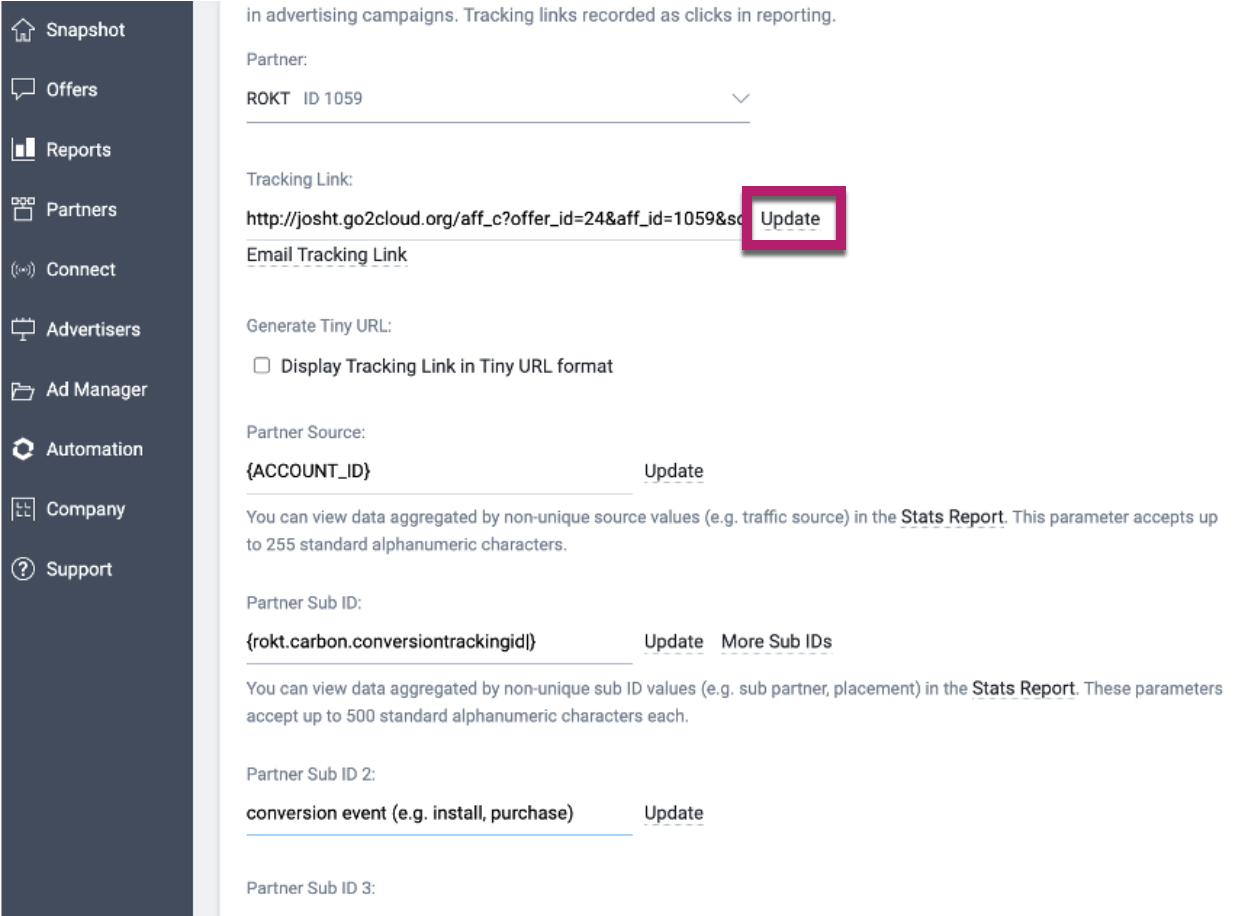
Check the Add source and Add sub ID box.
In the input box that appears, enter:
- Source = {ACCOUNT_ID}
- Sub ID = {rokt.carbon.conversiontrackingid|}
- Sub ID 2 = conversion event (e.g. install, purchase)
Click update to generate your tracking link.
- Example:
http://demo.go2cloud.org/aff_c?offer_id=1&aff_id=1&aff_sub={rokt.carbon.conversiontrackingid|}&source={ACCOUNT_ID}&aff_sub2=install
- Example:
Copy the generated link and send it to your Rokt account manager.
To set up the postback, go to Partners > Conversion Pixels/URLs.
Click Add conversion Pixel/URL.
Select the offer you want to use and set Partner to Rokt.
Set Type to PostbackURL.
Copy the following postback URL and paste it in the Conversion Pixel Code/URL textbox:
https://apps.rokt.com/api/conv?id={source}&passbackconversiontrackingid={aff_sub}&conversiontype={aff_sub2}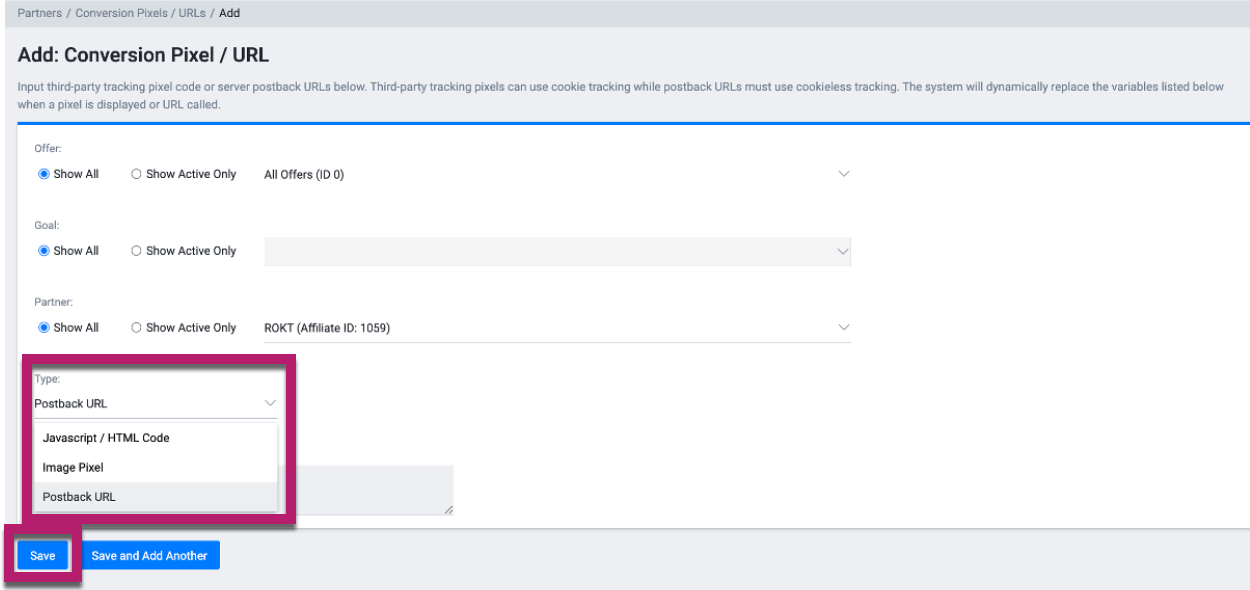
Click Save.
Adjust
Adjust integration does not have a preconfigured integration with Rokt. However, you can still set up a connection with Rokt by following the steps below.
Log into your Adjust account
Find your app and select your app options caret (^)
Select Tracker URLs
Select NEW TRACKER
Enter a tracker name and select network = Rokt
Select Customize
Select CREATE
Copy the Click URL and share it with your Rokt account manager.
If you would like to track other conversion events (e.g. register, purchase, first-time deposit) other than Install. you will need to generate a unique event token for each event on Adjust.
- Find your app in the dashboard and select your app options caret (^).
- Select All Settings > Events
- Select Create new event at the bottom of the module and enter your event name.
- Select Create
- Copy the Event token and share it with your Rokt account manager.
Partnerize
Your Rokt Account Manager will coordinate with you to set up Rokt and Partnerize.
- The Rokt Account Manager will create a new account for the specific partner that will integrate with Partnerize.
- The Rokt Account Manager will send a Publisher ID, which is used to invite Rokt to the campaigns they are tracking.
- Once Rokt is invited to the campaign, Rokt’s legal team will review the terms of the partnership before the integration is finalized.
- Once the integration is finalized, coordinate with your Rokt Account Manager and the Rokt Operations Team to create tracking links.
- The links should include the below parameters:
- Pubref:
{ACCOUNT_ID} - Adref:
{rokt.carbon.conversiontrackingid|}
- Pubref:
- The links should include the below parameters:
Rokt will then assist with setting up postbacks on Partnerize.
Branch
If you are using the measurement provider Branch for attributions follow the steps below to establish the preconfigured integrations with Rokt.
- Log in to your Branch account.
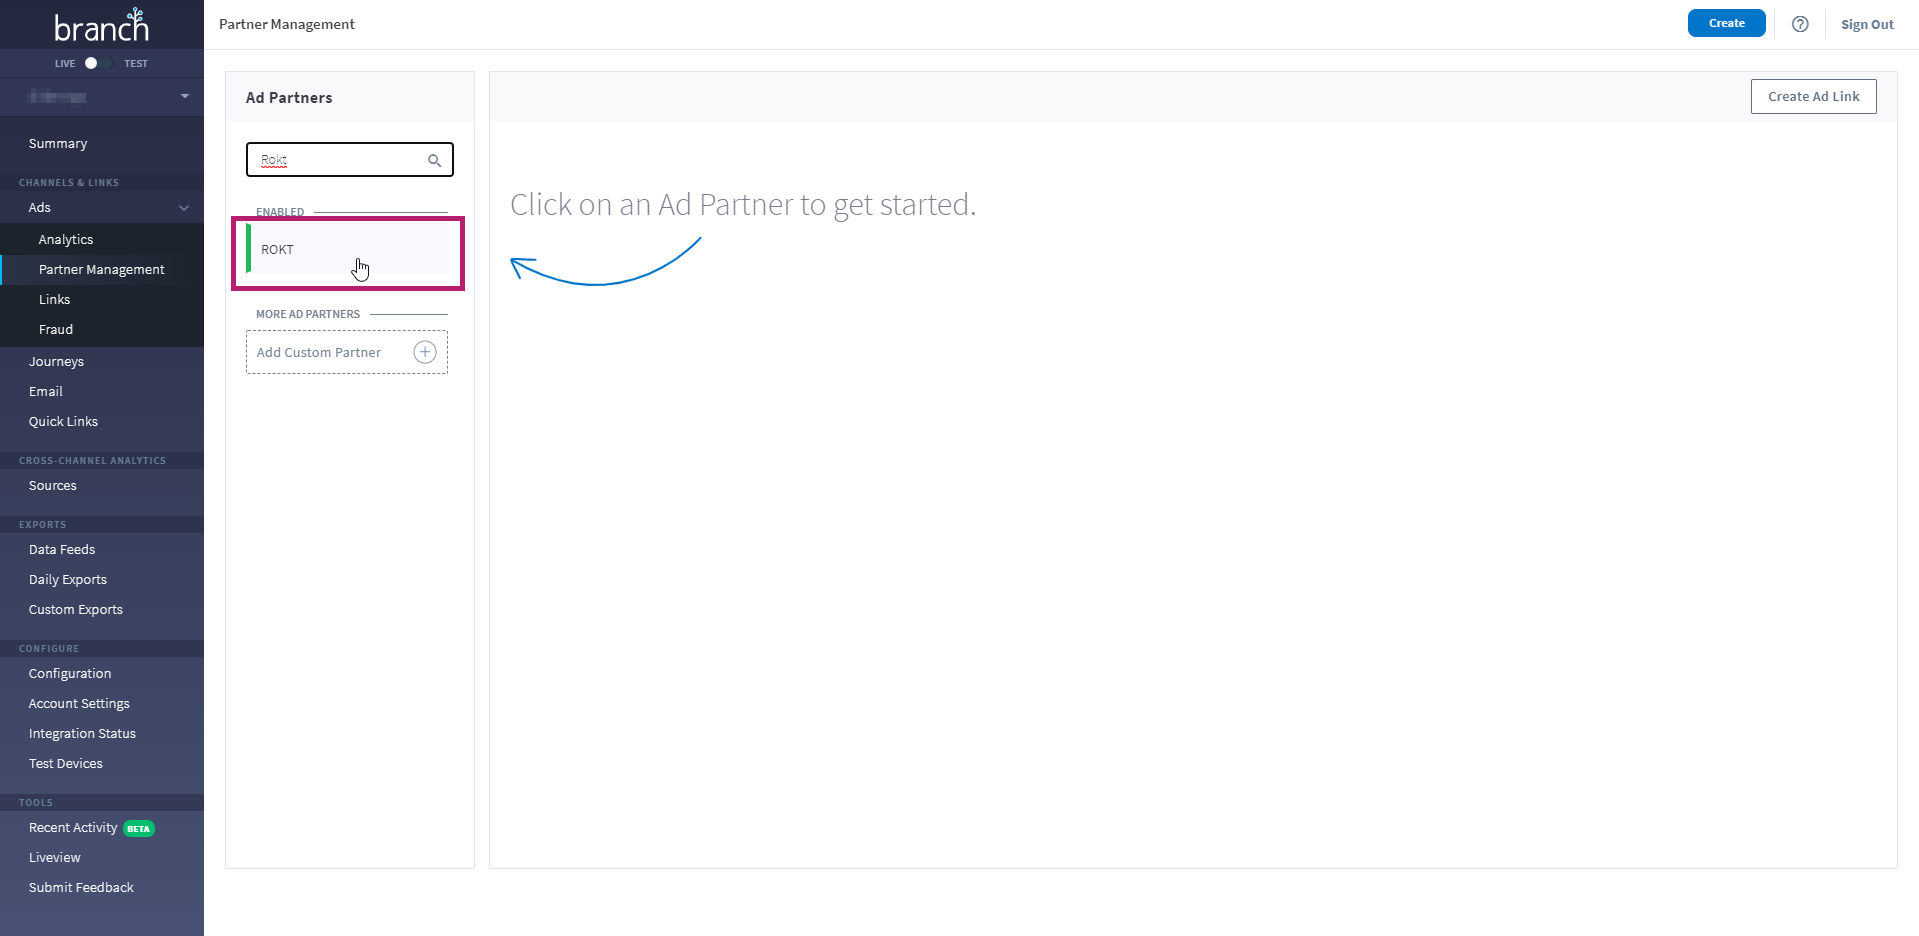
- Go to Ads > Partner management.
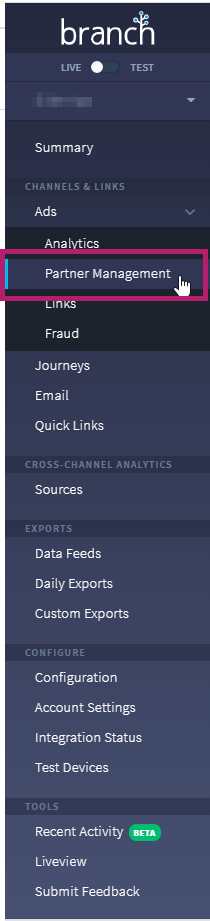
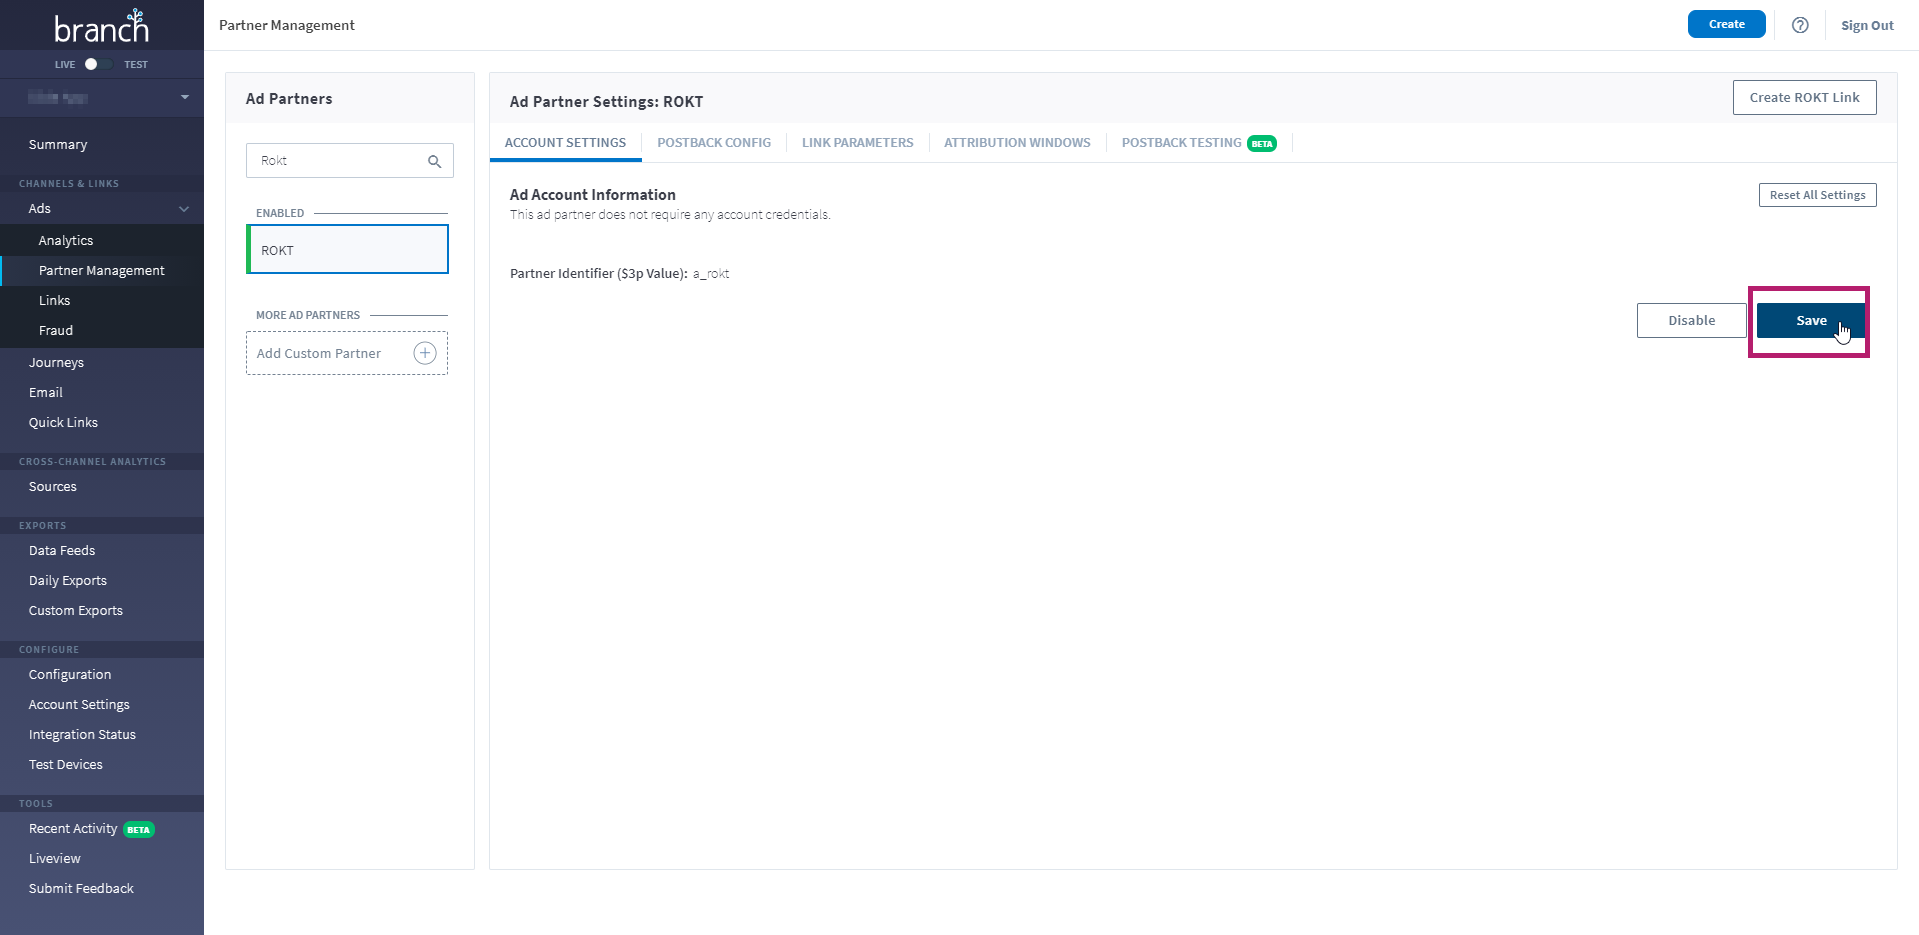
- Search and select Rokt to continue.
- Rokt does not require any account credentials, therefore click Save.
- Configure, edit, and add postback URLs and click Save.
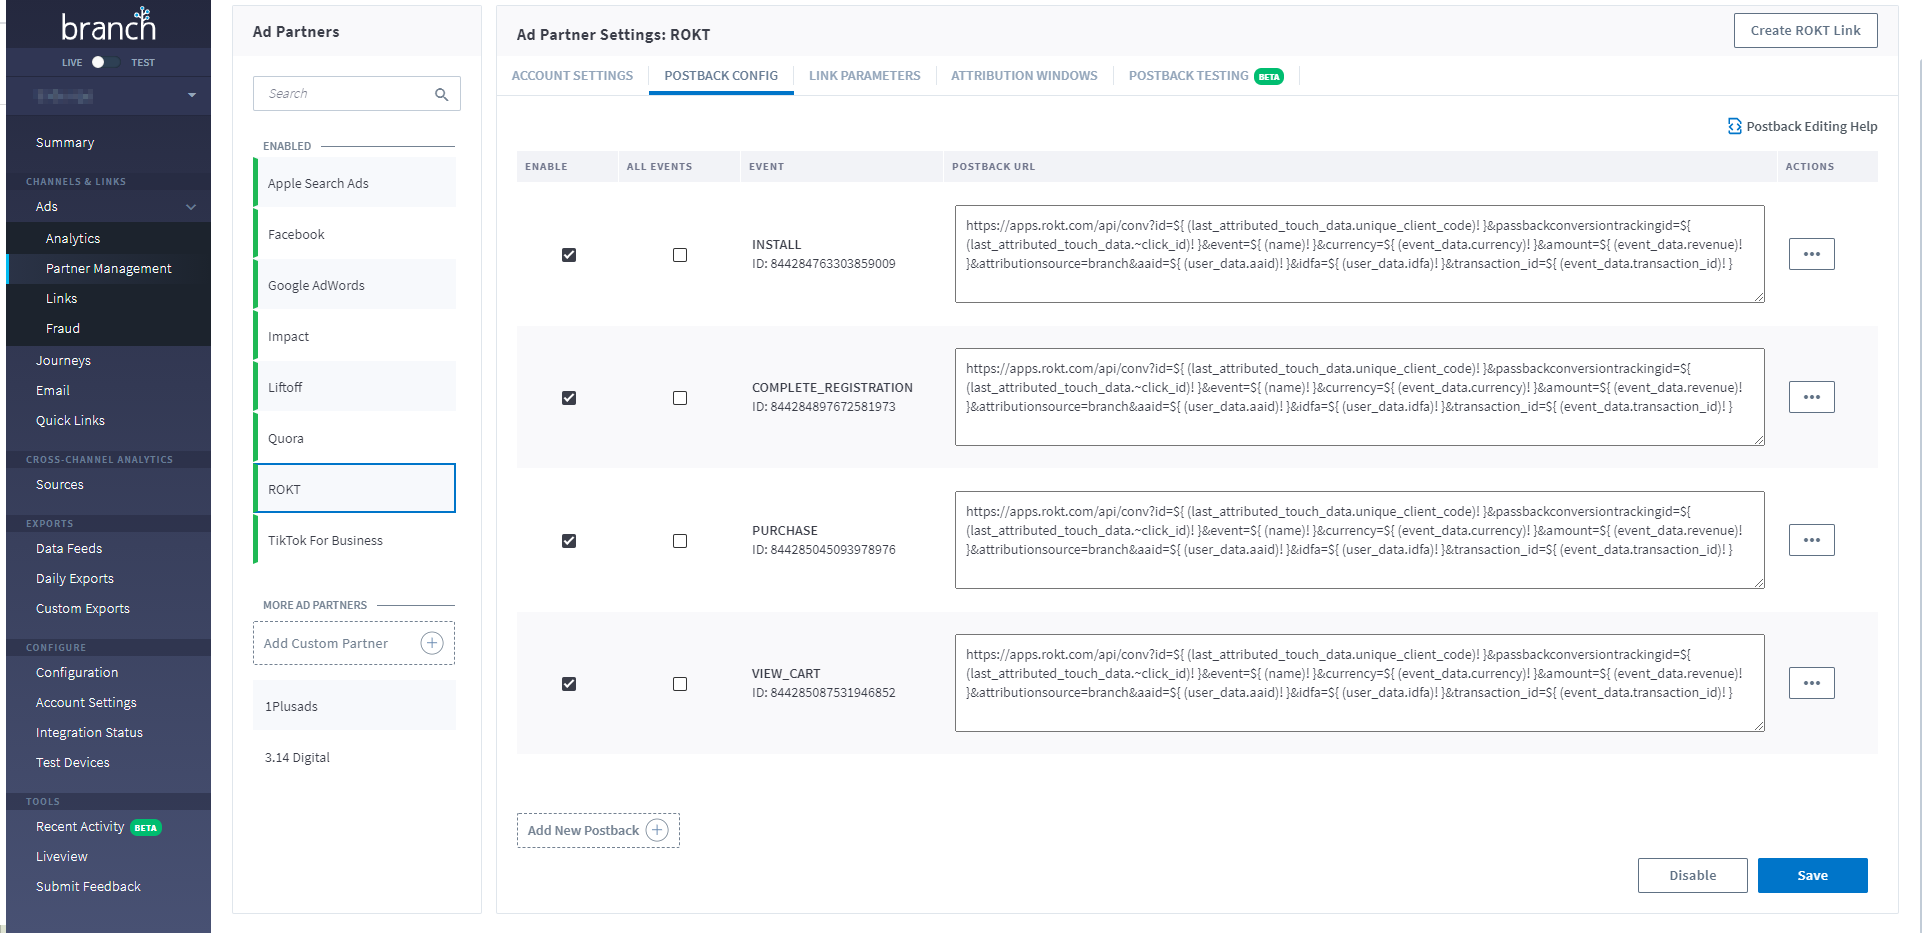
- Select Create Rokt Link.
- Select one of the ad formats.
- For app install or app engagement campaigns, select the App Only format.
- For search or display campaigns where the user should go to the web if they don't have the app, select Cross-Platform Search or Cross-Platform Display.
- Product links are for shopping or dynamic remarketing campaigns.
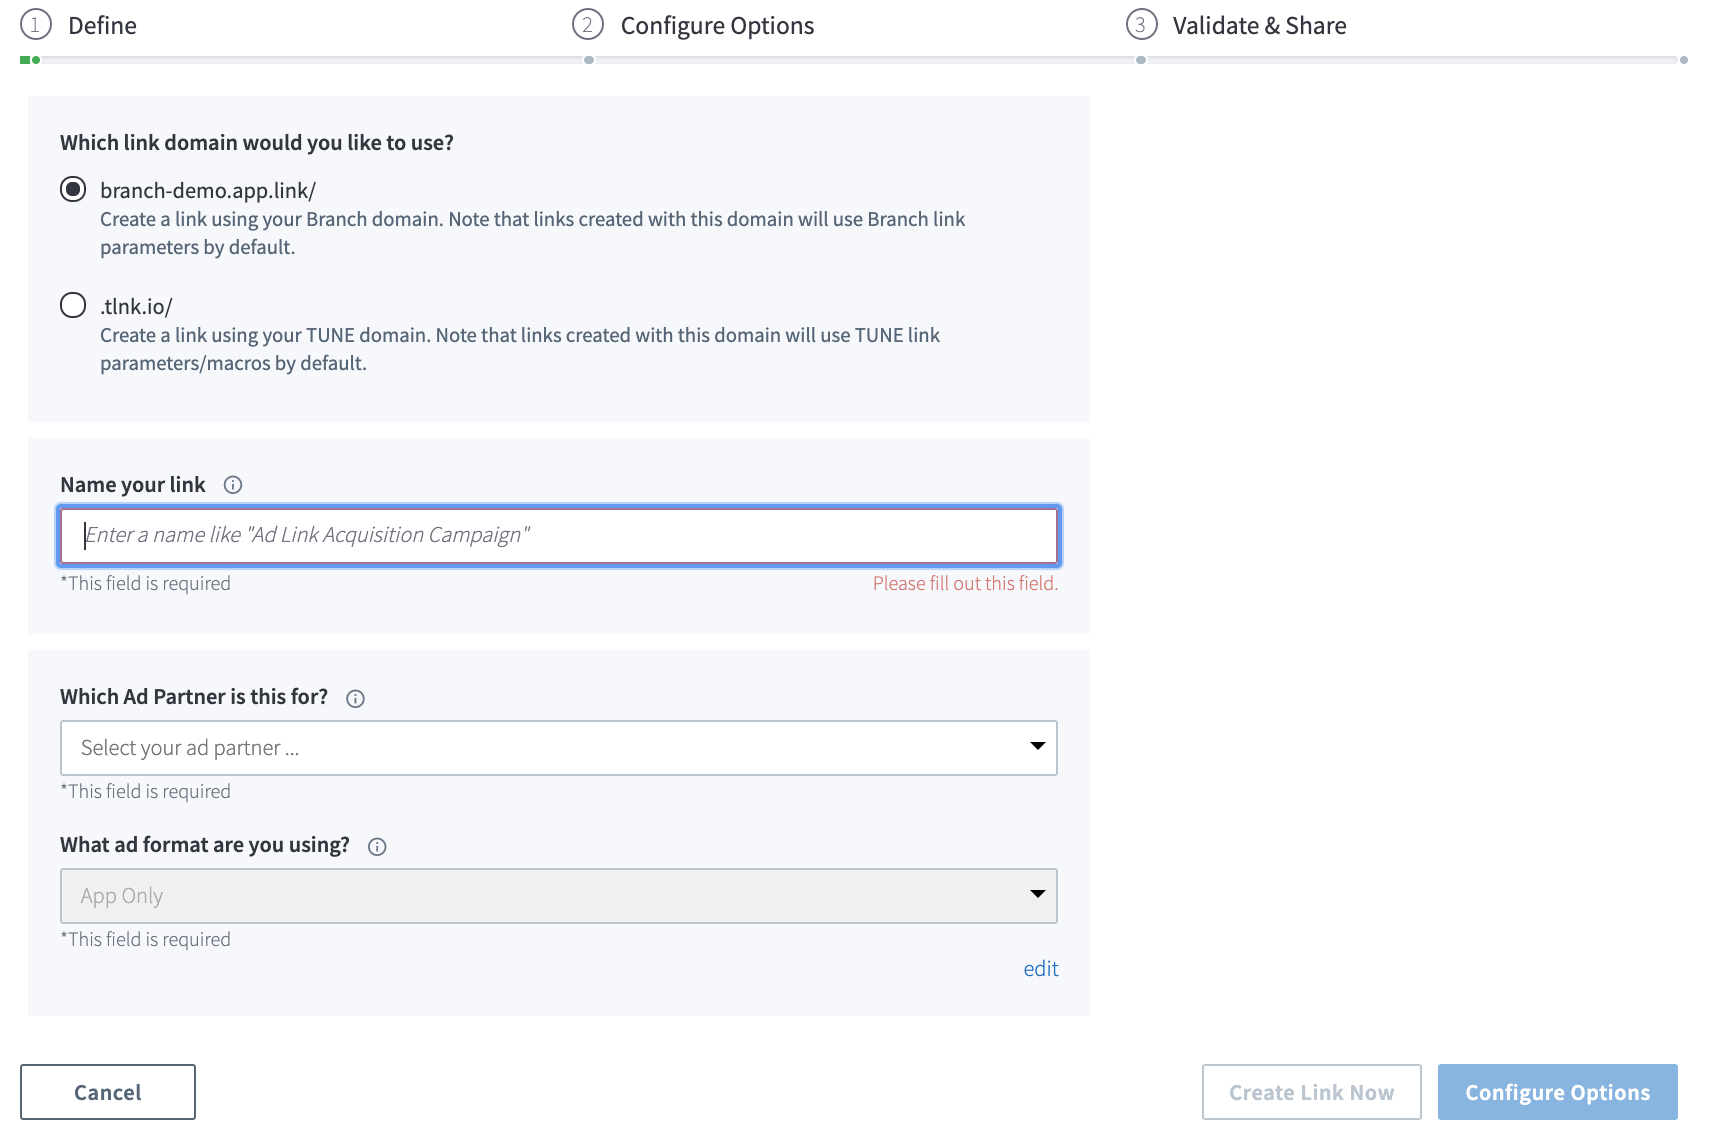
- In the Define section, complete the following:
- Choose which link domain you want to use (available for former TUNE clients only):
- Branch domain—Create a link using your Branch domain. Note that links created with this domain use Branch link parameters by default.
- TUNE domain—Create a link using your TUNE domain. Note that links created with this domain use TUNE link parameters/macros by default.
- Name your link.
- Select Rokt as the ad partner.
- Click Configure Options when you are done.
- Choose which link domain you want to use (available for former TUNE clients only):
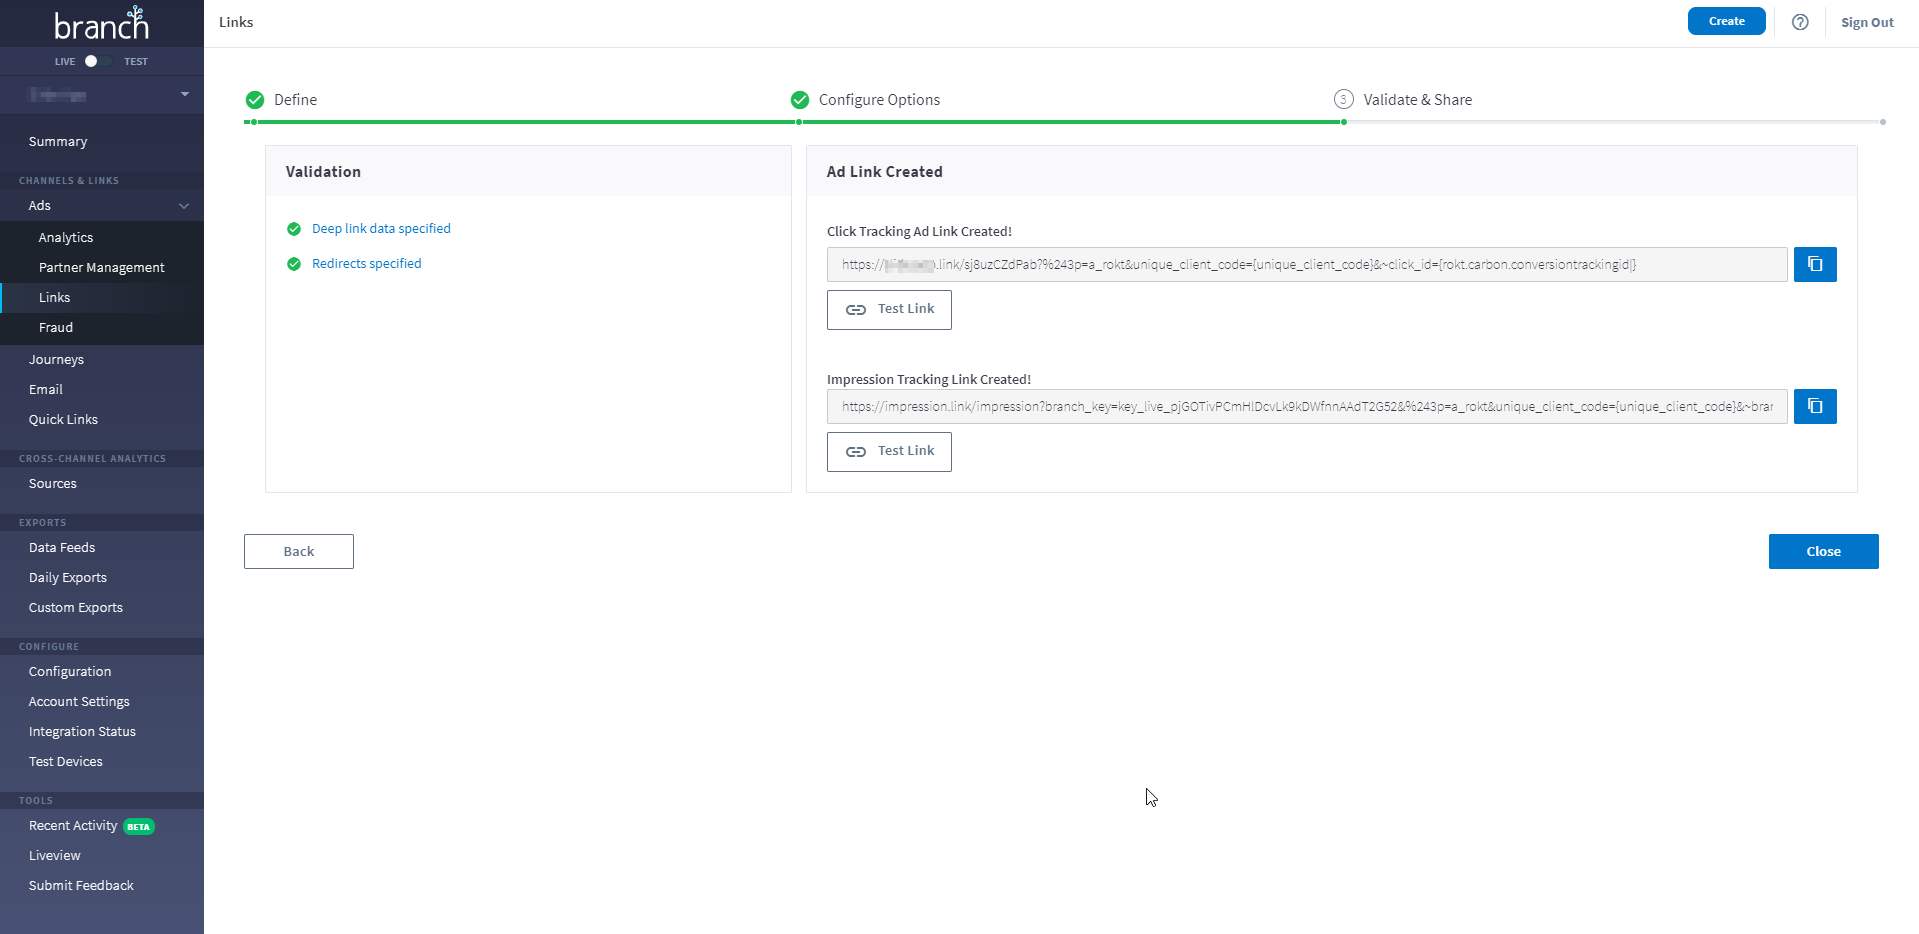
- Learn more about configuration options on Branch's website.
- Once you have completed your configuration, continue to Validate & Share. Copy the click tracking link and share with your Rokt account manager.
Impact Radius
Impact Radius does not have a preconfigured integration with Rokt. However, you are still able to set up a connection with Rokt through the following steps.
Log in to your Impact Radius account
Invite Rokt to the affiliate program on the Impact platform
- Rokt account name: Rokt_US
- Rokt account ID: 2666683
After sending the invitation, please inform your Rokt account manager.
Once Rokt has accepted the invitation, you can proceed to set up the integration.
Create your ad link. Please ensure your link includes
- Sub ID 1: {rokt.carbon.conversiontrackingid|}
- Sub ID 2: {ACCOUNT_ID}
- Sub ID 3: Conversion event / Action Tracker (e.g. install, purchase)
Set up postbacks
- Action tracker: This is typically the conversion event that you would like to track
- URL:
https://apps.rokt.com/api/conv? - HTTP Method: POST
- Body:
id={SubId2}&passbackconversiontrackingid={SubId1}&conversiontype={SubId3} - Body format: Query String
- Show advanced settings: Leave as default
- Click Save
After you have set up your ad link and postback, please share the ad link with your Rokt account manager.