Tealium Integration for Ecommerce
This guide walks you through the process of integrating with Rokt using Tealium. You'll learn how to create variables in Tealium based on your data layer, and how to use the mParticle by Rokt tag to initialize the Rokt SDK and insert placements.
Before you startDirect link to Before you start
Make sure you have:
- A data layer already implemented on your site (typically done by your developers)
- Your Rokt API key (provided by your Rokt account manager)
Understanding the data layerDirect link to Understanding the data layer
The data layer should have been implemented on your web page by your developers.
A data layer is an object that contains all of the information that you want to share with Tealium. Variables can be shared with Tealium via the data layer or in subsequent view change declarations.
Refer to the Tealium developer guide for comprehensive details on how the data layer works.
Example of a data layer:
window.utag_data = window.utag_data || {}

utag_data['email_address'] = 'test@test.com'
utag_data['first_name'] = 'john'
utag_data['last_name'] = 'doe'
Setting the view triggerDirect link to Setting the view trigger
To trigger the appropriate event, use the following code in your app when a purchase event happens:
utag.view({tealium_event : 'purchase', email_address : 'john.doe@example.com', amount:'20.00', currency:'USD', confirmationref:'123456789'})
Tag Configuration: Initialize the Rokt SDKDirect link to Tag Configuration: Initialize the Rokt SDK
- Log in to your Tealium account.
- Click Tags in the left hand navigation.
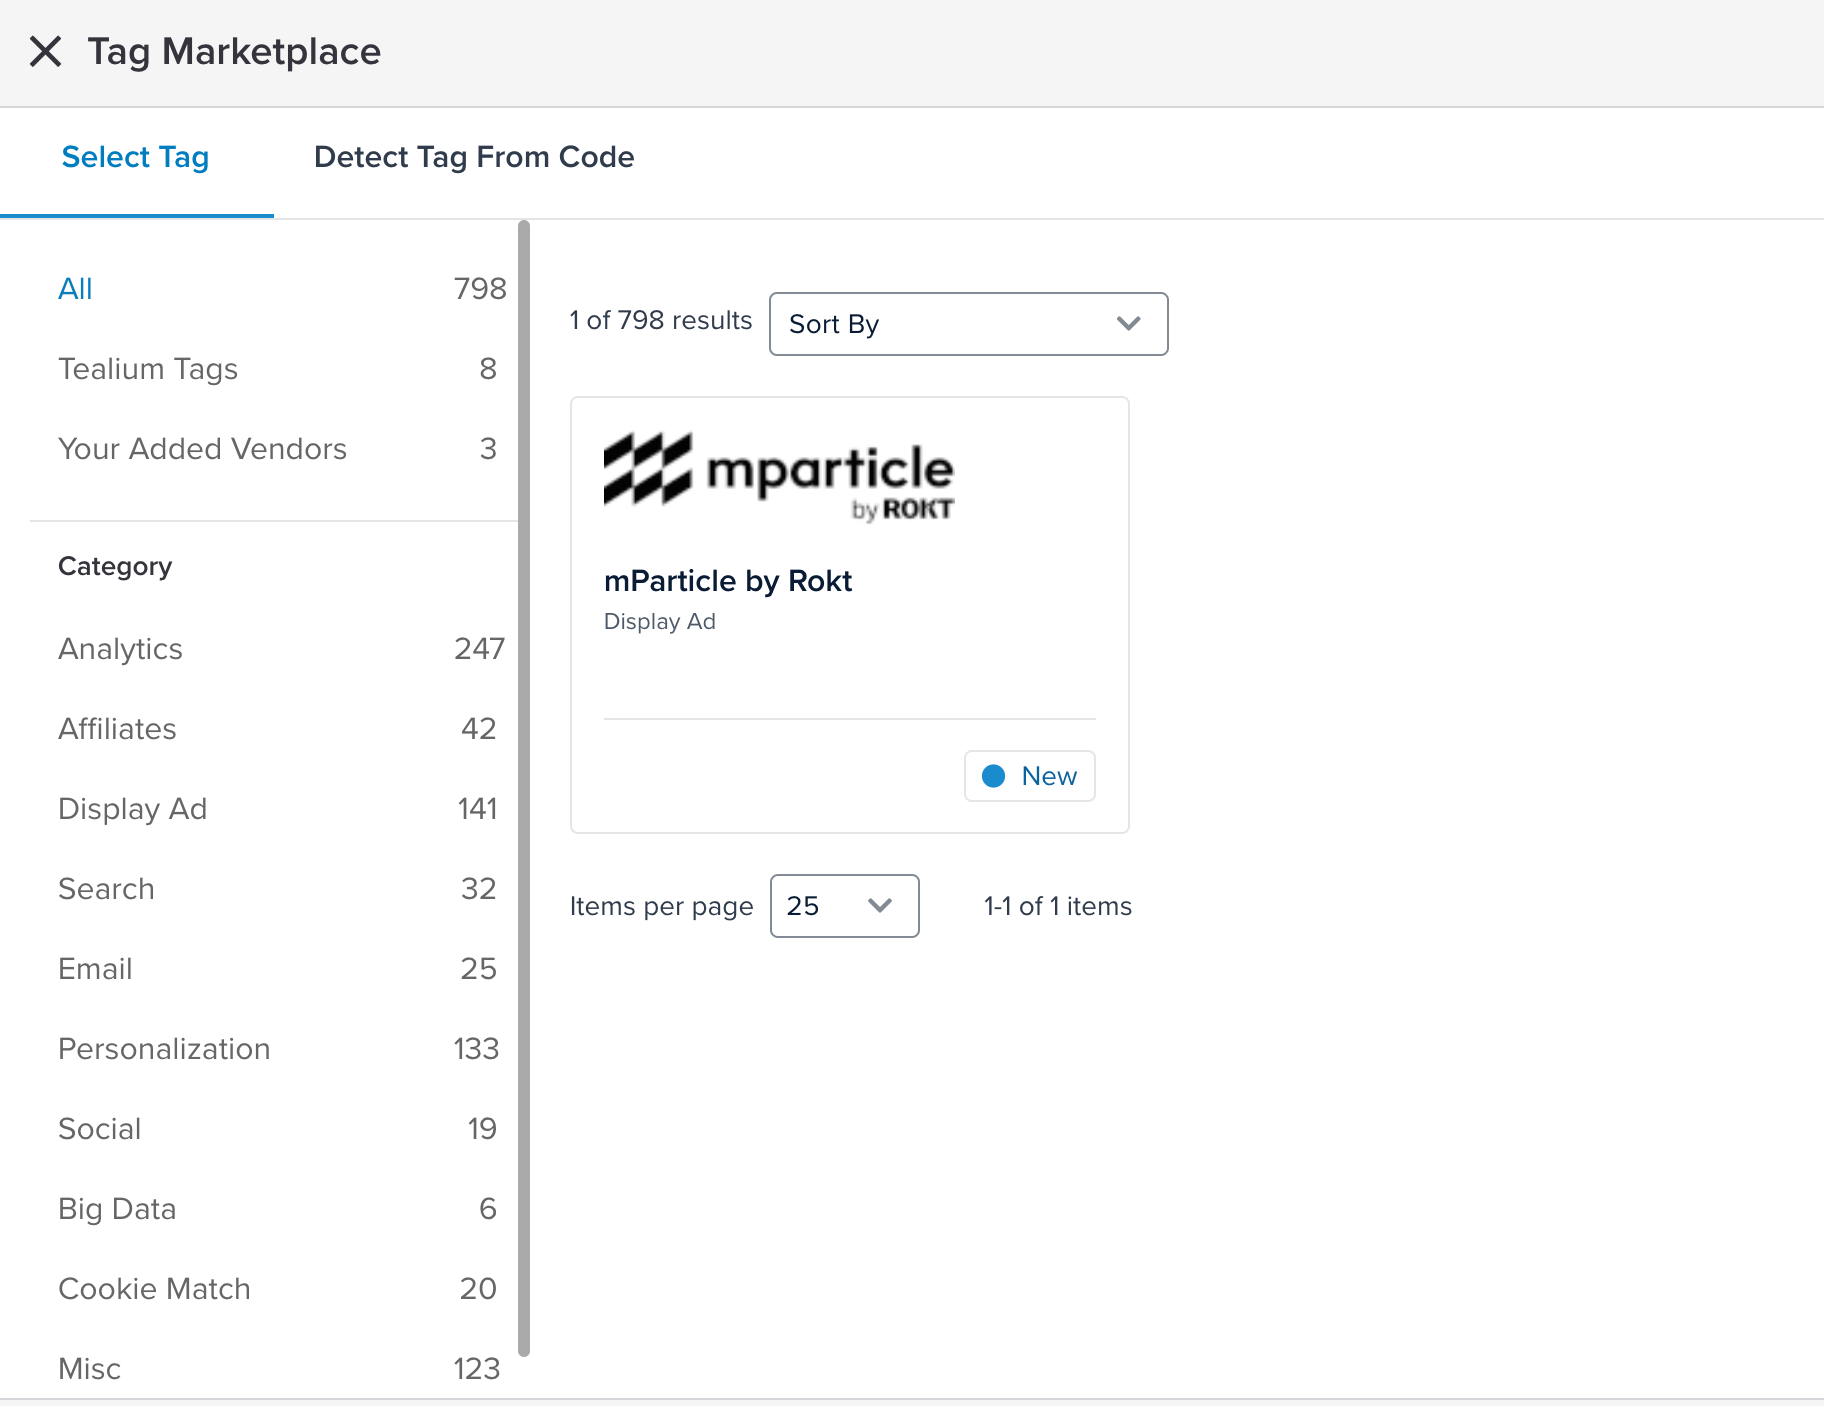
- Click the New Tag button on the right side, then search for the mParticle by Rokt tag.
- Enter a description name for your tag, like "Rokt SDK".
- Under mParticle API Key, paste the Rokt API key provided by your Rokt account manager.
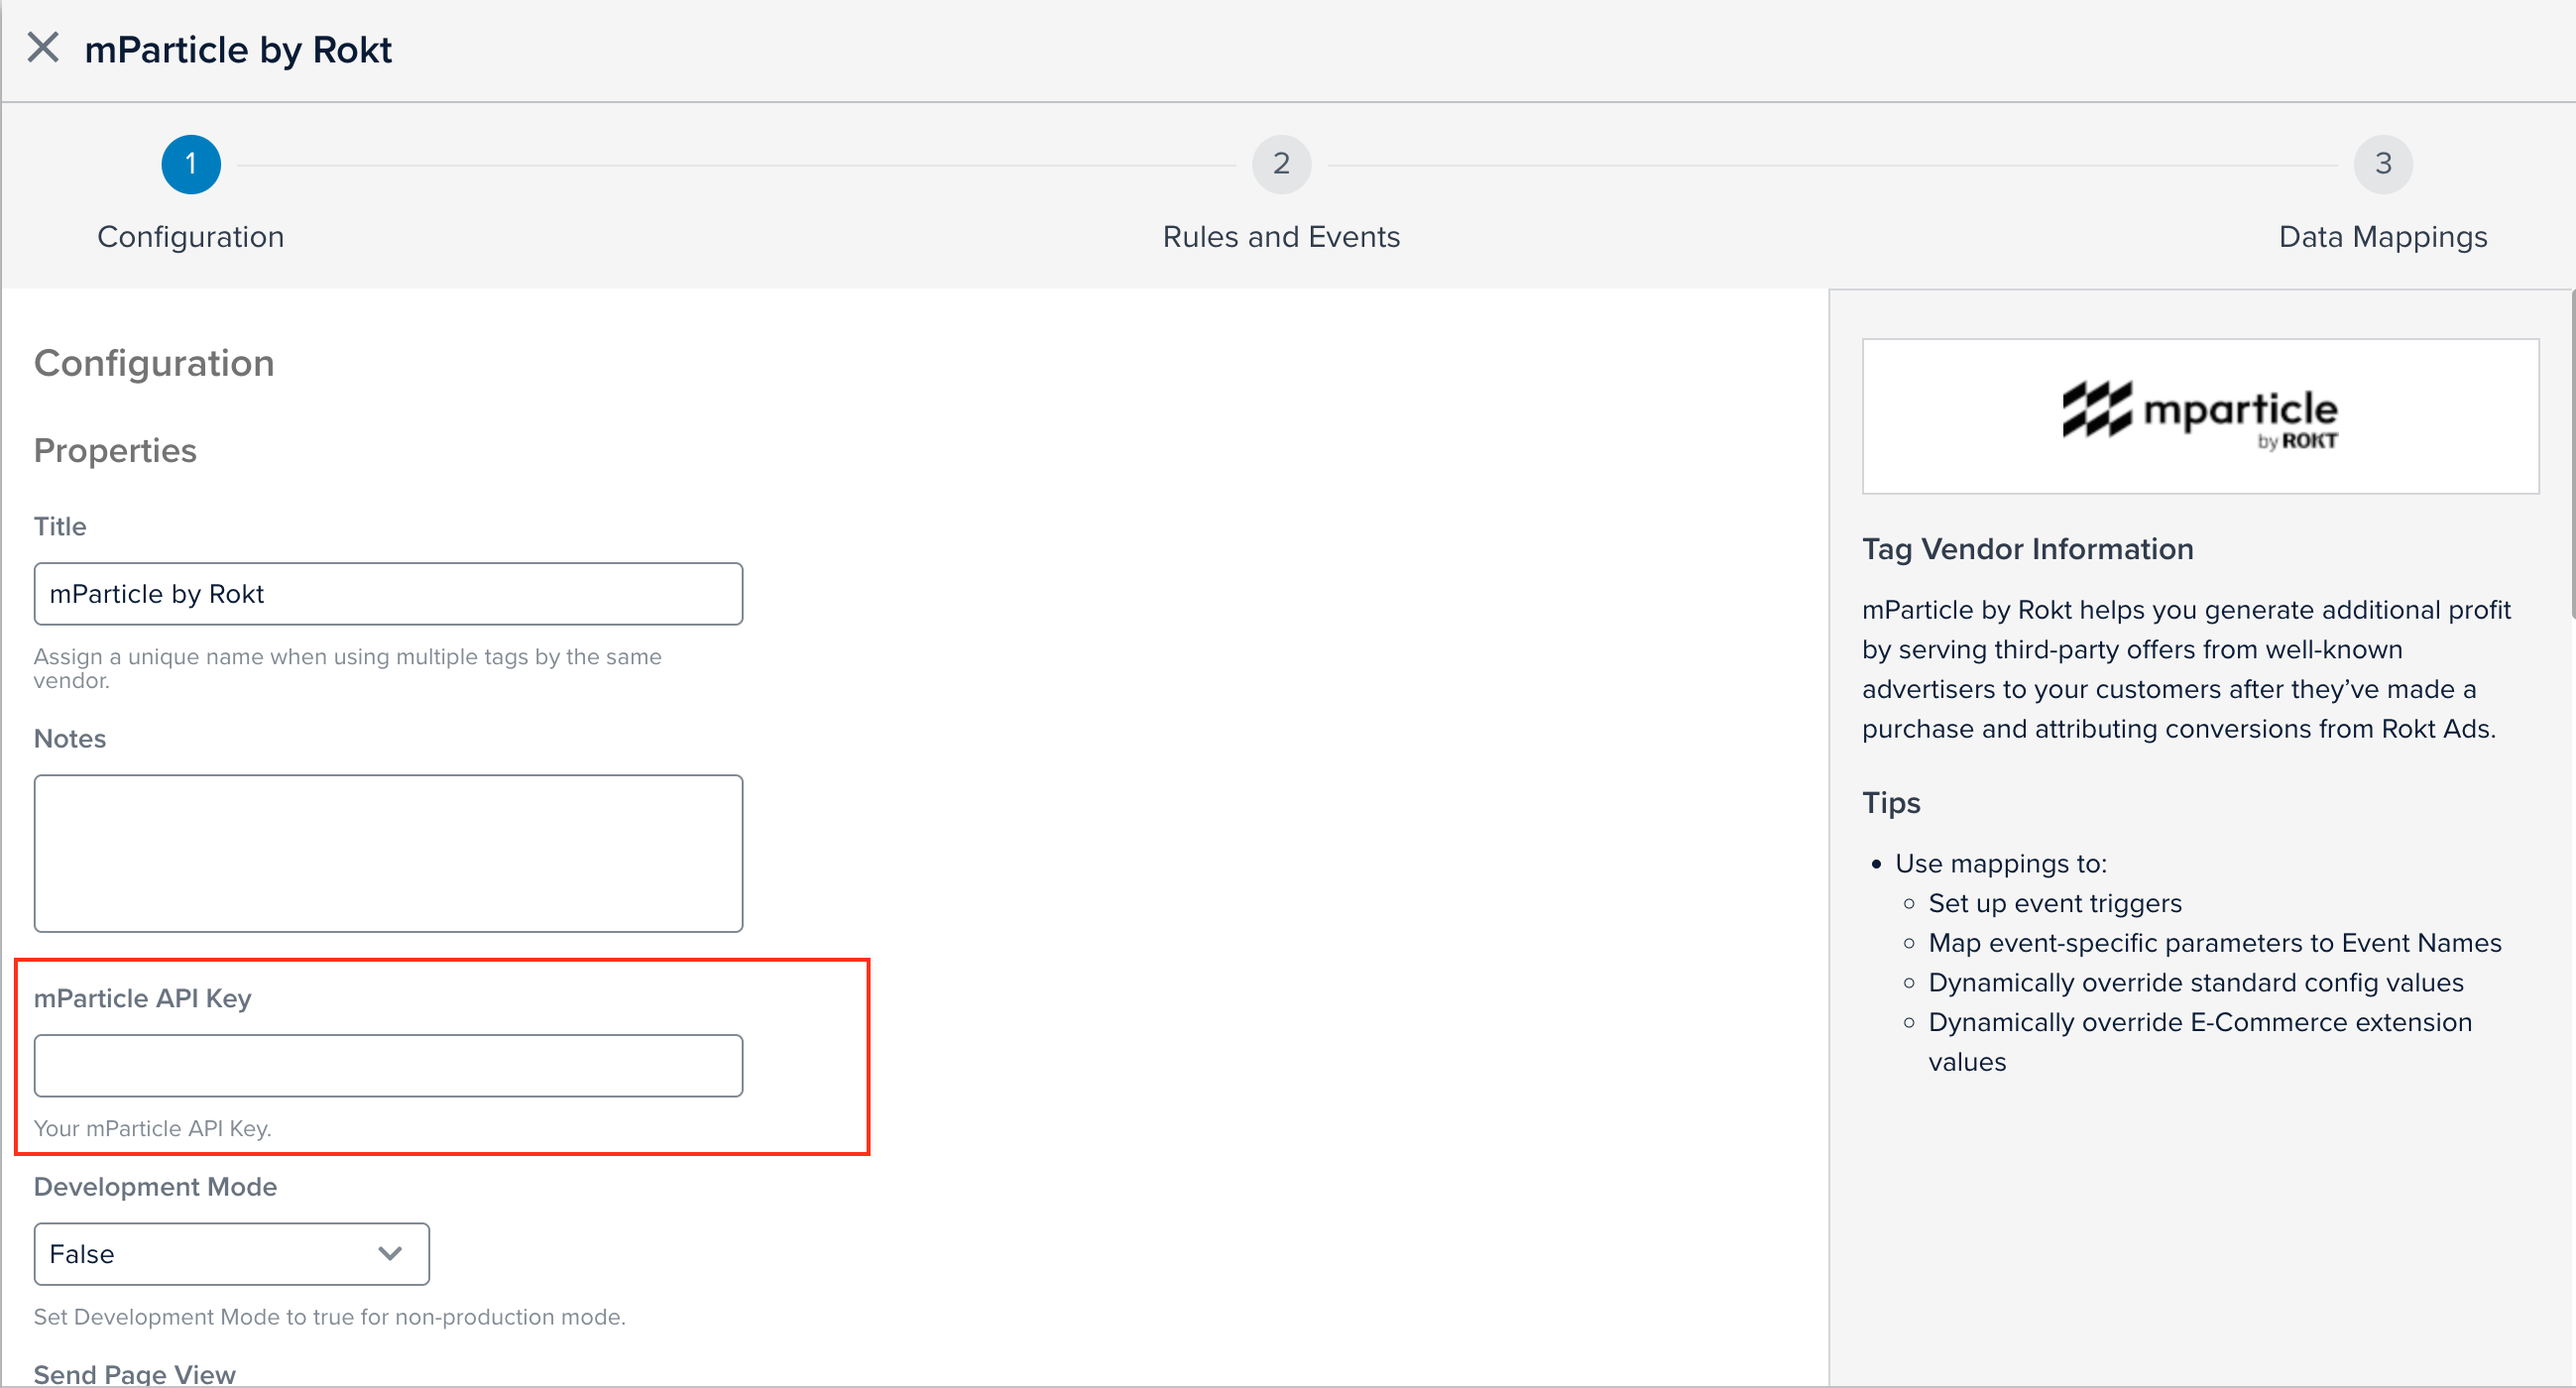
- Enable Log Page Views
- Click Save.
Rules and EventsDirect link to Rules and Events
Under Rules and Events, set your new tag to fire on all pages.
Variable Mapping: Required Changes in Web Page CodeDirect link to Variable Mapping: Required Changes in Web Page Code
1. Tealium EventDirect link to 1. Tealium Event
On your website, you must include a tealium_event value on EVERY page where you want Rokt to render a placement.
The tealium_event value should be set directly in your utag_data object, alongside all other attributes that will be sent to Rokt.
For instance, set:
var utag_data = {
  tealium_event : "purchase"
}
2. Page NameDirect link to 2. Page Name
Please ensure pageName is a variable that exists in your data layer. Rokt uses pageName to help log and differentiate page views. (Optionally, you can also pass the page URL.)
3. IdentifierDirect link to 3. Identifier
(Optional) Set a Page Identifier if you need to uniquely identify a page (useful for multi-step checkout flows that reuse the same URL). If you decide to integrate a Page Identifier, please disclose this to your Rokt account manager. Examples:
stg.rokt.conf- A confirmation page in a staging (testing) environmentprod.rokt.conf- A confirmation page in a production environmentstg.rokt.payments- A payments page in a staging (testing) environmentprod.rokt.payments- A payments page in a production environment
If you choose to use an identifier, you must also set the identifier in your data layer:
var utag_data = {
  tealium_event: "purchase",
  identifier: "mp-layout"
};
Variable Mapping: Required Changes in TealiumDirect link to Variable Mapping: Required Changes in Tealium
You must configure UDO variables within Tealium according to your specific data layer before mapping them to Rokt. Refer to the Tealium Data Layer Variables for more details about variables.
1. Create UDO variables in your containerDirect link to 1. Create UDO variables in your container
In Tealium, every field you want to map and pass to Rokt should exist as a UDO variable, including:
- Any attributes you want Rokt to use for offer selection
tealium_event- The identifier (if you’ve set one up with your Rokt Account Manager)
- pageName (and optionally the page URL) to support page-view logging
If you want to send additional attributes not listed in the tag template, add them to your data layer and create them as UDO variables in Tealium.
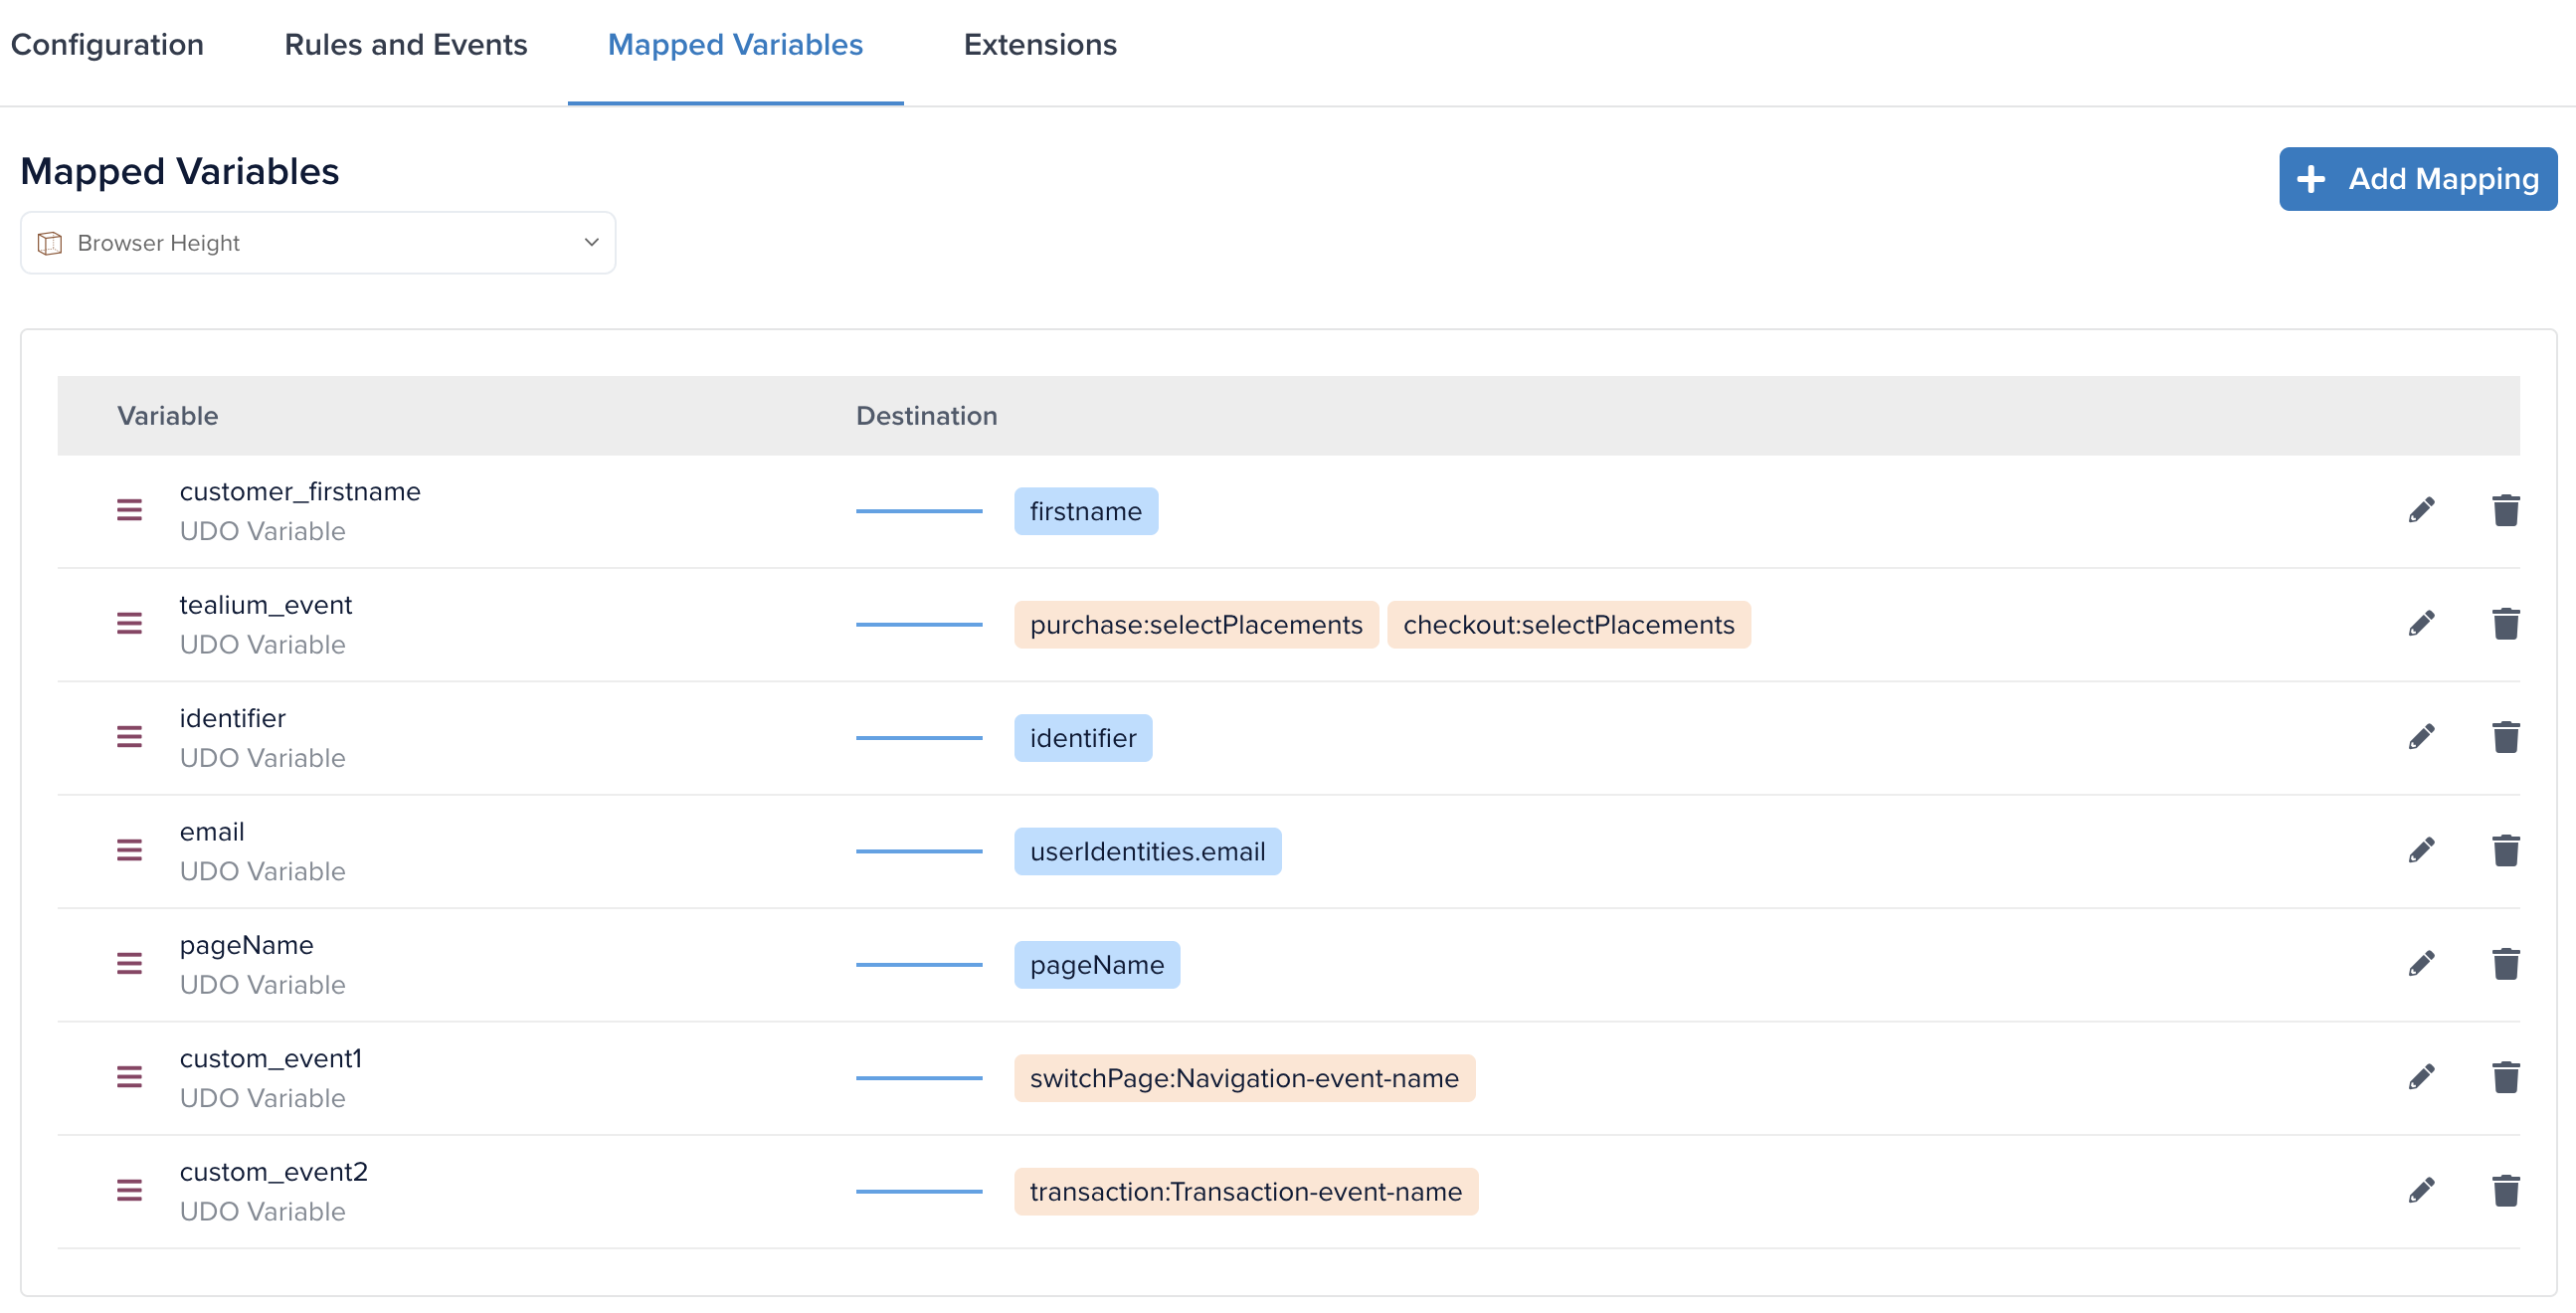
2. Map UDO variables to the correct destinationsDirect link to 2. Map UDO variables to the correct destinations
Under Mapped Variables, map your UDO variables to Rokt destinations. Each variable you want to send to Rokt must be mapped. Most destinations should be readily available in the tag.
If a Rokt destination does not exist for a UDO variable you want to map, please use the "+ Add Custom Destination" feature.
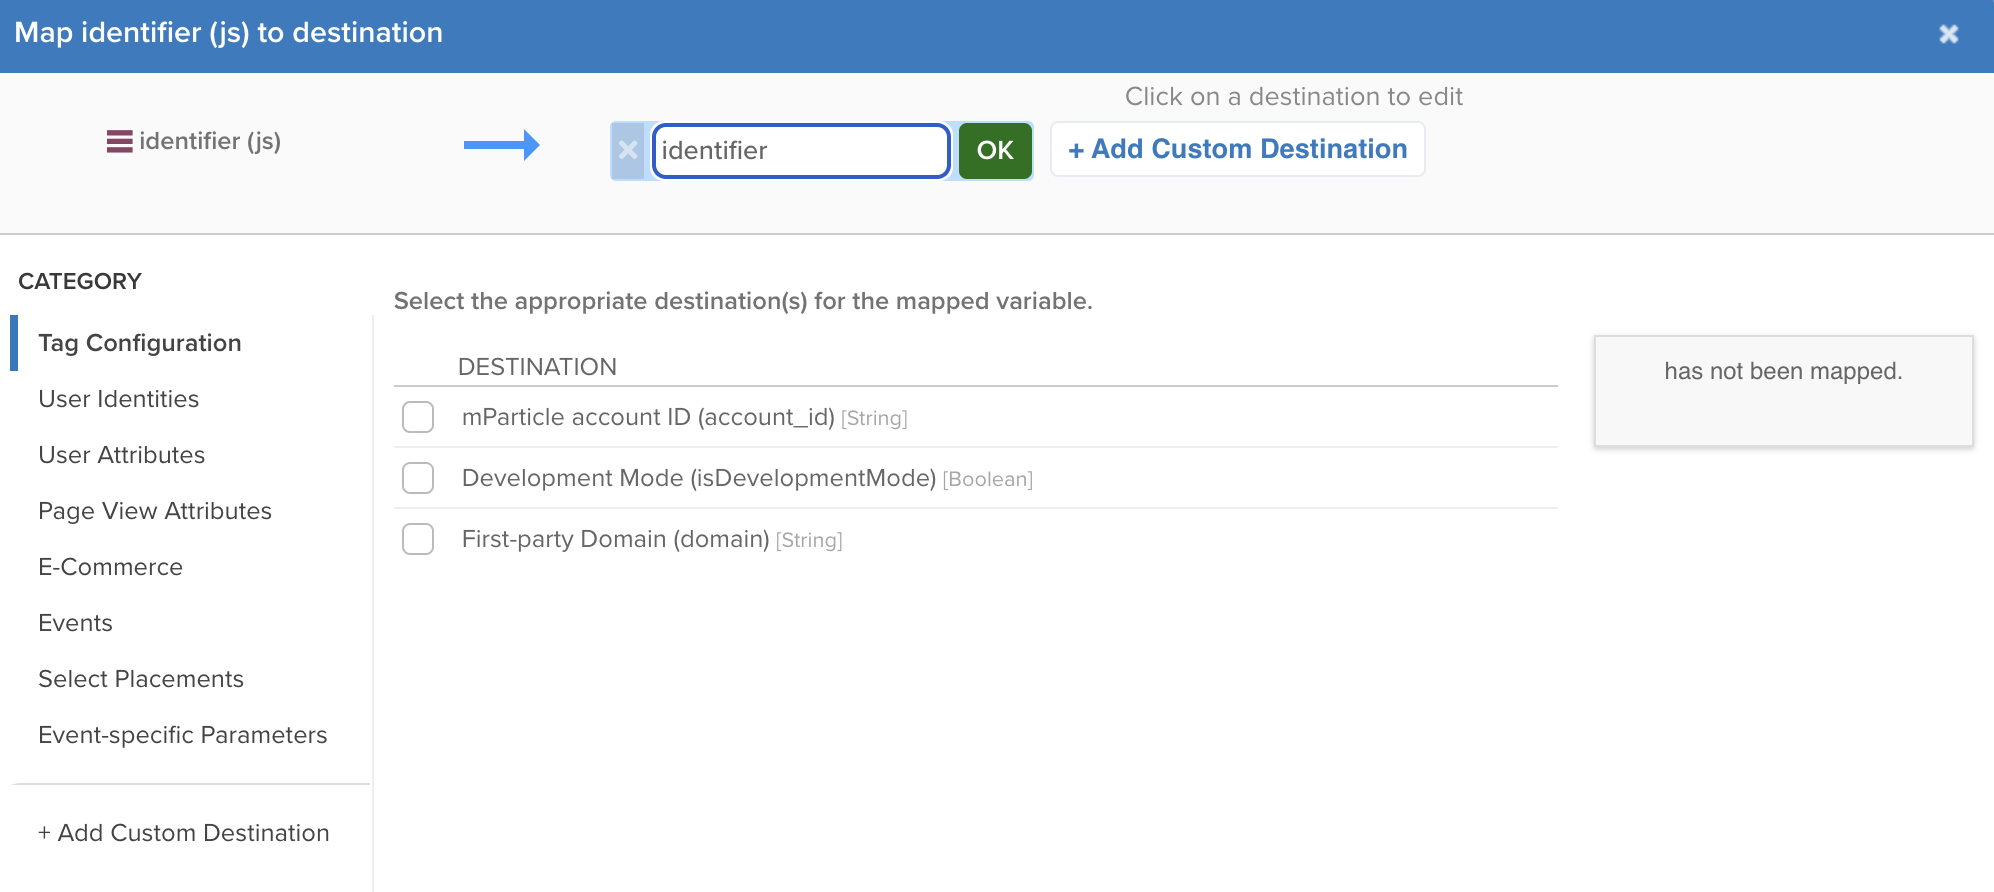
If you are using an identifier, it must be mapped using "identifier" as custom destination.
- Start by using the provided tag categories and destinations:
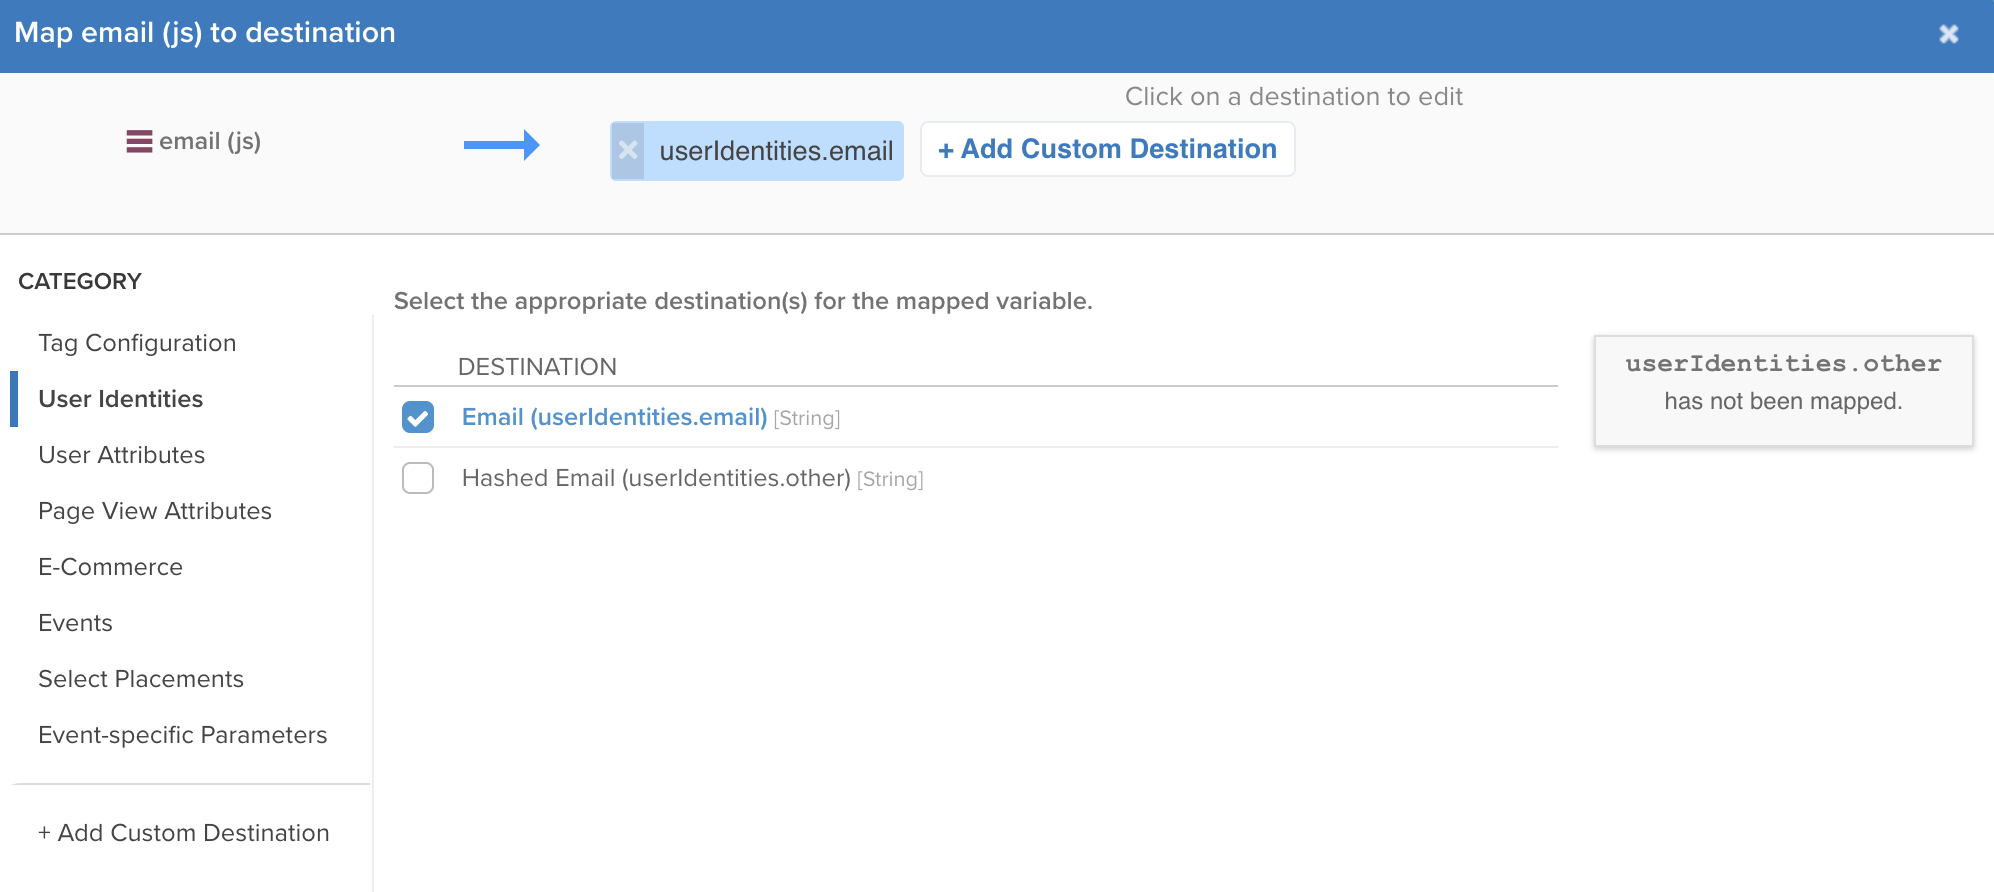
- Unique Identifiers (e.g. email) → use the User Identities category
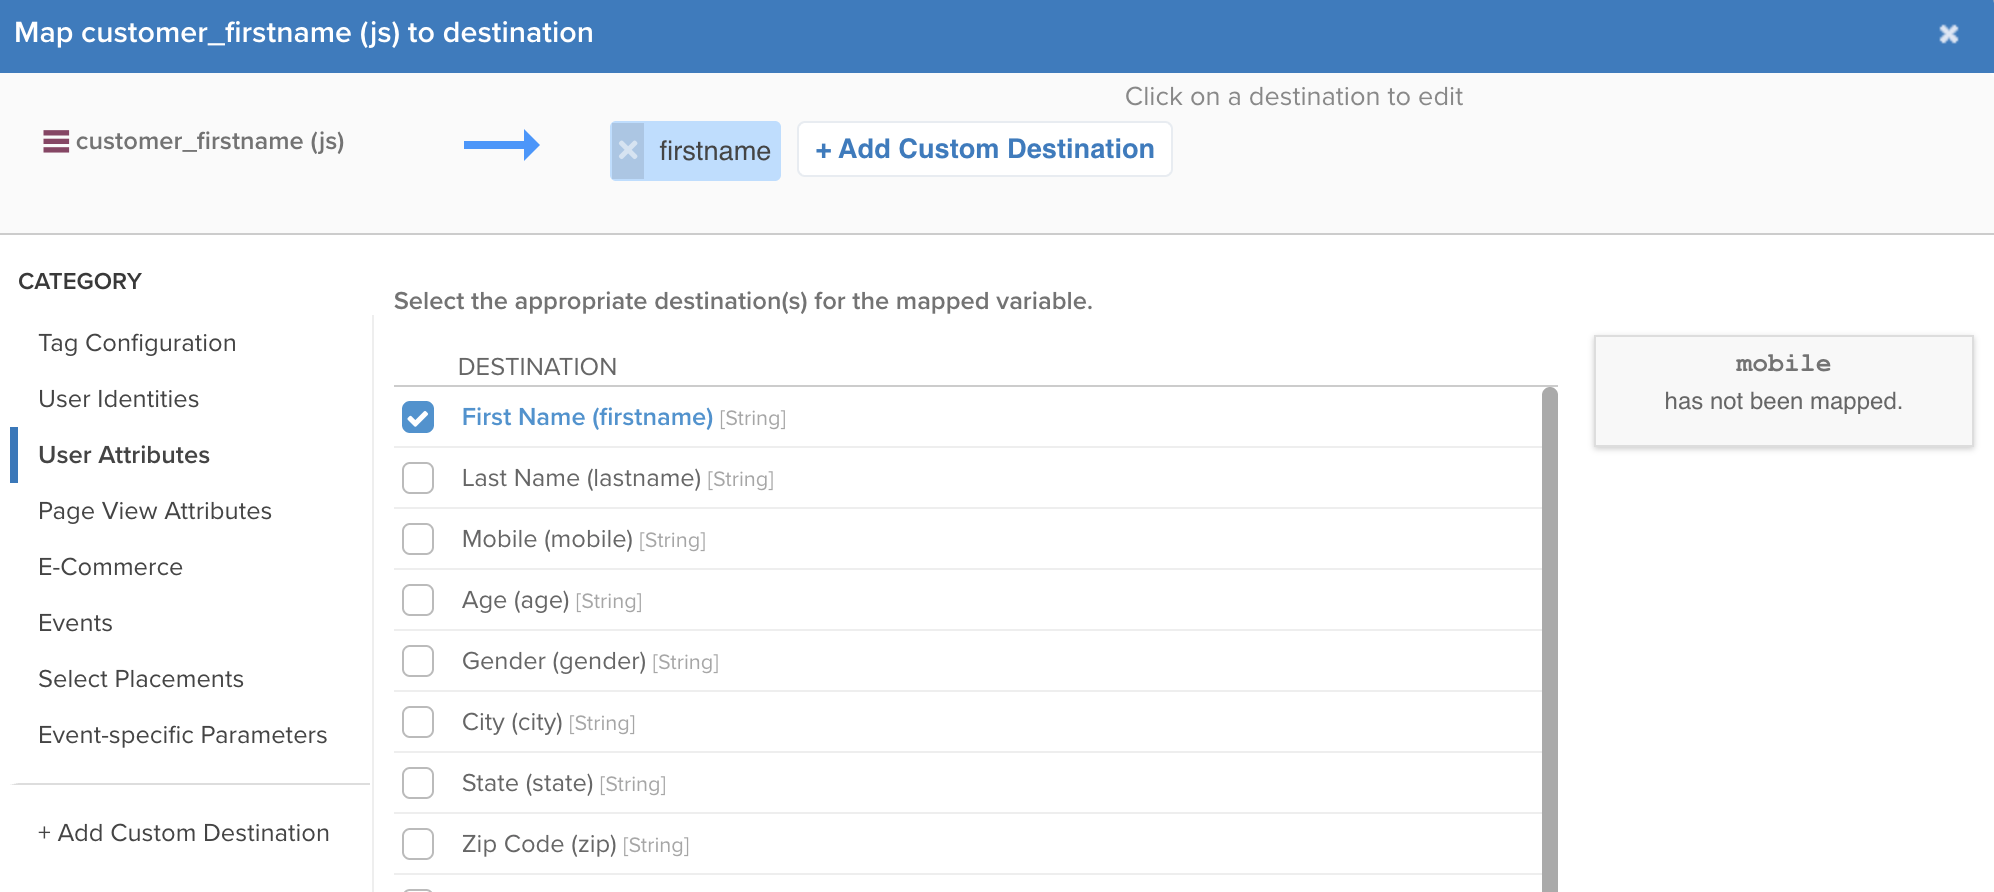
- User profile fields (e.g. first name) → use the User Attributes category
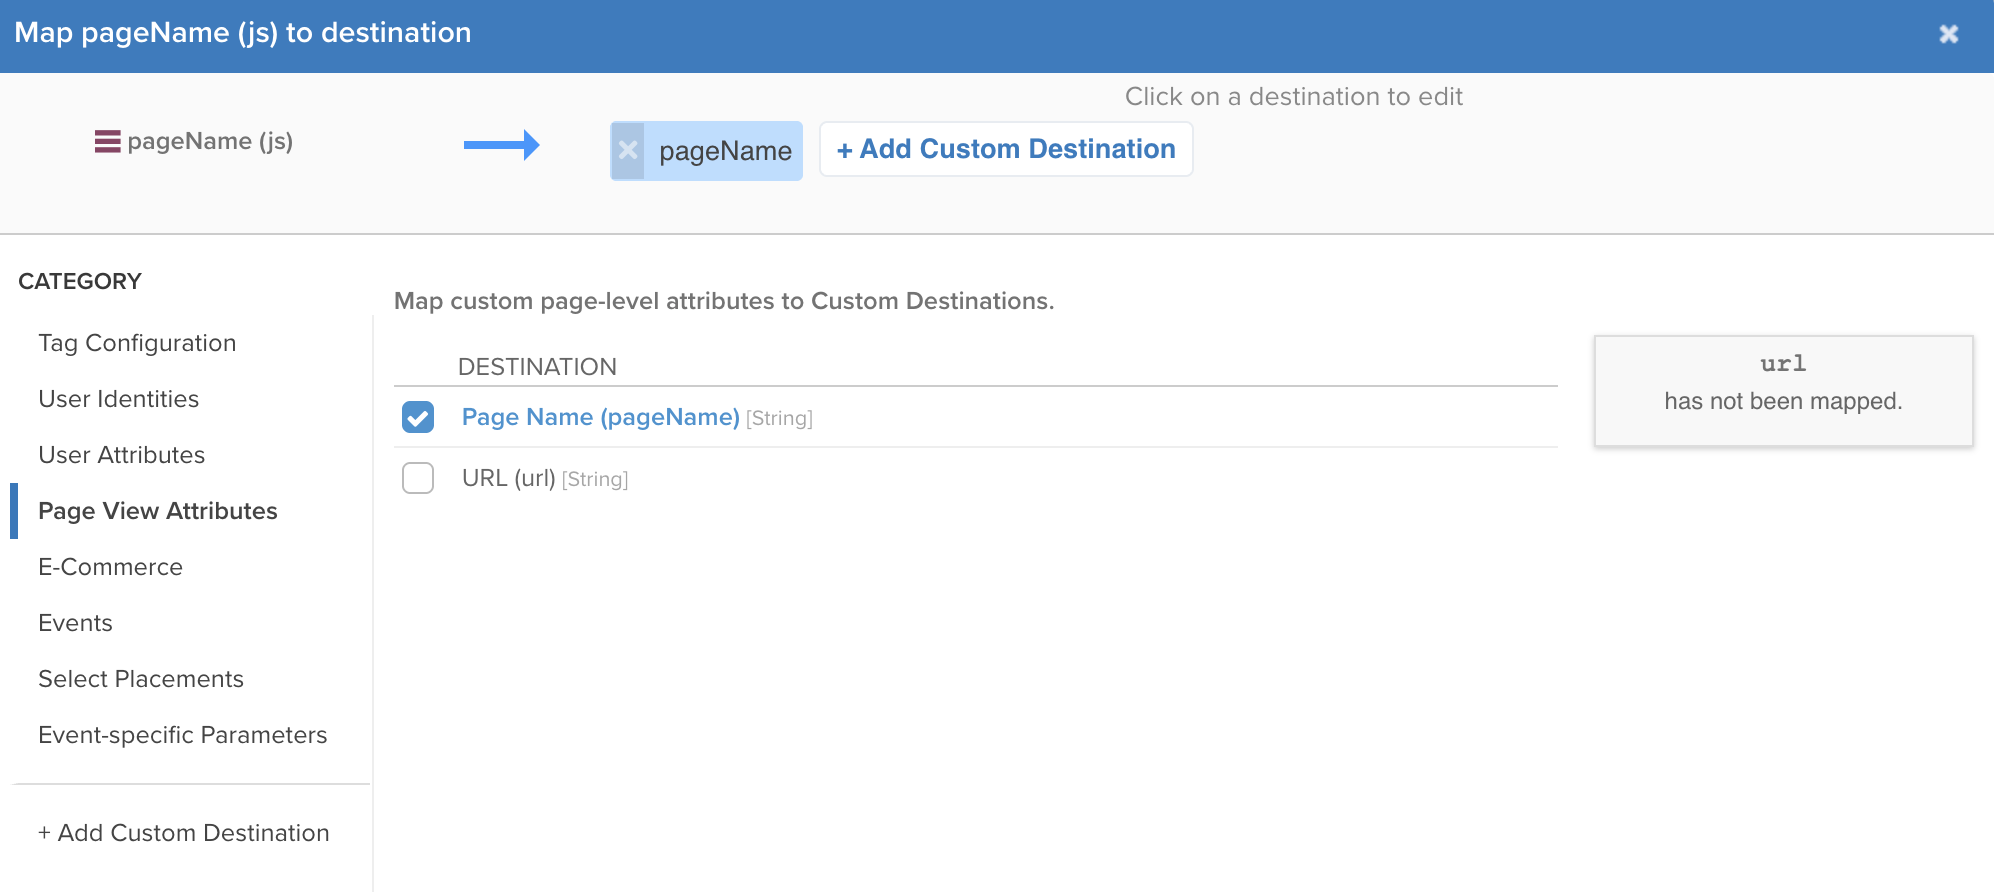
- Page level attributes (e.g. page name) → use the Page View Attributes category
tealium_event-based placement triggers → use the Select Placements category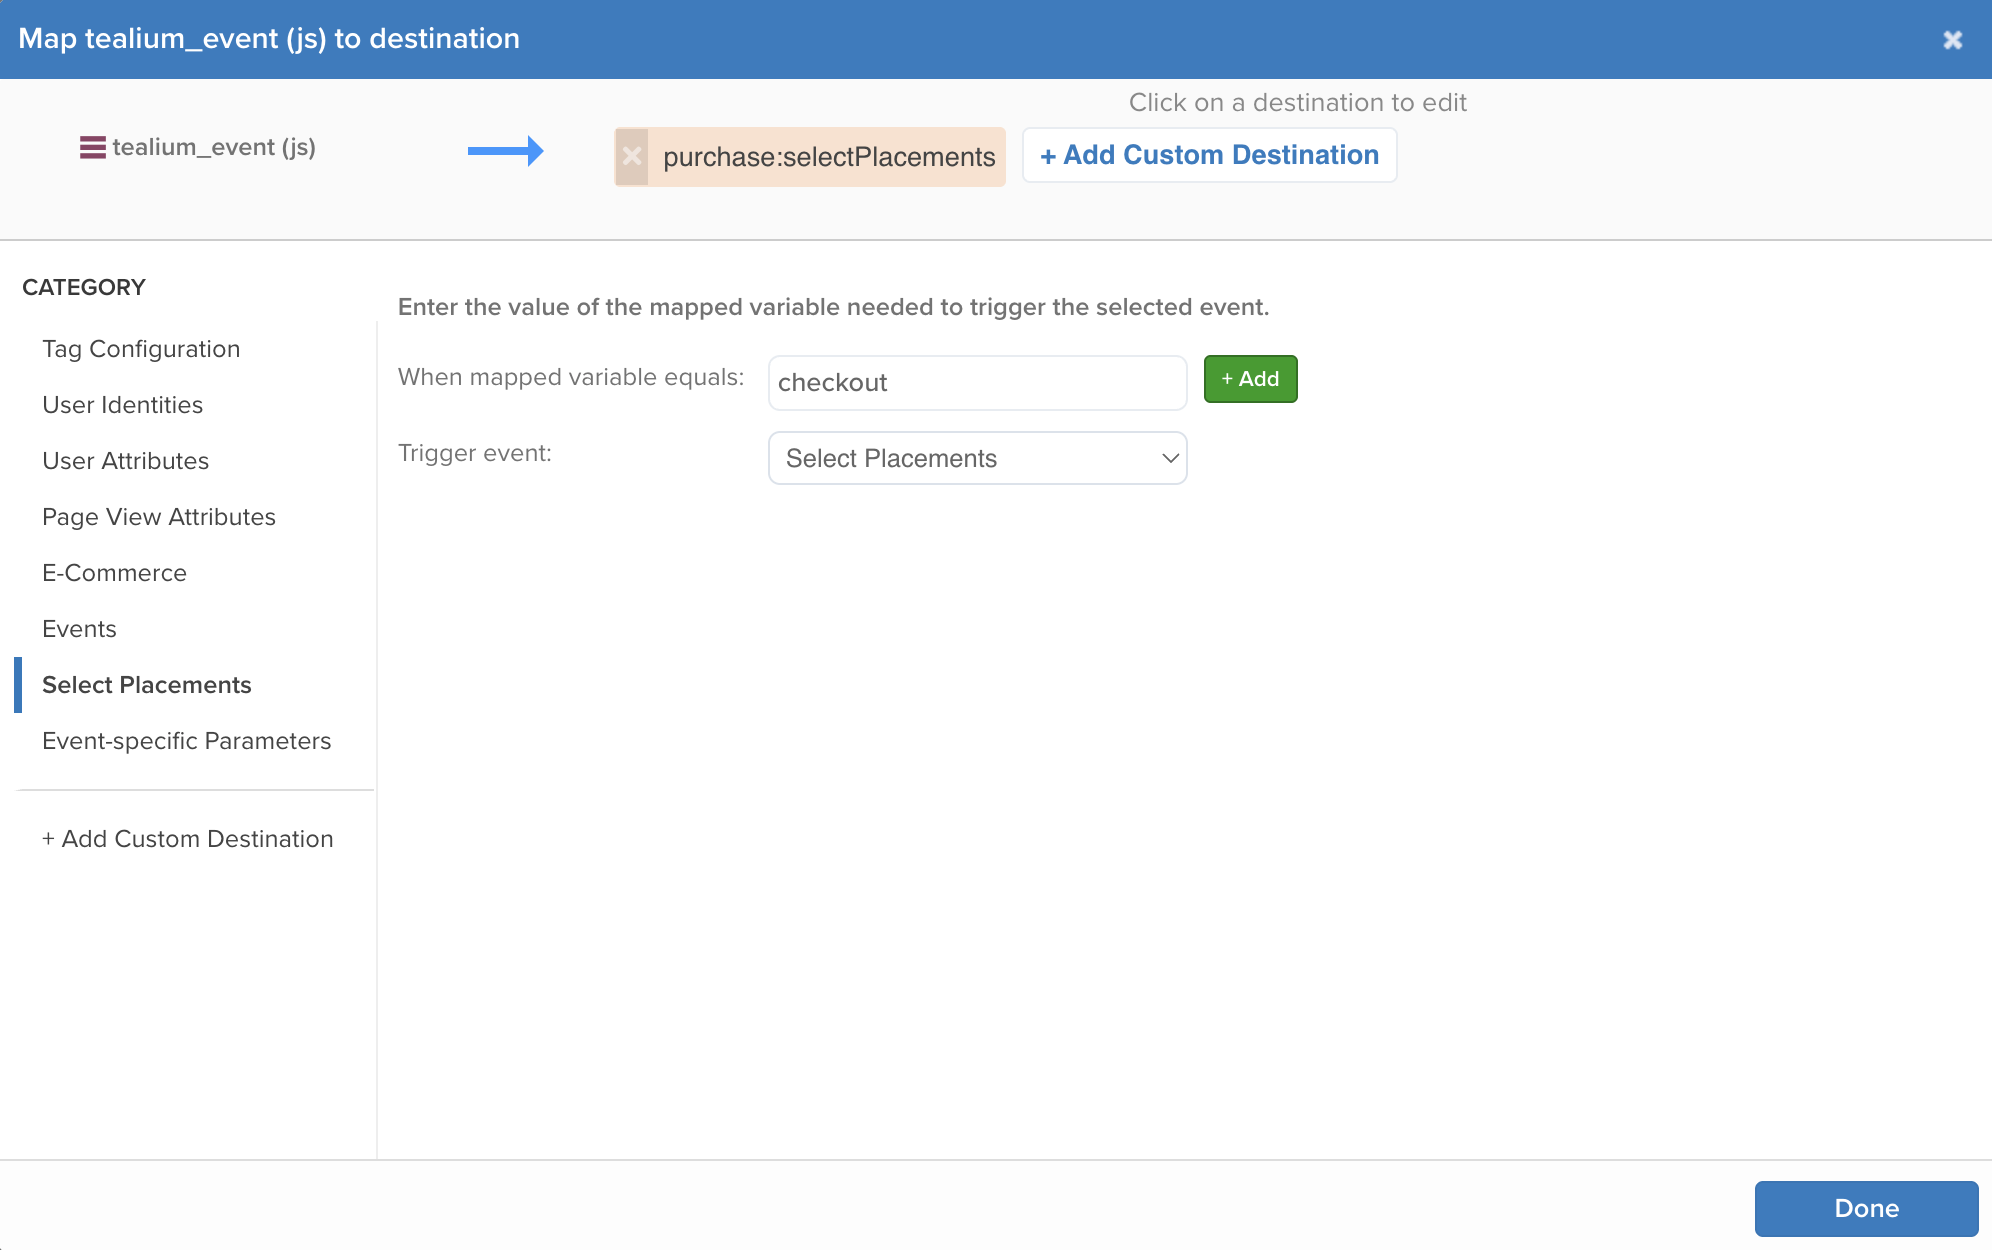
- For every
tealium_eventvalue you set on your website (for example,"purchase"), add a mapping that triggers a select placements event when that condition is true. - This ensures that when your site sends: utag.view({ tealium_event: "purchase" }), tealium triggers
selectPlacements
- For every
- Unique Identifiers (e.g. email) → use the User Identities category
- Map any attributes not listed under an existing category using a Custom destination (e.g. identifier)
Common Rokt Predefined AttributesDirect link to Common Rokt Predefined Attributes
| Attribute Key | Example Value | Category | Notes |
|---|---|---|---|
| john.doe@example.com | User Identities | The customer's email address. | |
| Hashed Email | a8b1a93c...7890abcdef | User Identities | SHA-256 hash of the customer's email address. |
| First Name | John | User | The customer's first name. |
| Last Name | Doe | User | The customer's last name. |
| Mobile | 3125551515 | User | Phone numbers can be formatted either as 1112345678 or +1 (222) 345-6789. |
| Age | 33 | User | The customer's age. |
| Gender | M | User | The customer's gender. For example, M, Male, F, or Female. |
| City | Brooklyn | User | The customer's city. |
| State | NY | User | The customer's state or province. |
| ZIP Code | 11201 | User | The customer's ZIP or postal code. |
| Date of Birth | 19900717 | User | Date of birth. Formatted as yyyymmdd. |
| Title | Mr | User | The customer's title. For example, Mr, Mrs, Ms, Dr. |
| Language | en | User | Language associated with the customer or purchase. |
| Amount | 20.00 | E-commerce | The total transaction amount. |
| Confirmation Number | 123456789 | E-commerce | The order confirmation or transaction reference number. |
| Page Name | Confirmation | Page View | The name of the current page. |
| URL | https://www.example.com/confirmation | Page View | The URL of the current page. |
Track Custom EventsDirect link to Track Custom Events
You can define and track custom events by mapping a custom UDO variable to an existing Rokt custom event type. The supported custom event types are:
NavigationLocationSearchTransactionUserContentUserPreferenceSocialOther
To track custom events:
- Add custom event variables to your web page code on every page where a custom event should be triggered
- Add your custom event variable as a UDO variable in Tealium
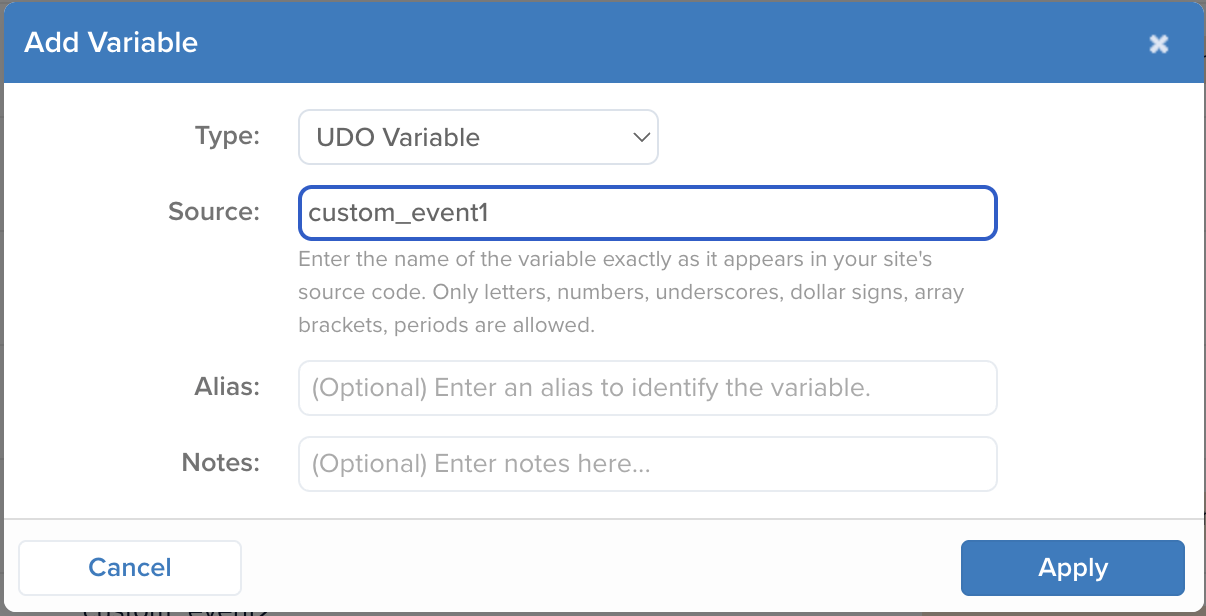
- Map that UDO variable's value to the event you want to trigger:
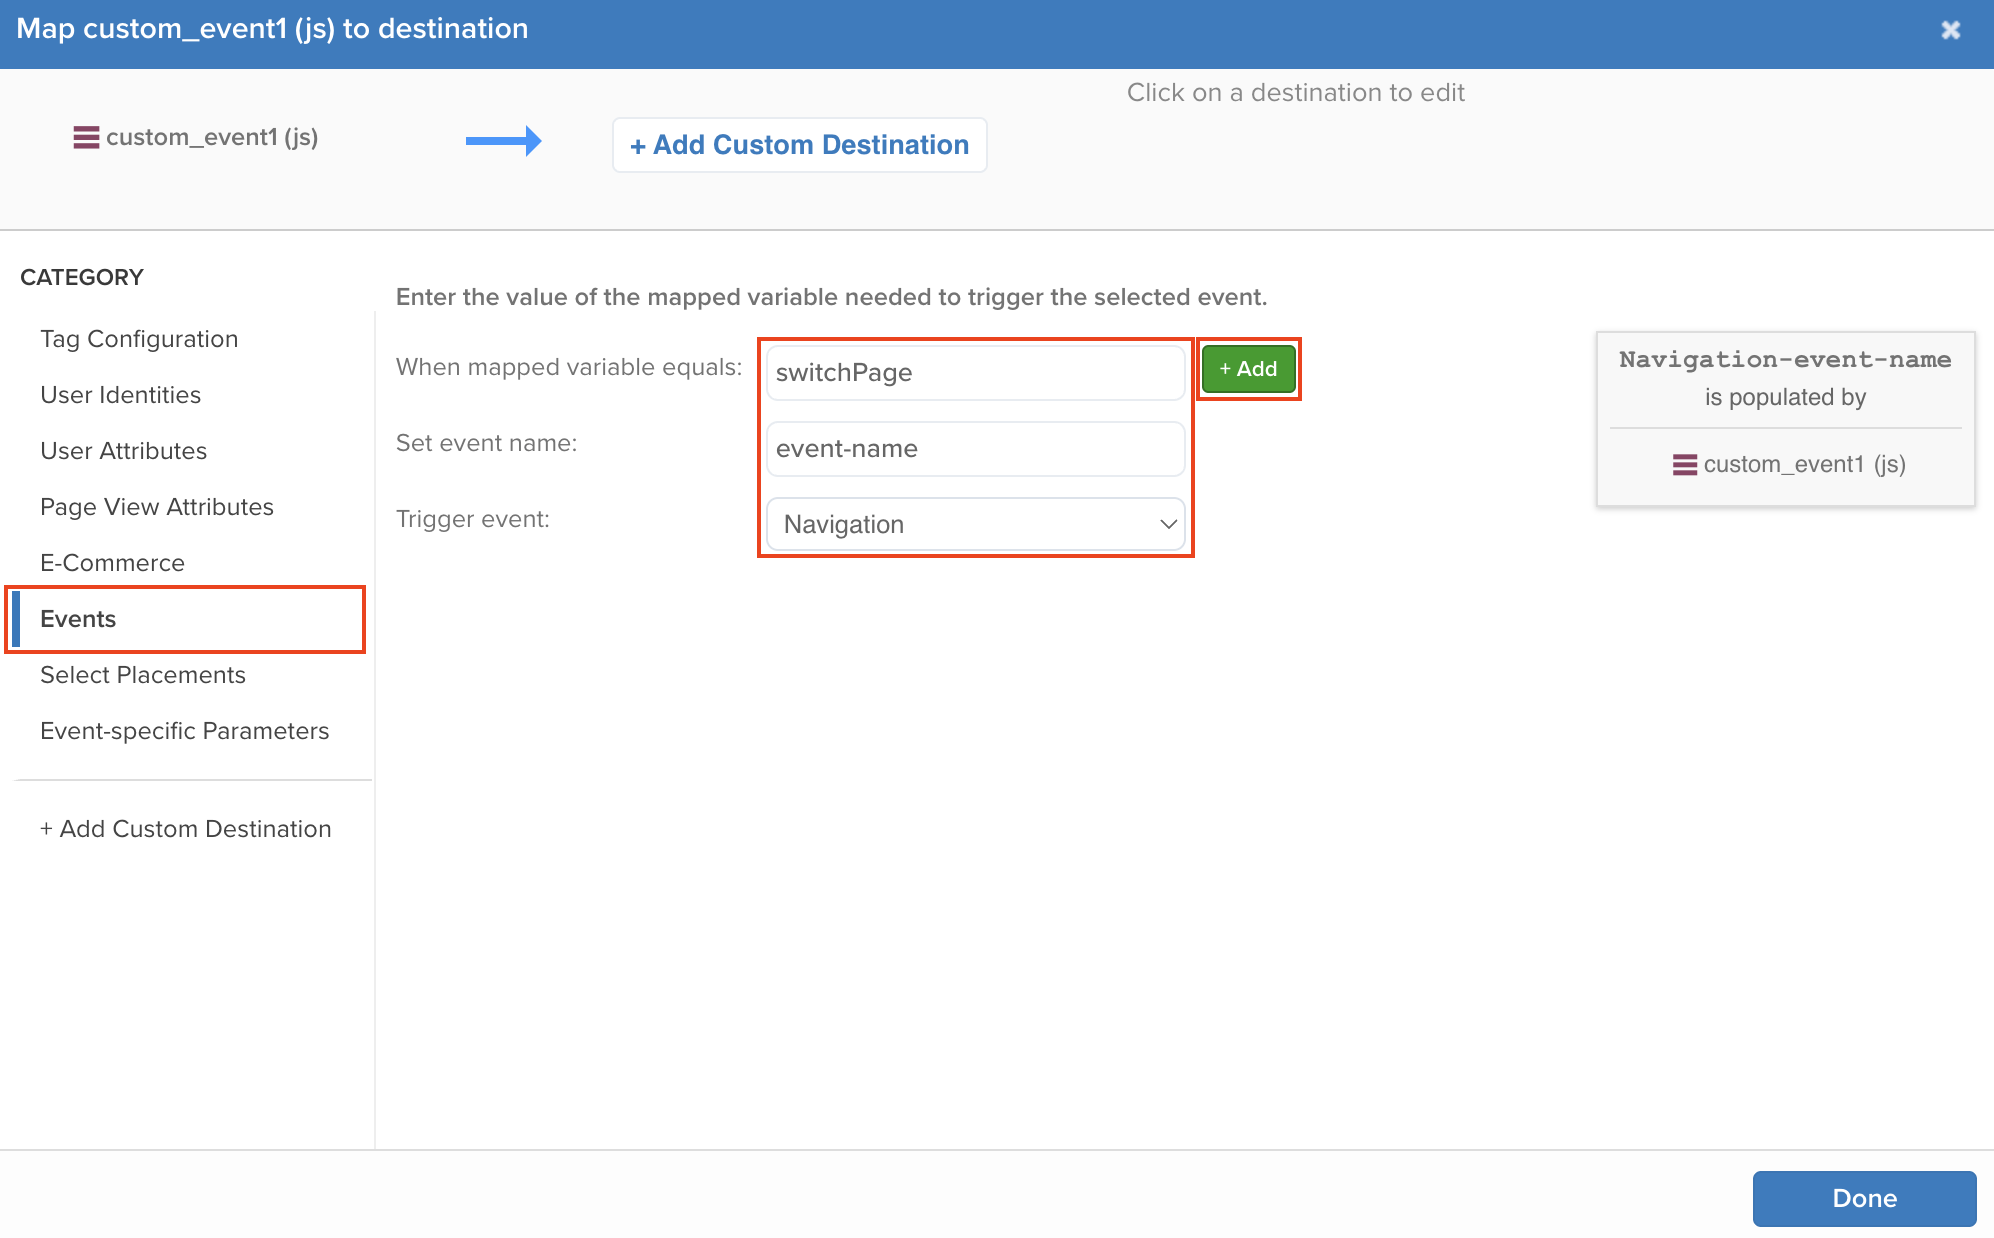
- Select Events as the Category
- Next to When mapped variable equals, enter the exact value set in your web page code
- Choose any event name
- Select the event you want to trigger on this page
Example of Mapped Variables SetupDirect link to Example of Mapped Variables Setup