Import conversions manually
Rokt supports importing conversion events manually via the conversion upload tool in One Platform. The conversion upload tool accepts conversion events via CSV for the purpose of attribution and reporting.
RequirementsDirect link to Requirements
Files sent to the conversion upload tool must be in CSV format. At least one of the following personal identifiers must be included for each event:
- Email—customer's email address
- Country and mobile phone number (separate fields)
- Passback conversion tracking ID—a tracking ID provided by Rokt after a customer engages with an offer. Engage with your account team to receive this tracking ID.
We require one of these identifiers to be present so that we can accurately match these conversions to Rokt campaign events.
Other data fieldsDirect link to Other data fields
The conversion import tool also supports a number of additional fields, along with an option to add custom data fields. These fields provide Rokt additional information about the conversion event and can be used in measurement and reporting use cases.
Fields supported by default include:
- Date/time—time of conversion.
- Amount—total conversion amount.
- Currency—currency reported in the amount field.
- Transaction reference—confirmation reference ID for the conversion; intended to be a unique ID for the conversion.
- Conversion type—used to differentiate between different types of conversion events (e.g., hotel_booking, rental_car_booking). The conversion type may optionally be used in measurement group configurations to ensure conversions events are mapped to the correct campaigns.
The custom segment field can be used to provide additional data outside of the default fields.
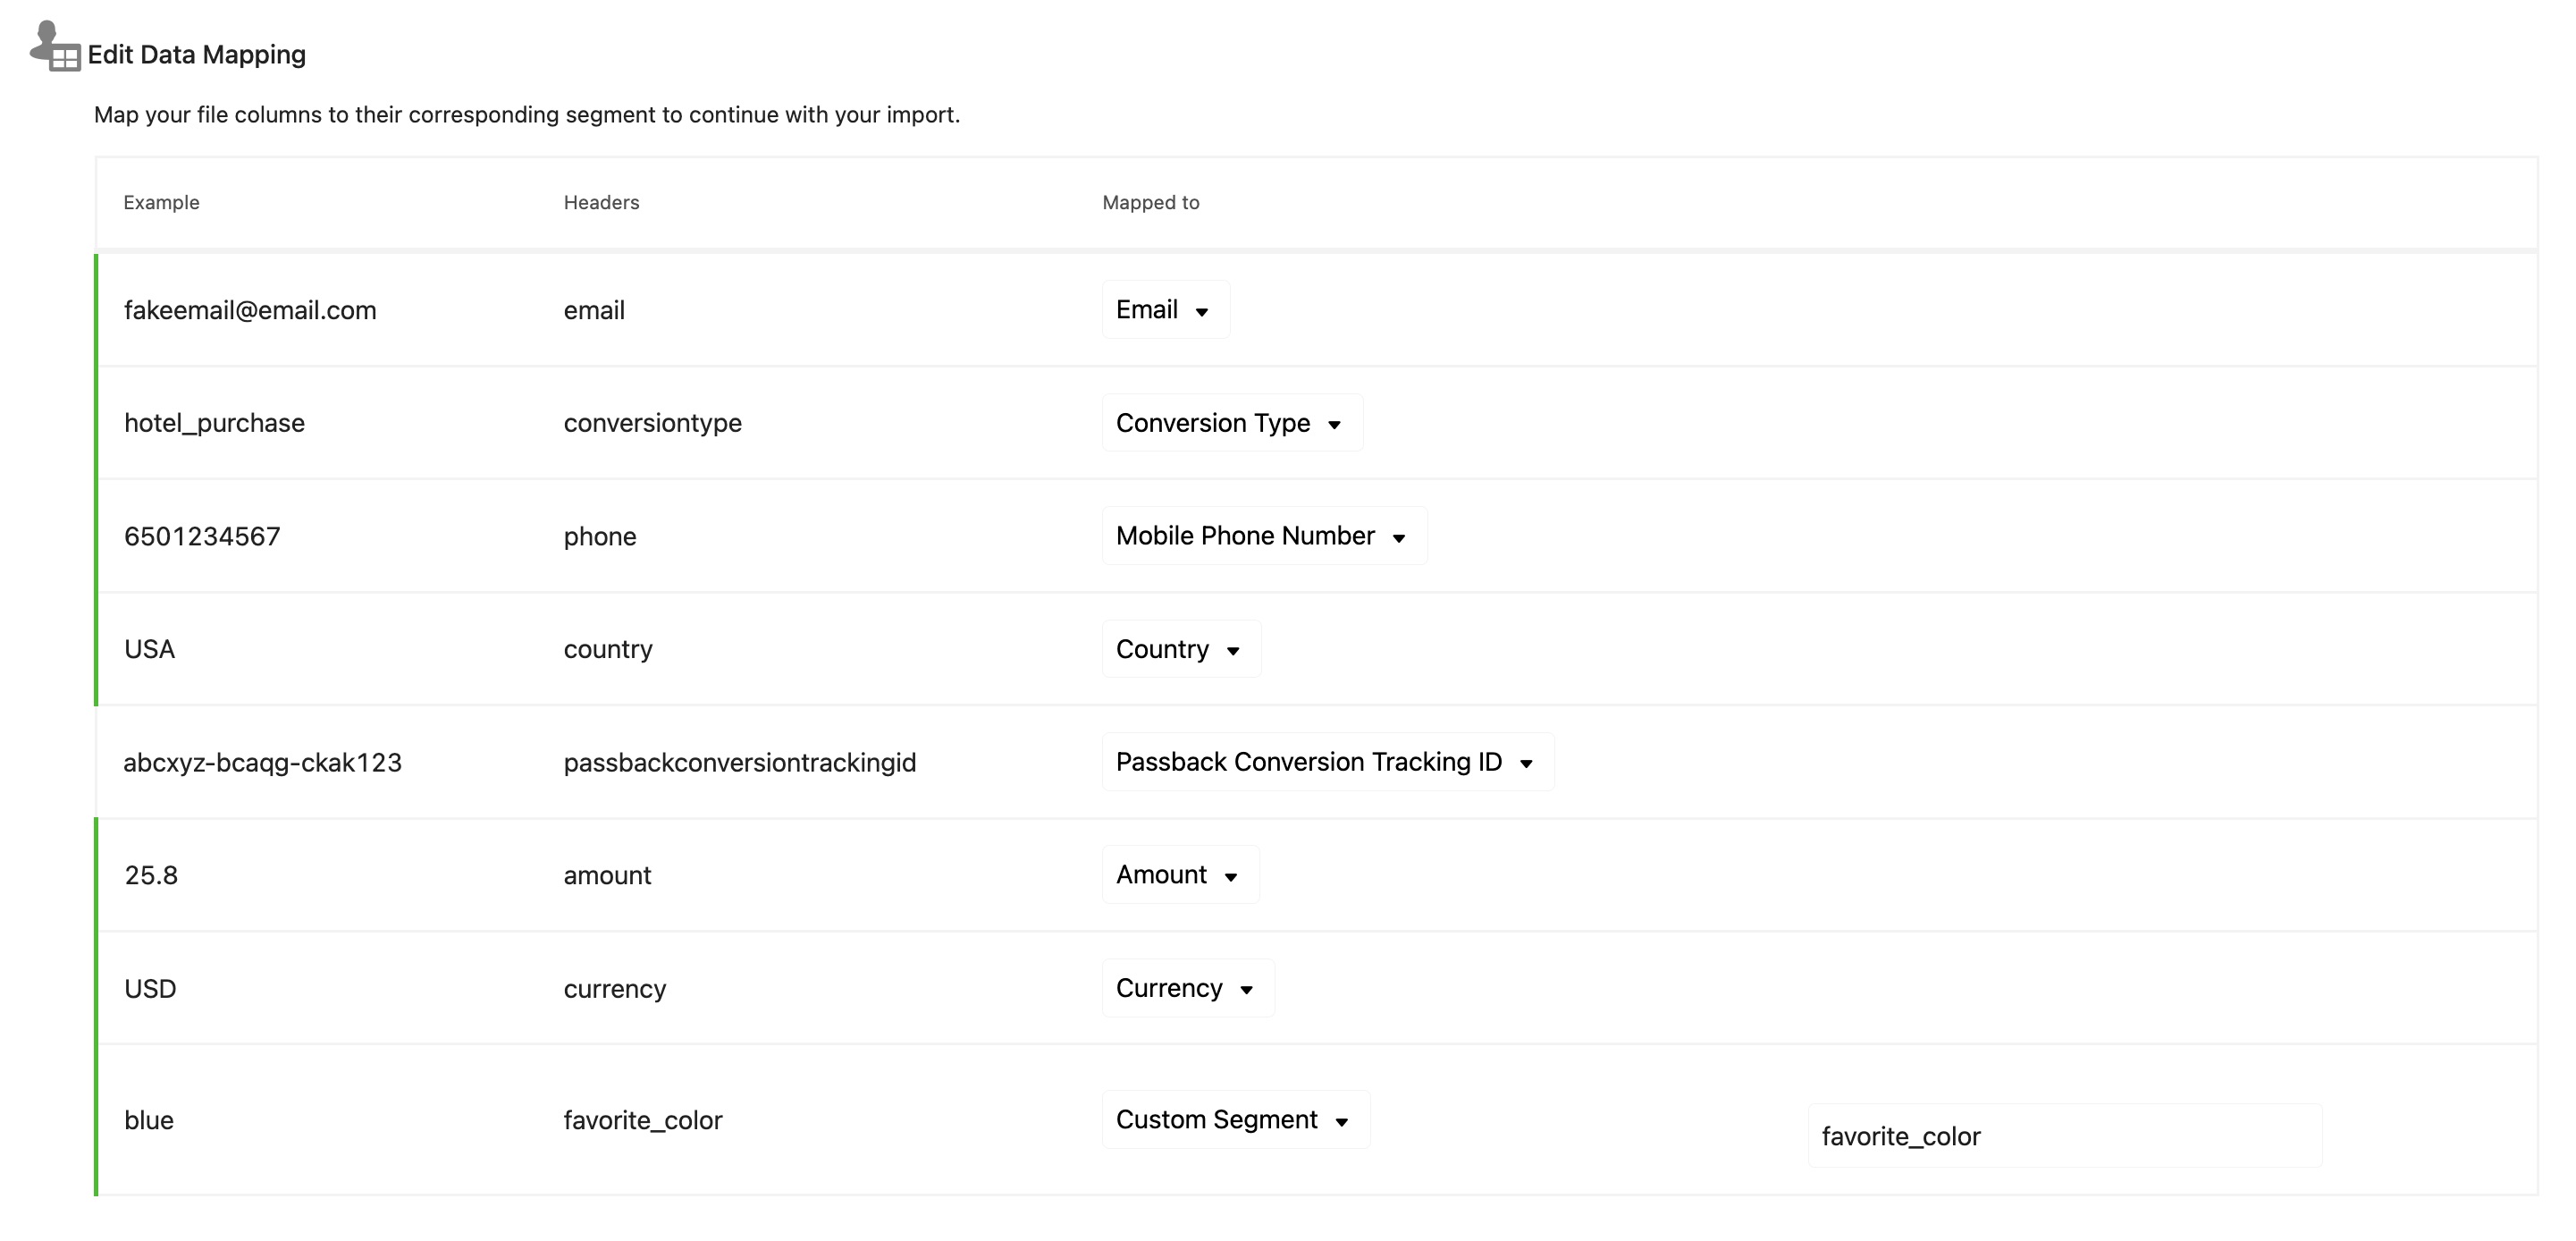
Importing conversionsDirect link to Importing conversions
-
Log in to One Platform.
-
From the left navigation, go to Customer Data > Conversions.
-
Click Import in the top right corner.
-
Select your prepared file and click Next.
-
Map the columns names in your uploaded file to the correct field names in the Rokt system. You see a green success indicator if the example data value is valid for the particular input.
-
If you attempt to import an invalid field, you will see an error. You can't proceed until all errors are resolved.

-
If needed, you can mark a field as do not import to proceed to the next step.

-
Review your data mapping. When you are ready, click Import.