Export transactions
To begin the API setup, Rokt requires a few pieces of information.
The following details should be sent to your account manager:
- Full API documentation on how to create subscribers in your system.
- Technical contact details to help troubleshoot setup queries.
- Endpoints for any relevant environments (production, testing, staging, etc.).
- Method (e.g., GET, POST, PUT)
- Authentication (if any)
- Request body encoding (e.g., JSON, XML, URL Encoded)
- Required API parameters (Learn about what attributes Rokt can share.)
- Expected API responses to help Rokt accurately categorize leads delivered successfully versus those that were rejected.
Set up the API connection
-
Log-on to my.rokt.com
-
Navigate to your account.
-
Click Integrations.
-
Click Connections.
-
Click Add connection.
-
Under Transactions, select API.
-
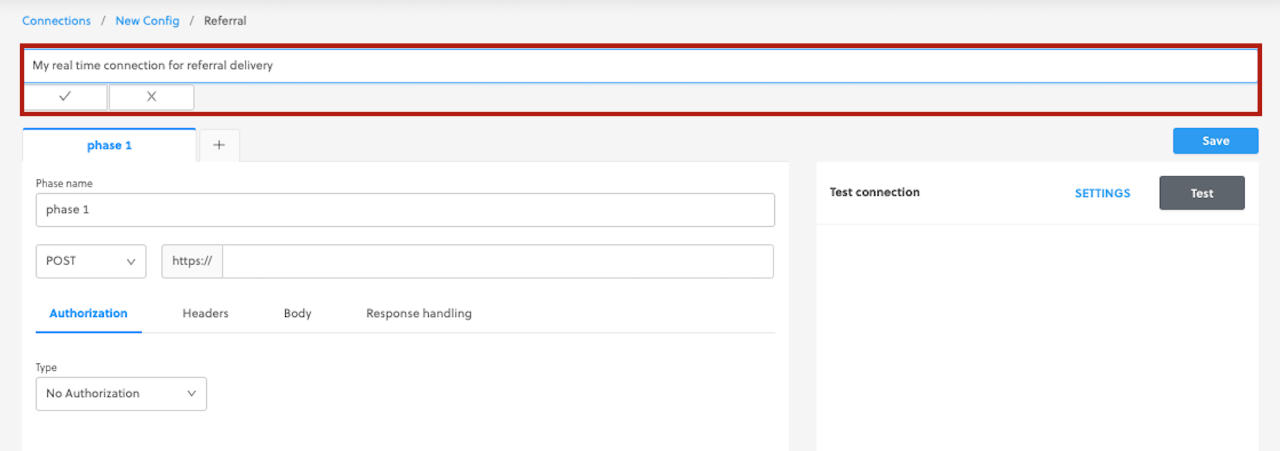
Give your connection a name.
-
Enter the endpoint for your connection.

-
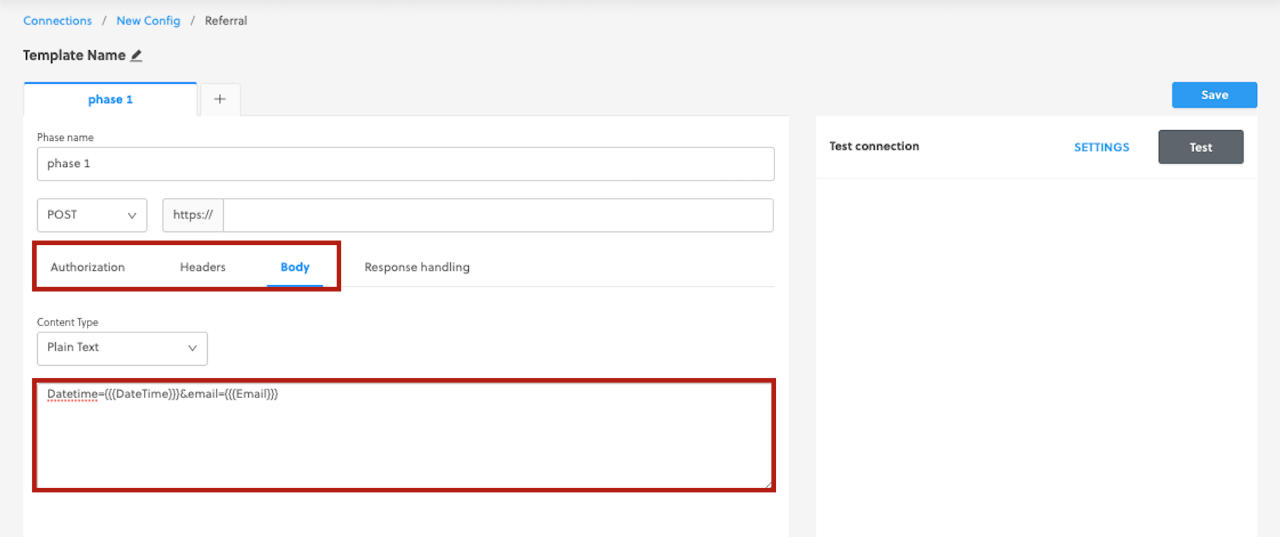
Enter all required information under Authorization, Headers, and Body.
-
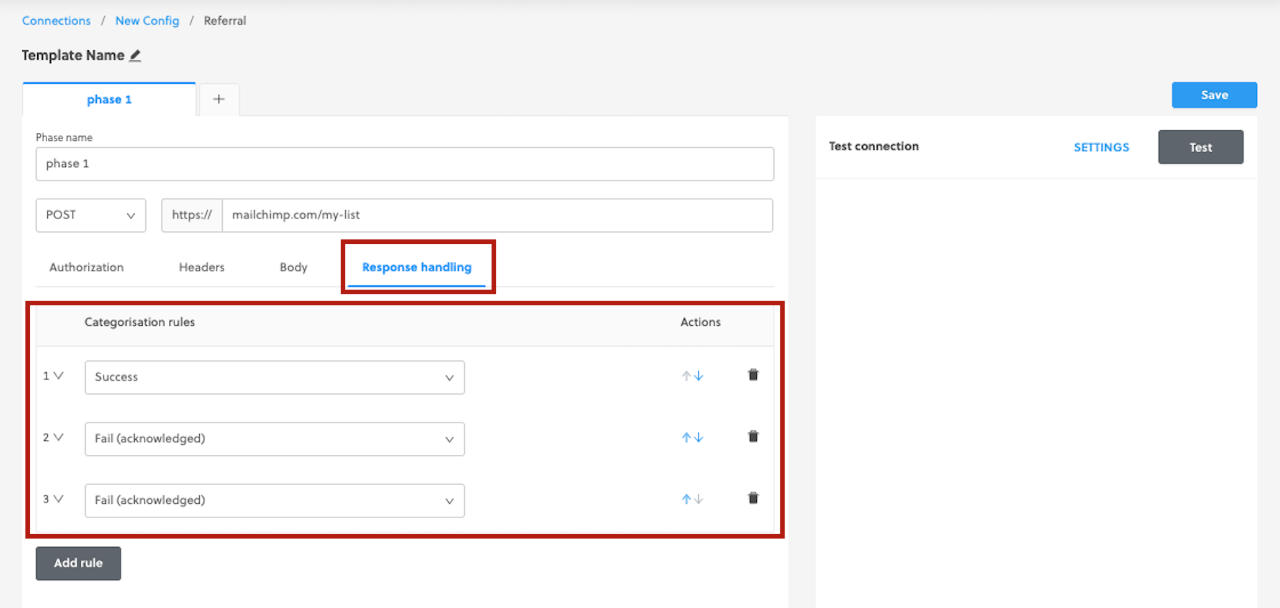
Enter all of your Response handling rules.
-
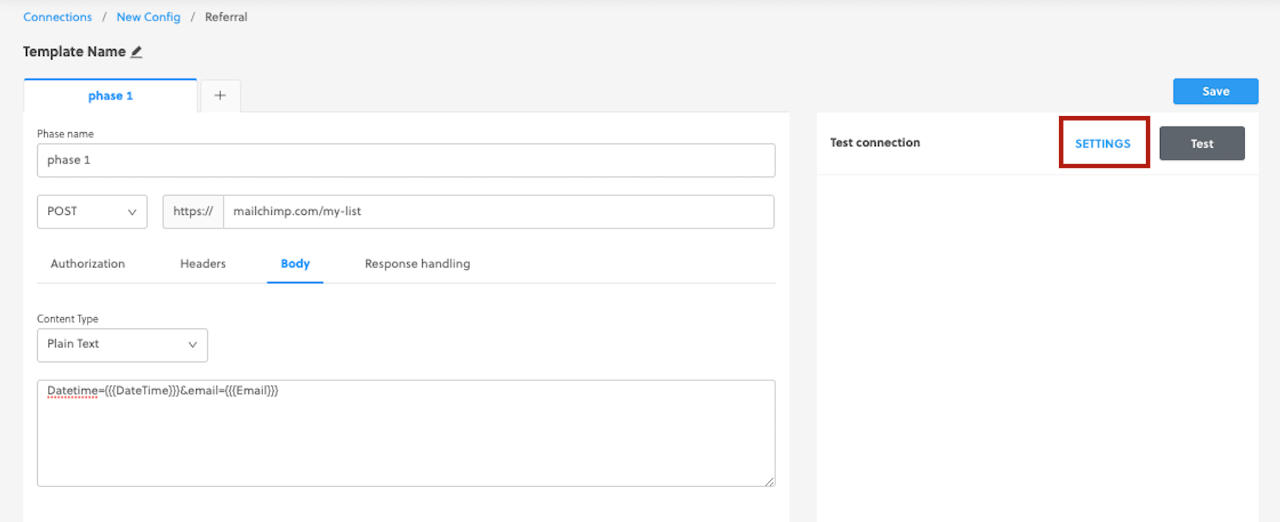
Once your API connection is set up (endpoint, authorization, headers, body, and response handling), click Settings.
-
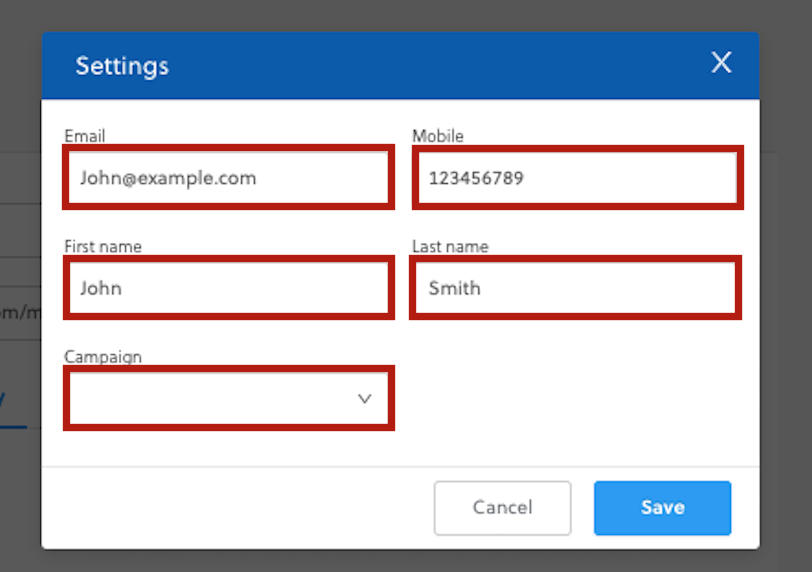
Edit the test settings according to your test criteria.
-
Click Save.
-
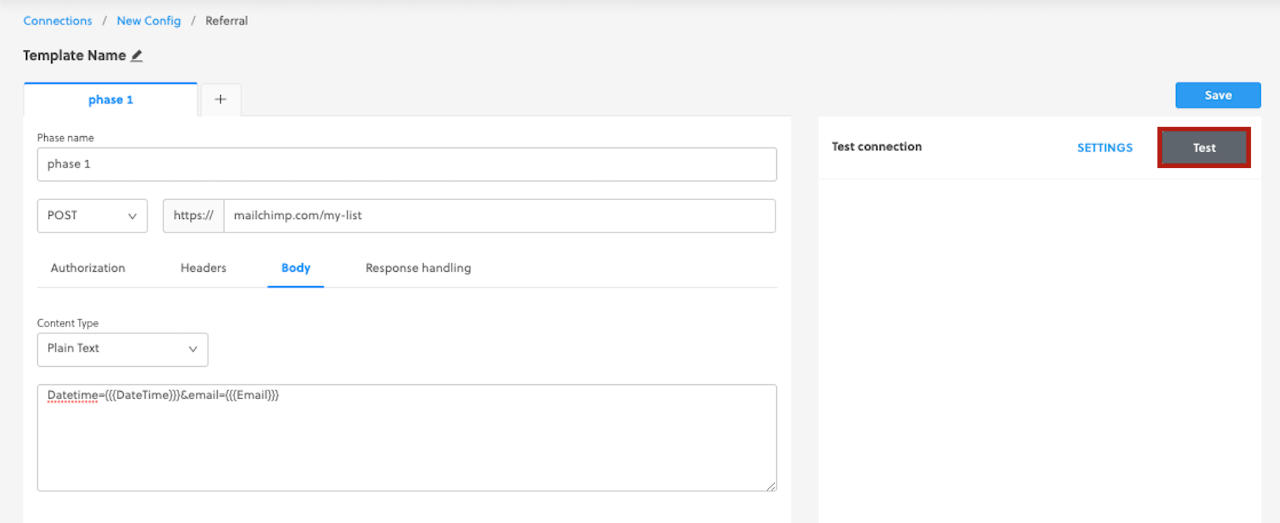
Click Test.
-
Check your test result.
-
Repeat tests until you've achieved your desired outcomes.
-
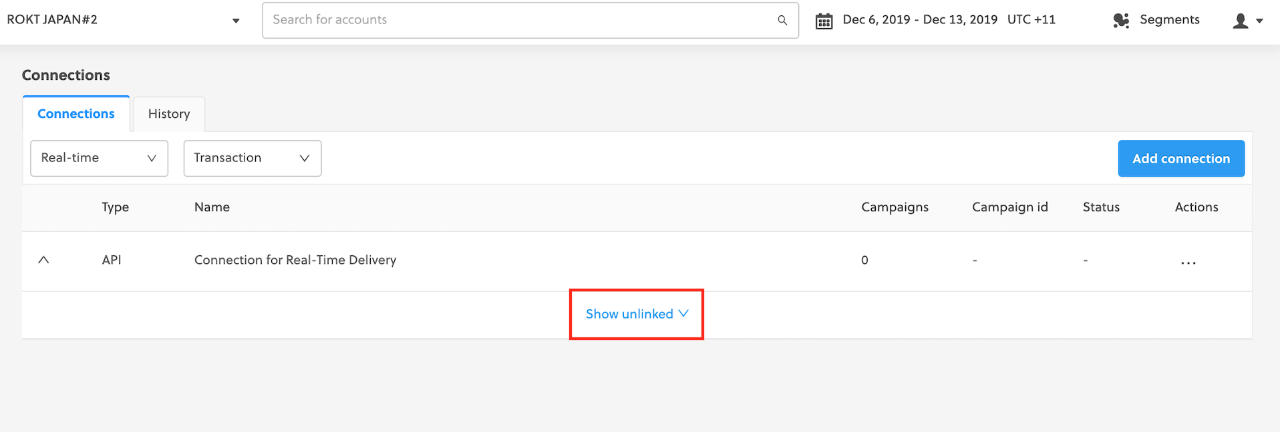
Link placements to your API connection
-
Log-on to my.rokt.com
-
Navigate to your account.
-
Click Integrations.
-
Click Connections.
-
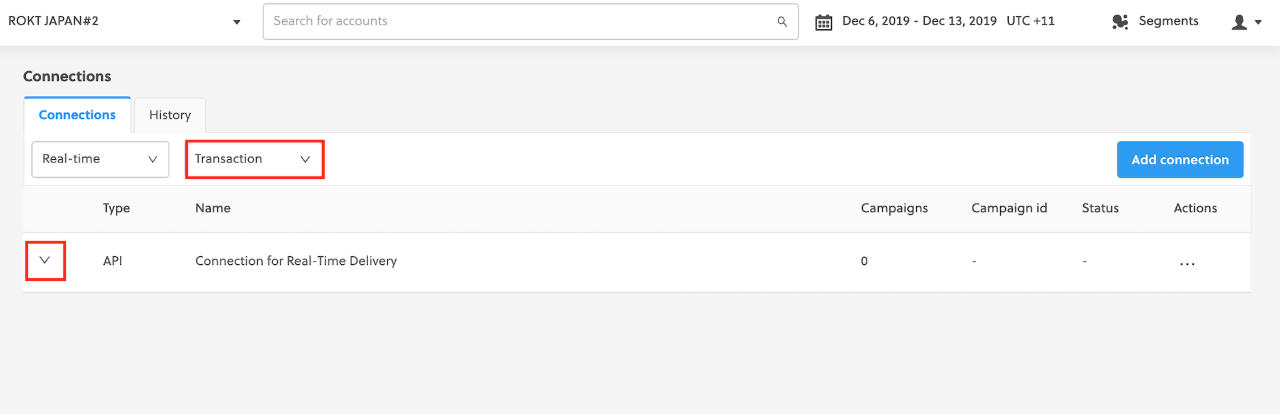
Select Real-time from the left drop-down menu and Transactions from the right drop-down menu.
-
Expand the connection that you want to link your placements to.
-
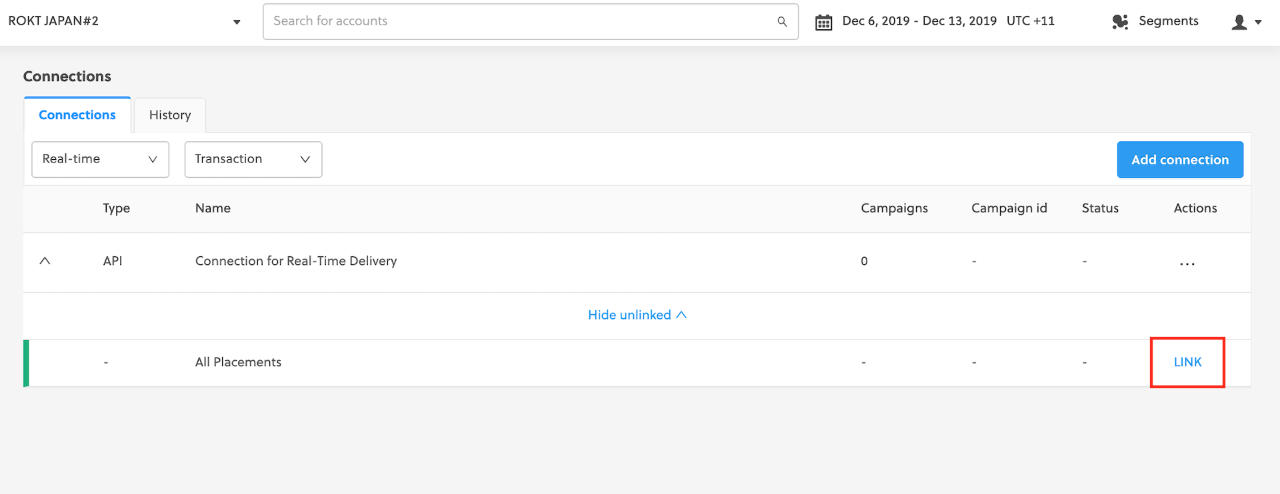
Click Show unlinked.
-
Click Link for All Placements.
-
All placements are now linked to your connection.
Unlink placements from your API connection
-
Log-on to my.rokt.com
-
Navigate to your account.
-
Click Integrations.
-
Click Connections.
-
elect Real-time from the left dropdown menu and Transactions from the right dropdown menu.
-
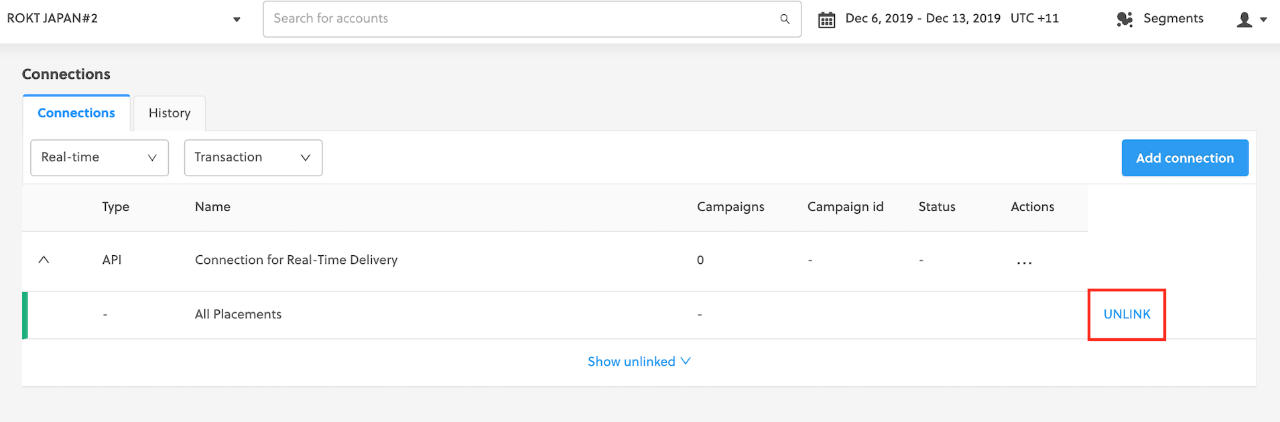
Expand the connection that you want to unlink your placements from.
-
Click Unlink to unlink all placements.
-
All placements are unlinked.
Scheduled deliveries
Establishing a connection from a host computer (e.g., your laptop) to a secure FTP server requires third-party client software. This tutorial suggests the popular and free client FileZilla which is available for Windows, Mac, and Linux operating systems.
- In your browser, navigate to https://filezilla-project.org/ and click Download FileZilla Client.
- Install FileZilla on your computer. If you already have FileZilla installed, ensure you are running the latest version.
- Reach out to your Rokt Account Manager to request access to the Rokt SFTP. Once you've been granted access, you should receive an email from Rokt with the subject "You've been granted access to Rokt's SFTP server."
- Download the attached file and unzip the encrypted file using the password provided in a second email "Email for password for file with instructions."
- The encrypted file you have just unzipped contains a
.pemfile which is your key file to access Rokt's SFTP folder.
The following steps are the same for Windows, Mac, and Linux operating systems and are based on the latest version of FileZilla.
- Open FileZilla and navigate to
File > Site Manager
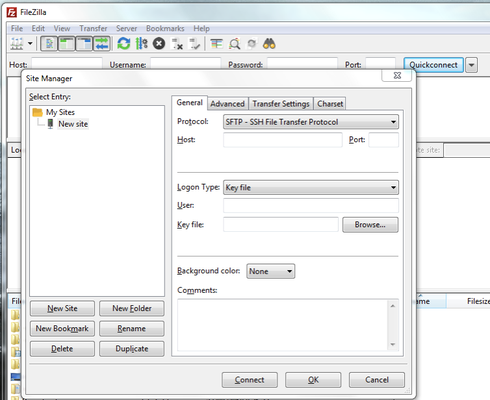
- On the left, click New Site and fill in the following:
-
Protocol: SFTP – SSH File Transfer Protocol
-
Host: ftp.rokt.com
-
Port: 22
-
Key file: Browse to your local key file (
.pem) and select it from your local drive (see image below).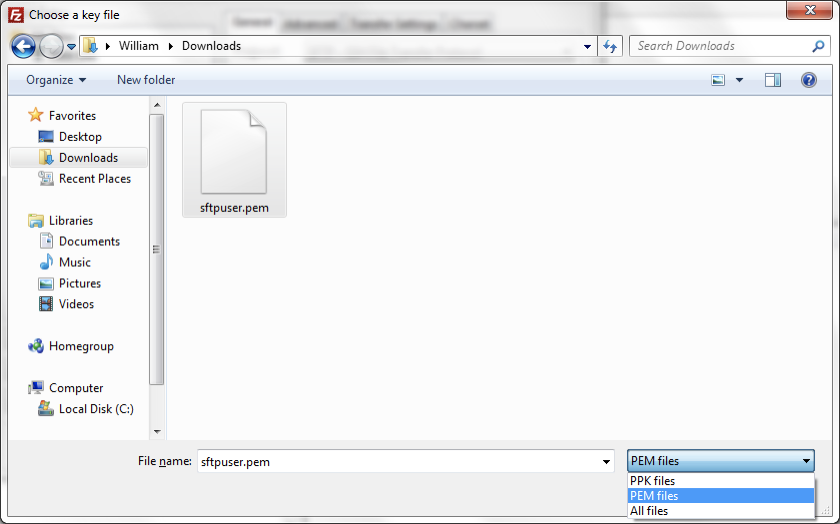
- Click Connect. You should be connected and able see your accessible folders to upload files.
Secure File Transfer Protocol (SFTP) connections automate your data deliveries and require little effort to set up. All you need are your SFTP credentials, and you’re ready to go!
After setting up an SFTP connection, you receive an email with a CSV file containing all of your transaction data at any frequency you prefer.
Rokt's SFTP connection
Before you begin
If you don't yet have access to the Rokt SFTP, reach out to your account manager.
Make sure you have the following information handy:
- Delivery frequency—how often and at what times transactions will be uploaded into the SFTP server.
- Required parameters—the most common being email, first name, last name, source, and state. For all available attributes, see Transaction metadata.
File path and requirements
Transaction data files are placed within the following file path:
| File path | Purpose |
|---|---|
| /downloads | Download transaction data provided by Rokt |
Transaction files are automatically deleted from this folder after 14 days.
Use your own FTP connection
-
Log-on to my.rokt.com
-
Navigate to your account.
-
Click Integrations.
-
Click Connections.
-
Click Add connection.
-
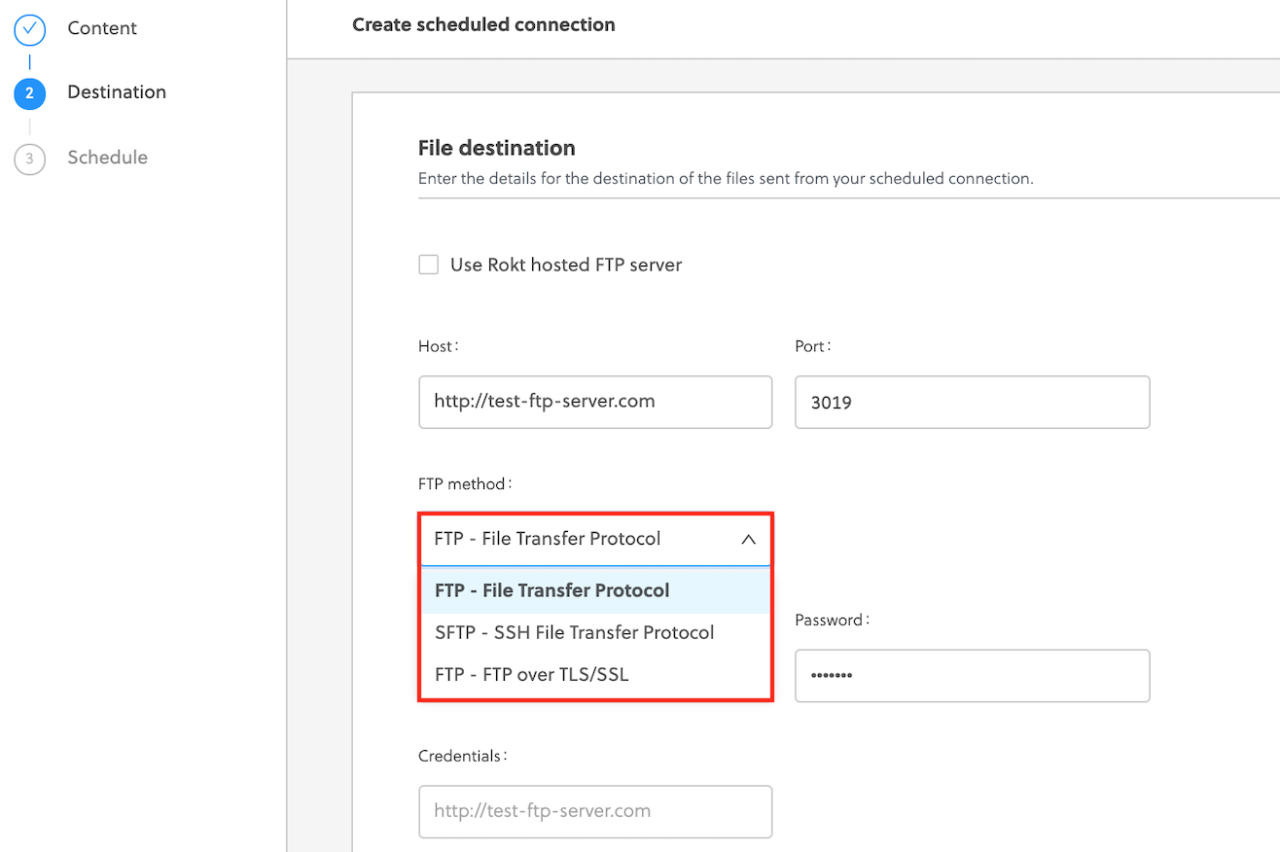
Under Transactions, click FTP.
-
Select a template for this connection, then give your connection a name.
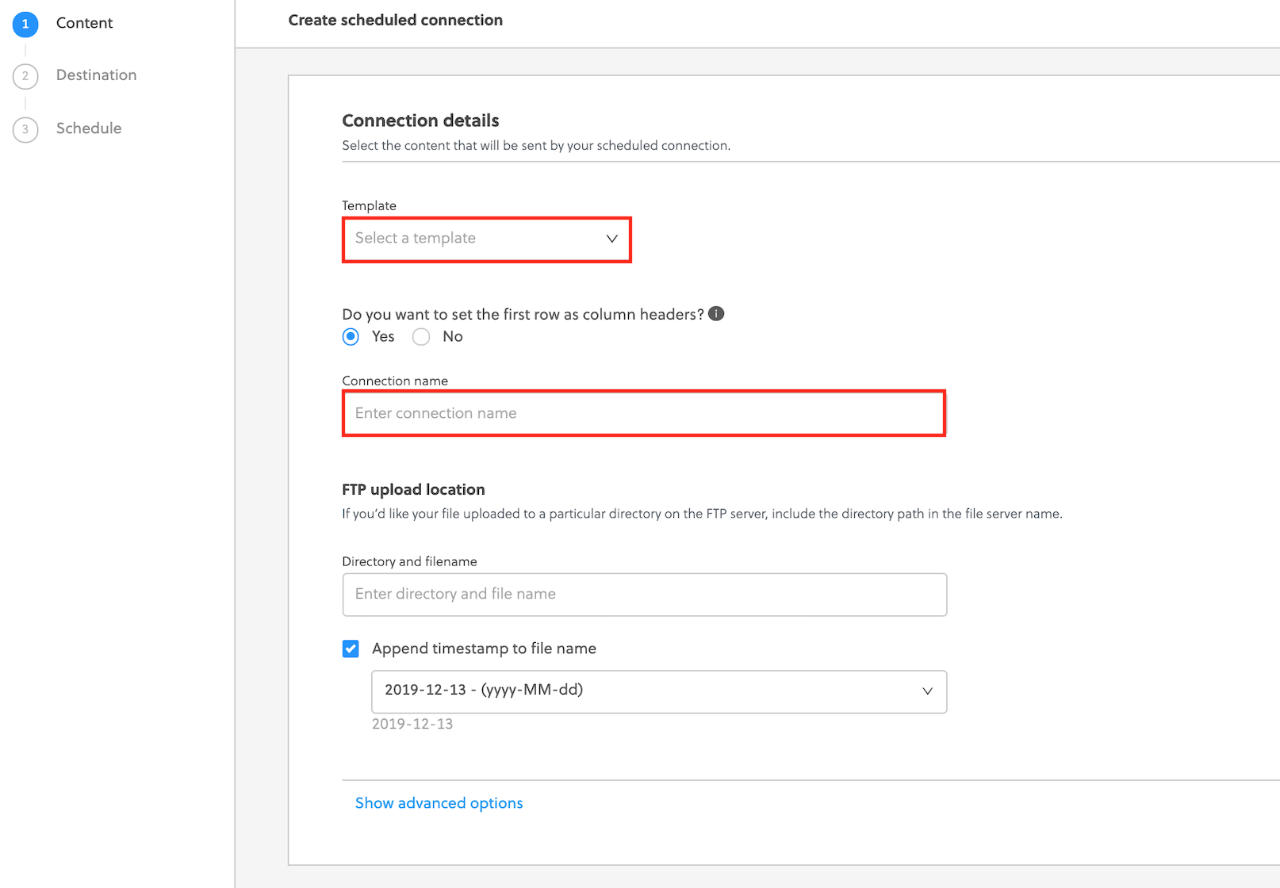
-
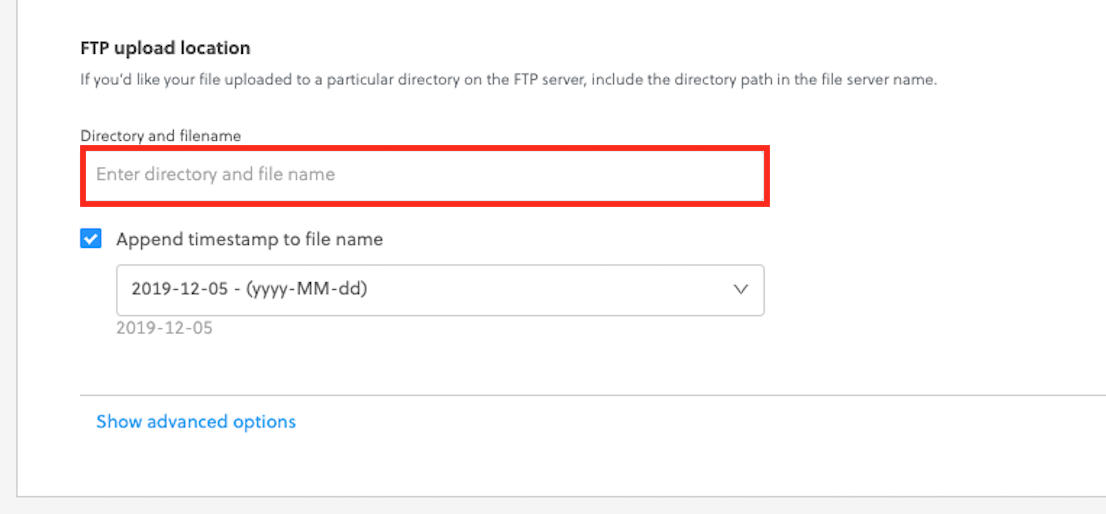
Enter the directory and file name.
-
Enter your FTP server host details and port.
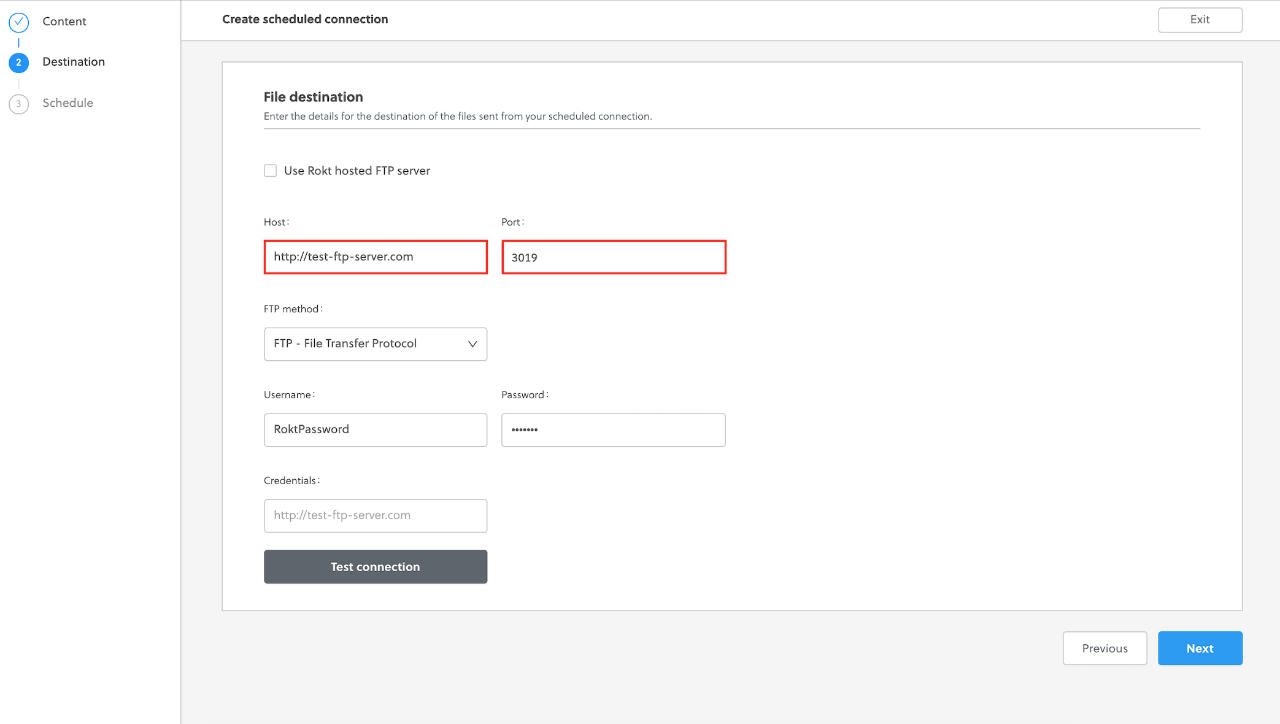
-
Select your desired FTP method.
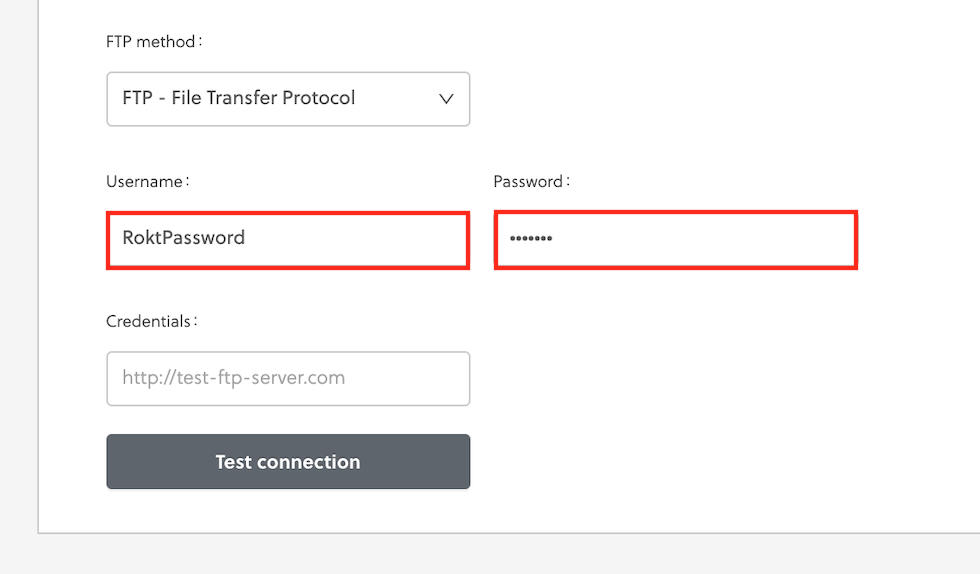
- Enter the username and password, or enter the username and upload your key file.
-
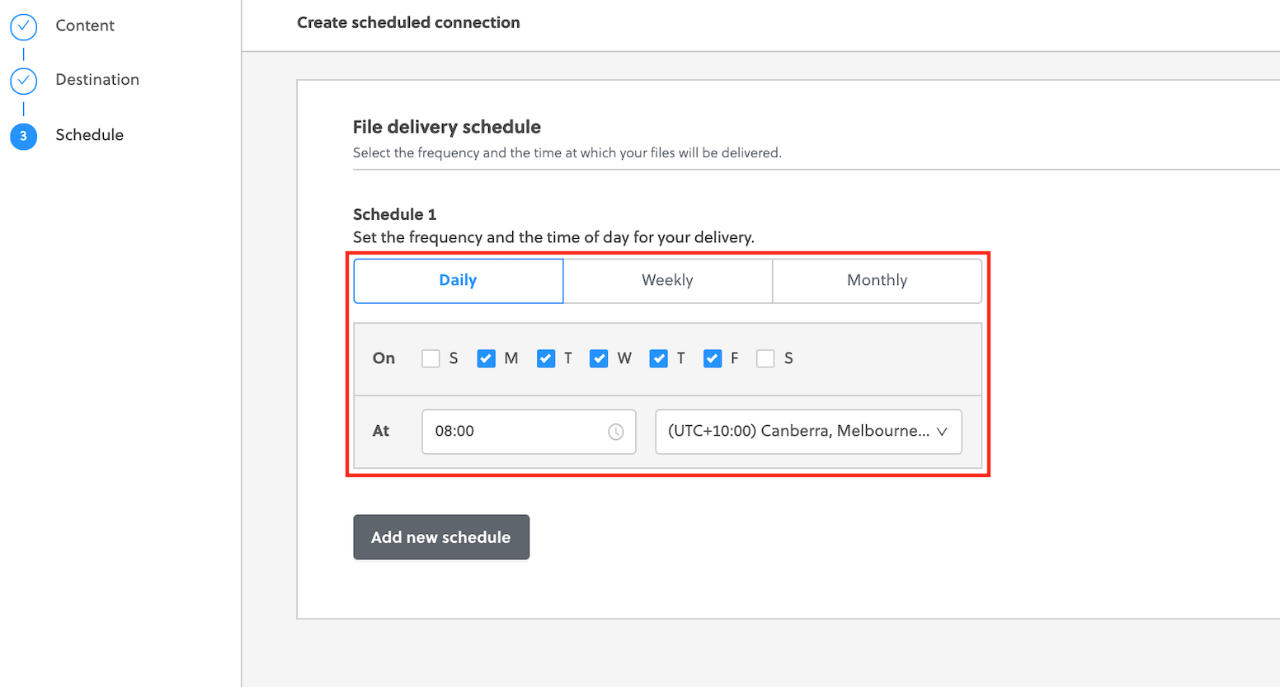
Select your schedule and click Save.
-
Your connection has been created.
Disable an FTP connection
-
Log-on to my.rokt.com
-
Navigate to your account.
-
Click Integrations.
-
Click Connections.
-
Select Scheduled from the left dropdown menu and Transactions from the right dropdown menu.

-
Click Pause.
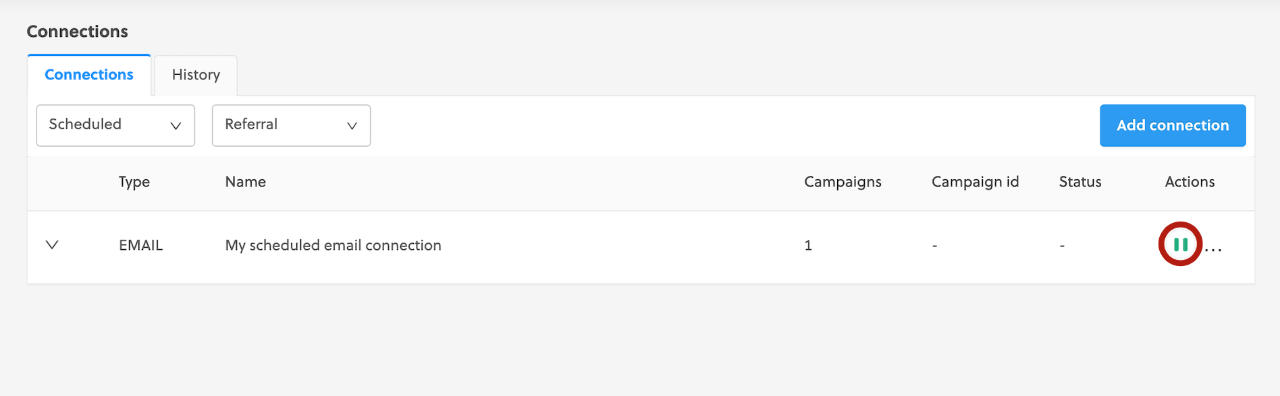
-
Your email connection is disabled.
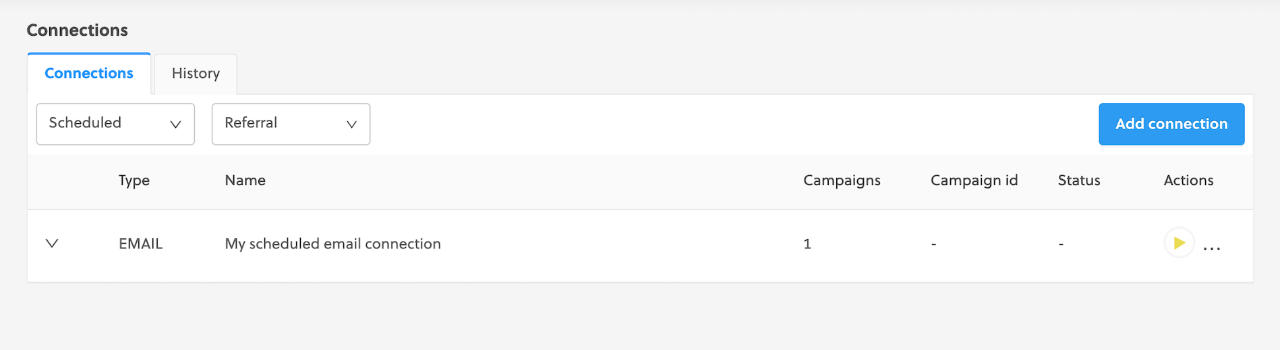
-
You can reverse these steps to enable your connection.
Manual export
However you like to have your transaction data delivered to you, all of your data is always accessible on the Rokt platform by going to Transactions > Customer Data > Export.
If something goes wrong, such as an API failure or an email being deleted, don’t worry! You can always log in to Rokt and download all of your transaction data at any time.
Rokt offers downloadable data in CSV format. To download:
-
Log-on to my.rokt.com
-
Navigate to your account.
-
Click Transactions.
-
Click Customer Data.
-
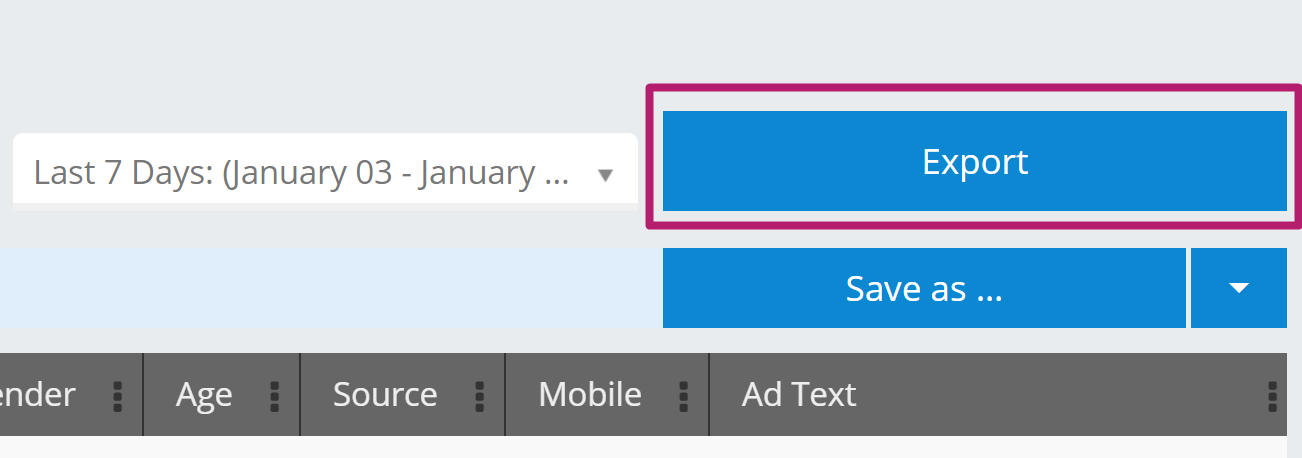
Choose the placement that you want to view transaction data for.
-
Adjust the date range in the top navigation bar.
-
Click Export.
-
Your export will immediately begin downloading to your computer. Depending on the number of records in the report, it may take a little while to complete. You should be able to open the CSV files into most common spreadsheet applications.
A maximum of 100,000 records can be downloaded at a time.
Customize export data fields
The export uses a default template containing the key fields for your transactions. In needed, you can customize what data you export by adding, removing, and reordering the columns.
-
Log-on to my.rokt.com
-
Navigate to your account.
-
Click Transactions.
-
Click Customer Data.
-
From the Template dropdown, select Create new template.
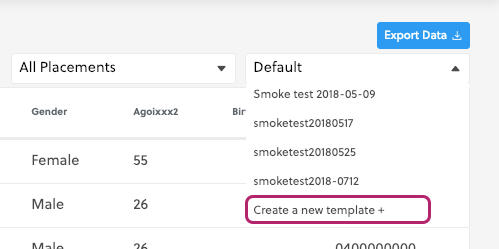
-
On the screen that appears, use the drop-down menu to add or remove data fields.

-
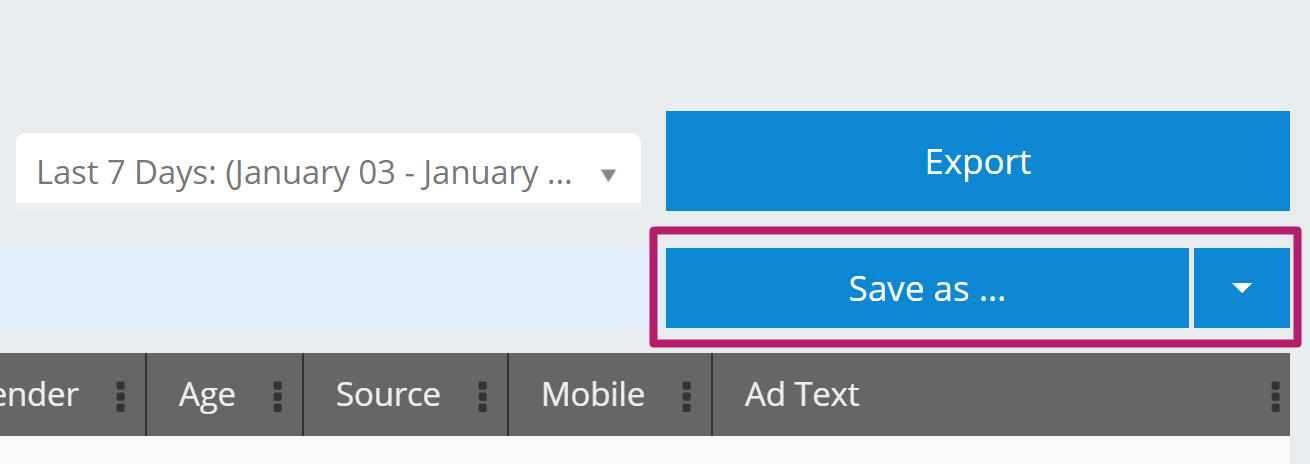
Update the order of columns in the export file by dragging and dropping the fields.

-
Click Save as and enter a template name, if you want to use this template for future exports.
-
Click Export to download your data to a CSV file.