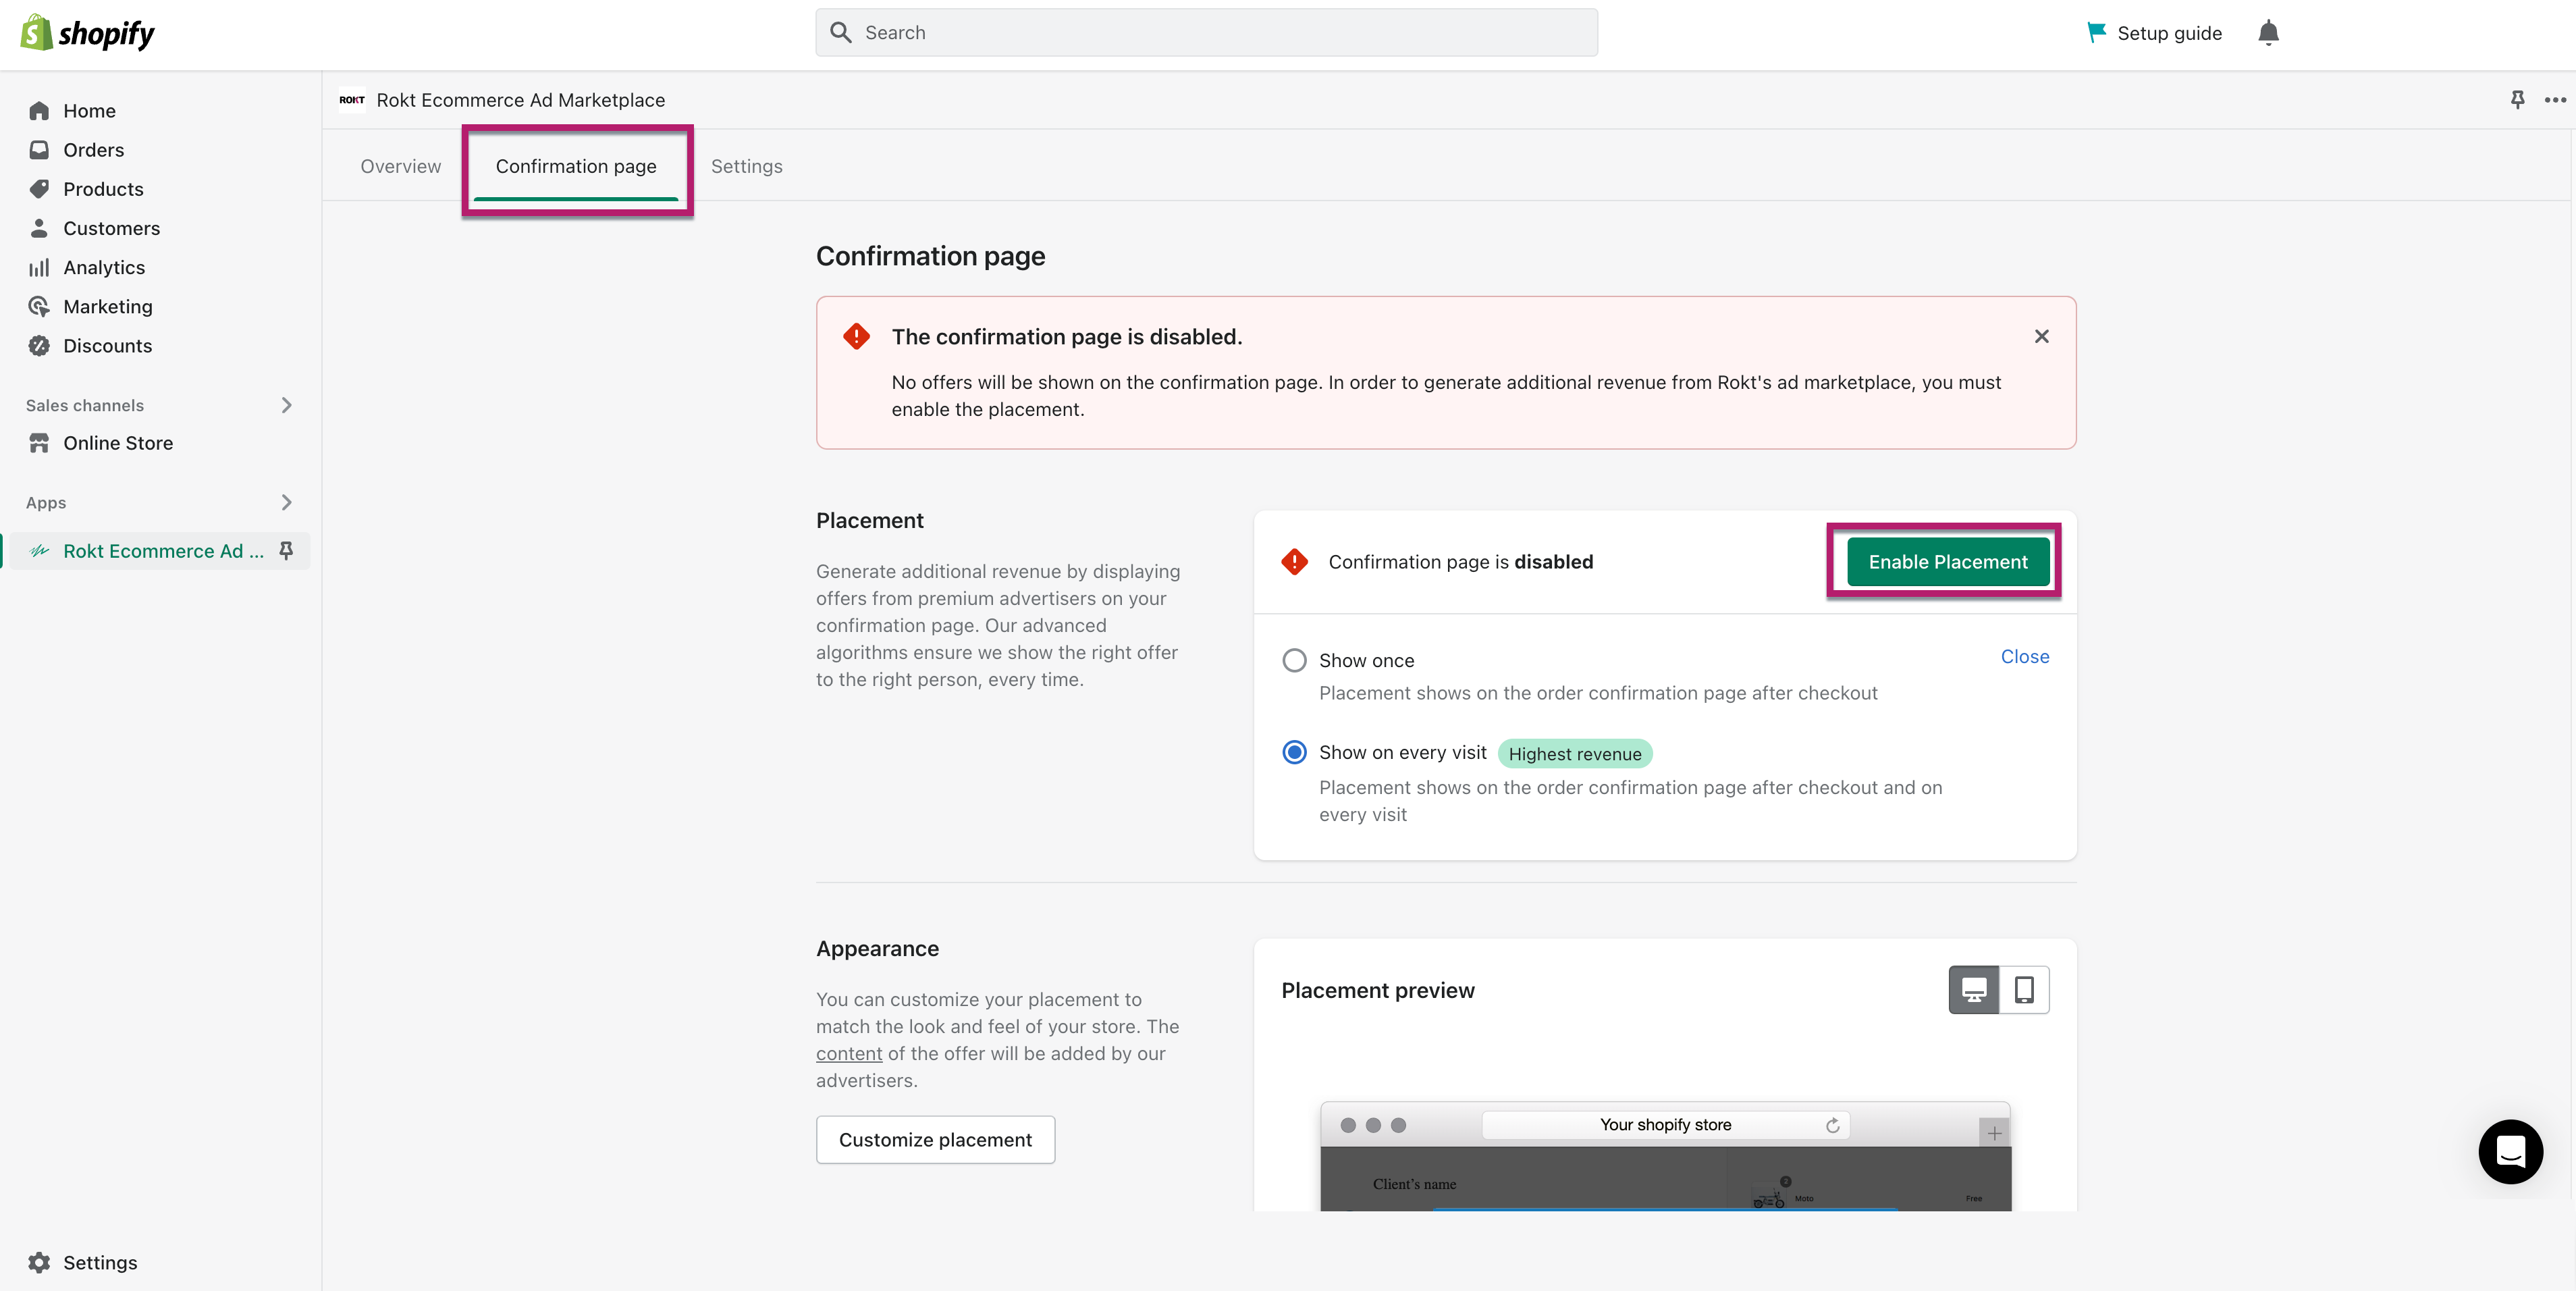
Enable the confirmation page placement
In order to generate additional revenue from Rokt offers on your confirmation page, you must first enable the confirmation page placement. To do so:
-
Navigate to the Confirmation page tab.
- Select Show once to display the placement on your order confirmation page only.
- Select Show on every visit to display the placement on your order confirmation page and any time a customer comes back to the confirmation page to view their order status.
-
Select Enable Placement.
If you have not already provided your PayPal account, a payment information page will appear where you can enter your Paypal email address to receive payouts from Rokt. If you do not have a PayPal account, you can still enter the email address that you wish to receive payments through, and PayPal will help you create an account once your first payment has been processed. Learn more about payouts here.
AppearanceDirect link to Appearance
To customize the appearance of your placement, go to the Confirmation page tab and under Appearance select Customize placement.
LayoutDirect link to Layout
Choose from two placements:
- Overlay: A placement that loads on top of your confirmation page.
- Embedded: A placement that loads in-line with the content of your page.
For optimal performance, we recommend you use the overlay placement as it typically drives twice the revenue as the embedded placement.
SettingsDirect link to Settings
You can adjust the placement to match your site’s style and preview desktop and mobile versions. Customizable components include:
- Header (font, font color, and background color)
- This is only applicable to the Overlay layout.
- Body (font, font color, and image position)
- Choose whether offers include images or not. The images that show are often logos, but can also be other relevant images set by the Advertiser. We recommend showing images after first offer for best results.
- Buttons (font, font color, background color, border color, and lead button)
We recommend matching the theme of your site as much as possible. The more native the placement looks, the better the experience for your customers.
Preview the placementDirect link to Preview the placement
There are two ways to preview the placement.
-
Preview the placement in the Confirmation page tab or click Customize placement to make changes to the design. This is not an exact match of how the placement will look on your site, as Shopify does not allow our app to load checkout pages in the preview.
-
Make a test purchase on your store to see the placement on your confirmation page (see steps below).
You can preview the placement for both desktop and mobile.
Test the placementDirect link to Test the placement
To view the placement on your actual confirmation page and see what customers see, follow these steps:
-
Make sure the confirmation page placement is enabled.
-
Wait 10 minutes after enabling the placement before conducting a test purchase.
-
Make a test purchase on your store using:
- A shipping address from one of Rokt’s supported regions (i.e. United States).
- Test payment details to ensure you are not charged for the purchase. Learn more about the Shopify Payment Test Mode.
-
Complete the purchase and view the confirmation page. The Rokt placement should appear after a few seconds.
TroubleshootingDirect link to Troubleshooting
Why is the placement not appearing on my confirmation page?Direct link to Why is the placement not appearing on my confirmation page?
There are a number of reasons why the confirmation page placement might not appear. These include:
- The confirmation page placement is disabled. Check that the placement is enabled on the Confirmation page tab.
- The confirmation page placement has been recently enabled. After enabling, it can take up to 10 minutes to begin appearing.
- The shipping address may be from an unsupported Rokt region. To ensure that all offers are geographically relevant to the customer, Rokt will not show an offer to a customer from an unsupported region.
- You are viewing an old order confirmation page. When the confirmation page placement is set to Show once, it will only display when the customer first lands on the confirmation page. In order to view the confirmation page placement, place a new test order via your checkout.
SettingsDirect link to Settings
To configure the placement settings, go to the Confirmation page tab and select View settings.
Traffic allocationDirect link to Traffic allocation
Use the slider to configure the allocation of traffic that will see the Rokt placement on your confirmation page.
When the traffic allocation is set to 100%, the Rokt placement will appear for every customer provided there is a relevant offer available. Reasons the placement may not appear include:
- The customer is from an unsupported geography.
- The customer’s browser settings are using an unsupported language.
- There are no relevant Rokt offers to be displayed based on the available advertisers and the allowed vertical/sub-vertical categories. To ensure the maximum number of advertisers are available, it is recommended that only the necessary verticals or sub-verticals are blocked.
Offer controlDirect link to Offer control
Rokt’s machine learning algorithms ensure that you show the most relevant and engaging offers to each individual. In addition, you have full control over which offer categories to show to your customers.
By default, all industry verticals and sub-verticals are allowed except for the sub-vertical of your store. This is so that competitors in your sub-vertical are blocked from displaying on your site. To change your store vertical, go to the Settings tab.
All sensitive verticals (e.g., alcohol, tobacco, gambling) are blocked so you can rest assured that offers are friendly to all age groups.
Block advertisersDirect link to Block advertisers
To block offers from particular advertisers:
-
Enter their domain name(s) in the Block competitors field.
-
Select Block.
A list of all blocked advertisers will appear underneath the field once you’ve saved your changes.